
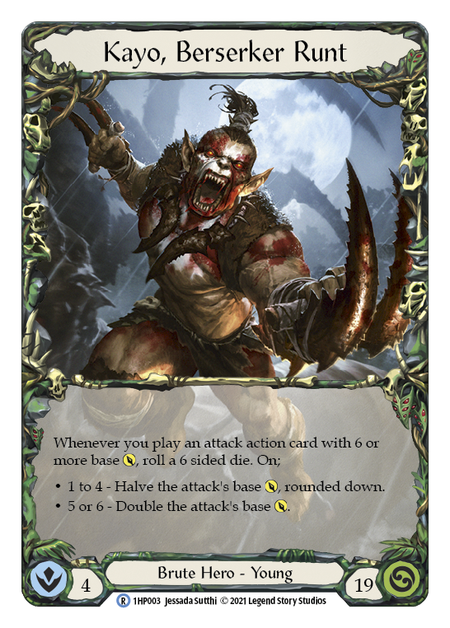
Back in July 2021, I wrote a piece called the Benji Trap, in which I critically examined hero powers that led to bad deck building. Kayo stands as one of the most pronounced examples of this. To quote myself half a year ago:
Did anyone fail to see the holes in Kayo's plan? He has 2:3 odds of failure! Take that critical examination a step further, and you'll note that failure, in this case, means taking an attack you paid a lot for and reducing it to that game-defining value of 3- easily blocked with a single card.
Kayo felt like a hero for Timmy: a player who liked his cards big and raw and risky. That one-in-three chance of doubling the damage on your already-large Brute attacks was too enticing to ignore, but surely this was just a fun, casual deck, right? There couldn't be competitive prospects built around a dice roll.
The real trouble comes when you put that prospective Oops, All Sixes deck on the table. The 66% of turns ruined by a bad roll aren't counterbalanced by the 33% of good rolls, because even a 12 can be blocked out with a full hand, and all you got out of it was a turn reset. You can't simply lean into sixes and let RNGesus take the wheel.
You can jump back and read that article if you want to explore the topic as it applies more generally to the heroes in Flesh and Blood, but today we're zero'ing in on Kayo in particular. Back then, I implied that the solution to Kayo's strategic shortcomings was to lean fully into the dominate keyword. Let's explore what that looks like.
The Decklist
Weapons
- Romping Club (1)
Equipment
- Arcanite Skullcap (1)
- Fyendal's Spring Tunic (1)
- Gambler's Gloves (1)
- Nullrune Boots (1)
- Scabskin Leathers (1)
- Heartened Cross Strap (1)
- Skullhorn (1)
Loadout
- Barraging Beatdown (Blue) (2)
- Barraging Beatdown (Yellow) (2)
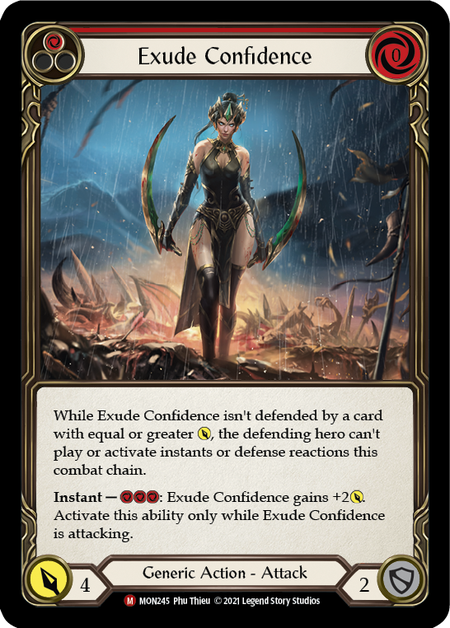
- Exude Confidence (Red) (1)
- Bone Head Barrier (Yellow) (1)
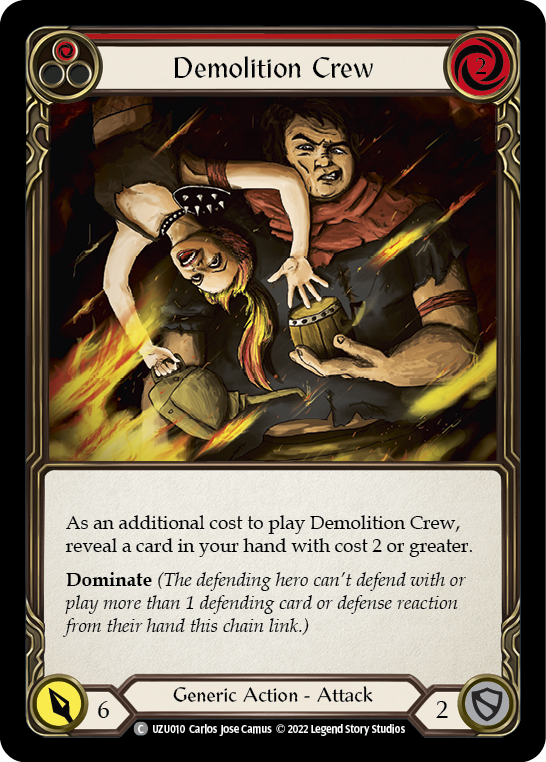
- Demolition Crew (Red) (2)
- Smash Instinct (Yellow) (2)
- Reckless Swing (Blue) (2)
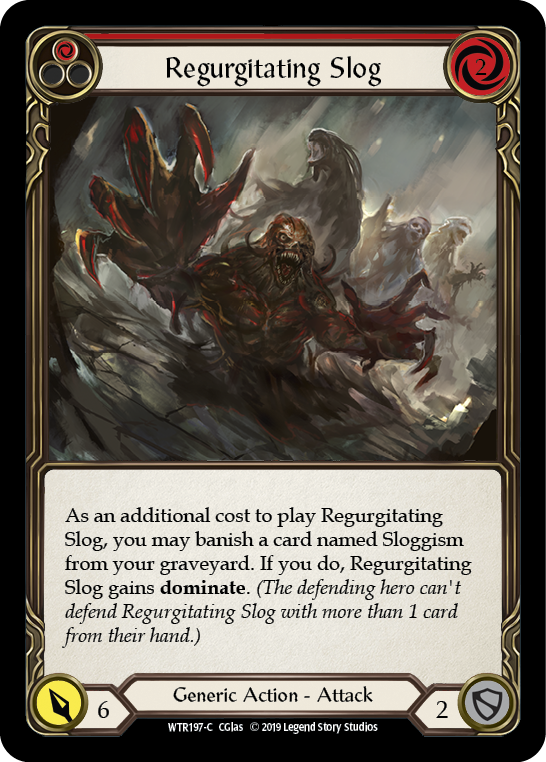
- Regurgitating Slog (Red) (2)
- Command and Conquer (Red) (2)
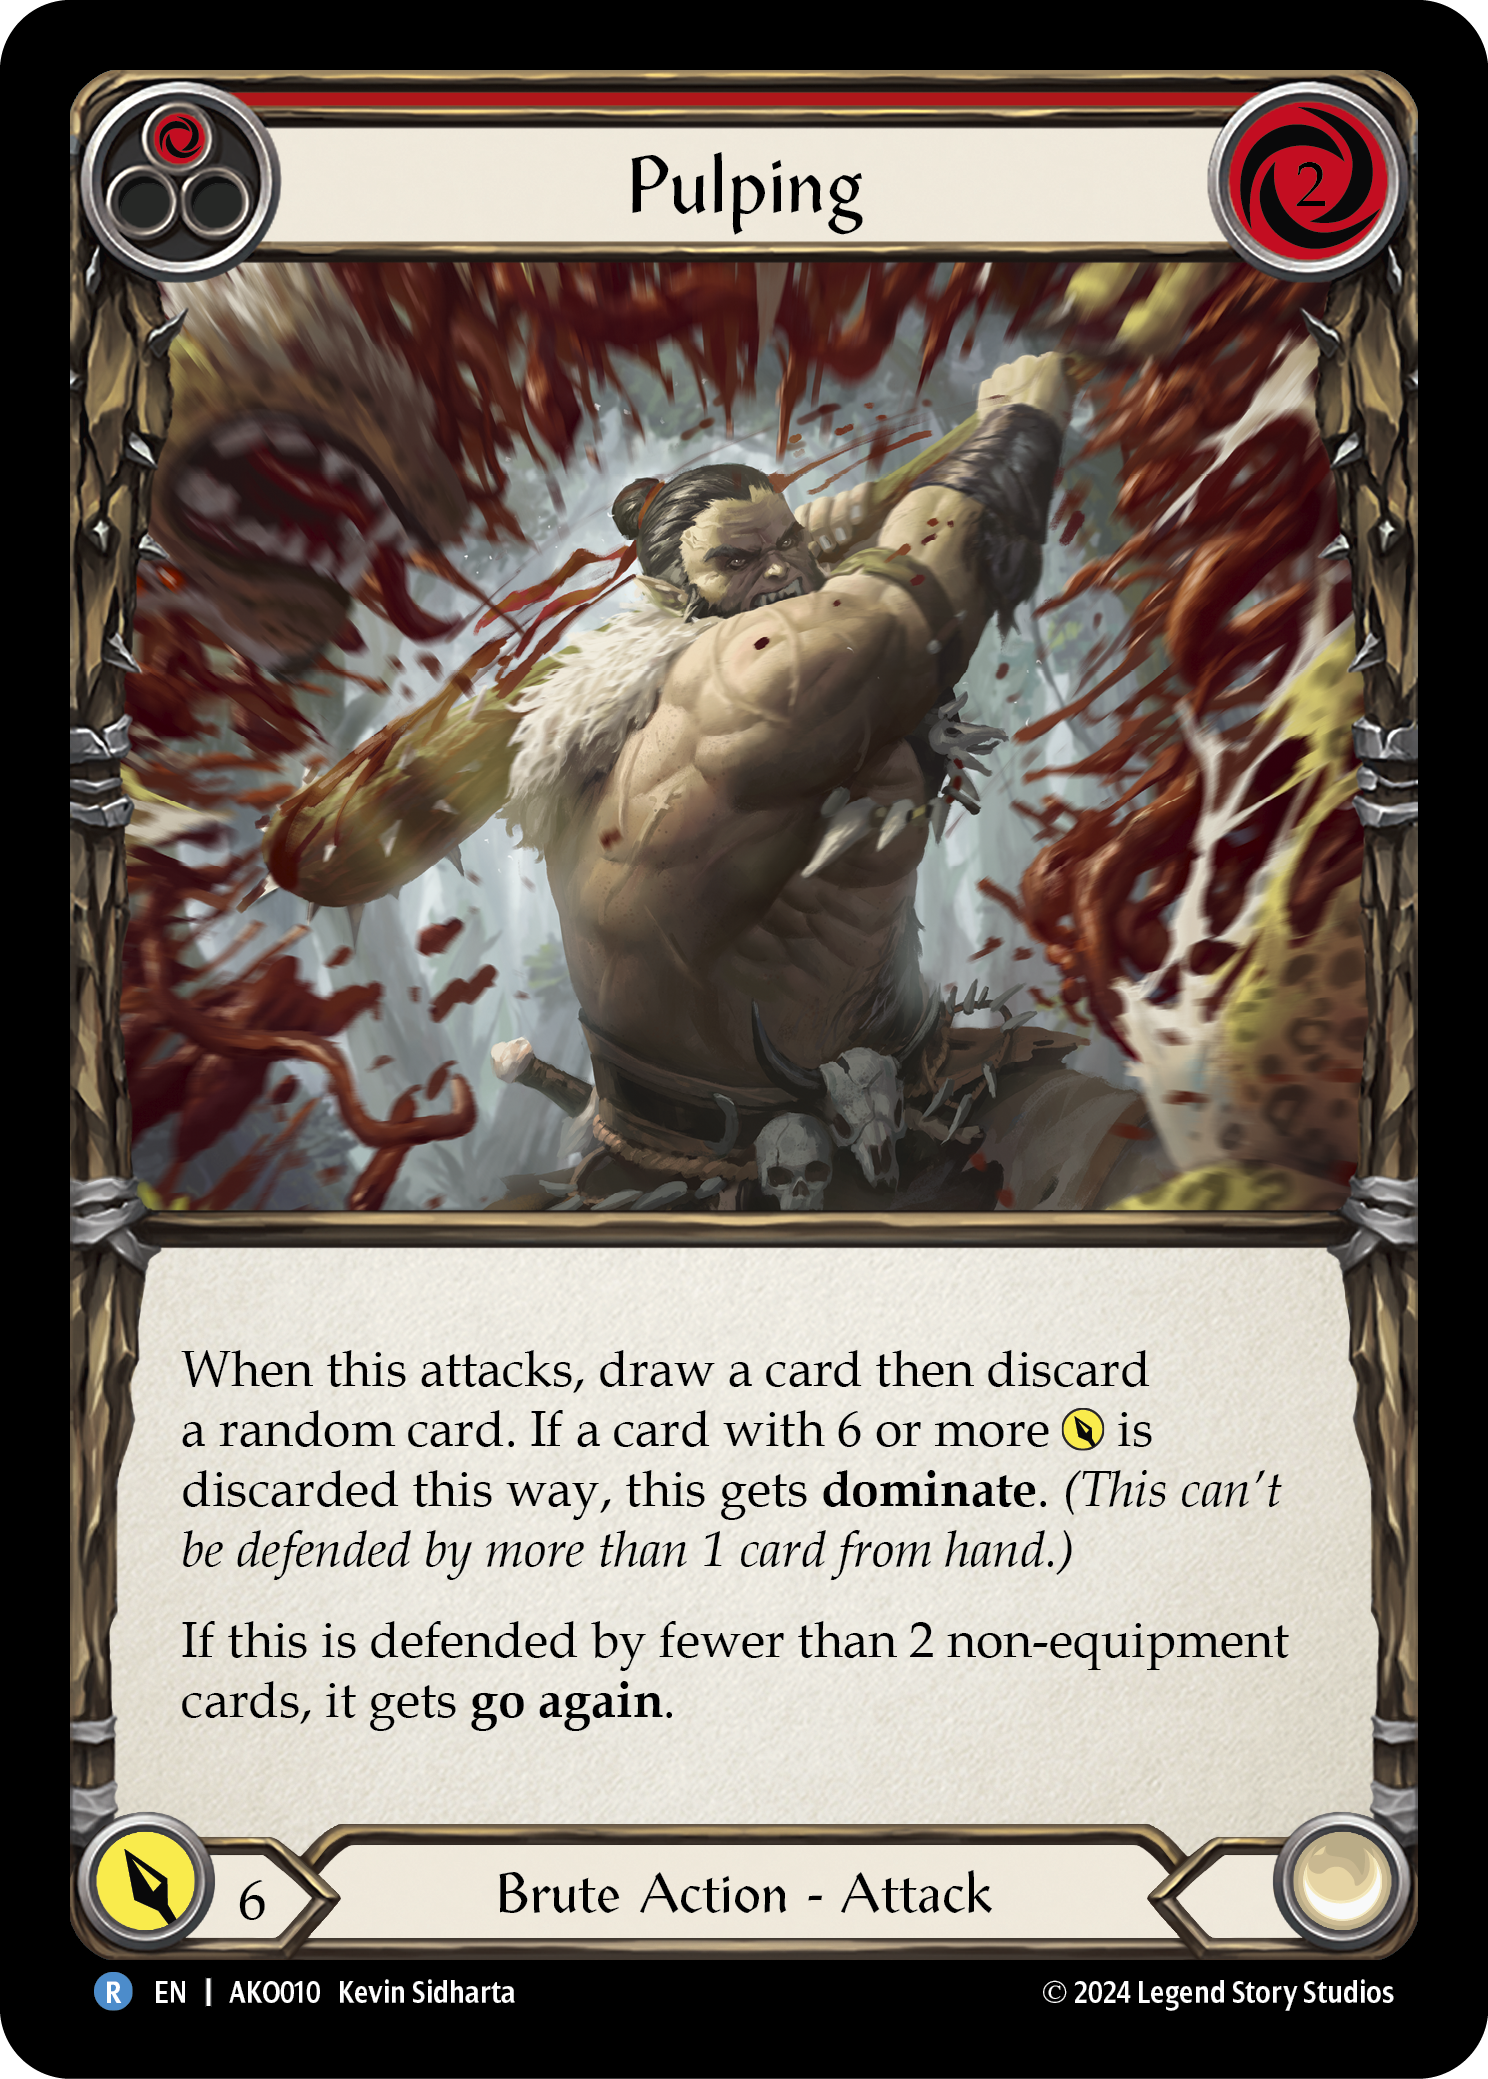
- Pulping (Red) (2)
- Lead the Charge (Blue) (2)
- Nourishing Emptiness (Red) (2)
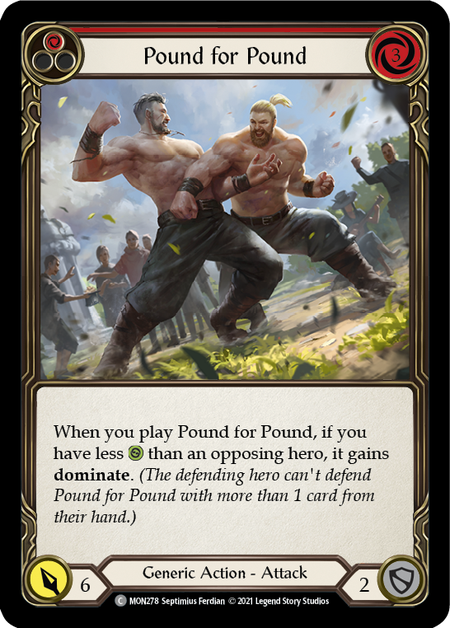
- Pound for Pound (Red) (2)
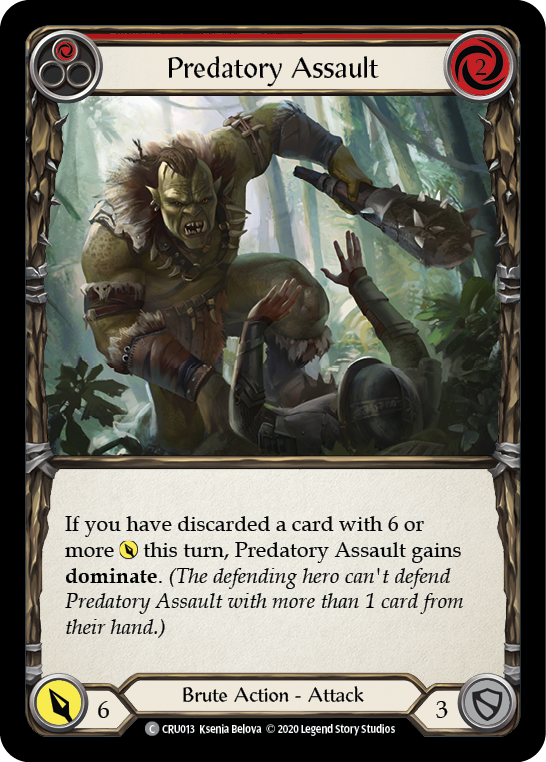
- Predatory Assault (Red) (2)
- Tear Limb from Limb (Blue) (2)
- Savage Swing (Yellow) (2)
- Riled Up (Yellow) (2)
- Sloggism (Blue) (2)
- Swing Fist, Think Later (Blue) (2)
- Wrecker Romp (Blue) (2)
- Wrecker Romp (Yellow) (2)
Let's start with the core: 10 attacks with 6 damage and dominate. If I could bolster two of these with Kayo's ability, I was almost certain to deal 18 damage, putting me in position to win with any additional damage leaked throughout the game- or a perfectly timed Reckless Swing! Those attacks were Demolition Crew, Pound for Pound, Predatory Assault, Pulping, and Regurgitating Slog, all in red.
Dominate was essential here. As I said before, a 1:3 chance at your attack going from 6 to 12 meant your opponent could simply dump their whole hand into defense, pass their turn, and count on probability giving them a better situation next time. Those raw 12s weren't reliable; and the 3s were absolutely devastating.

I don't want to just say that; let me illustrate it. Wrecker Romp is a card we're still using- because it's blue, it blocks for 3, and it's a 6 for discard triggers when those matter. To play this card, I need to pitch another blue card; I also need another card in hand to discard. Assuming Romp came from hand, this means I had 3 cards in hand, which means I only used 1 on the defense.
Now I roll Kayo's dice, and that lousy 1 comes up. This attack now cost me:
- Not blocking for more than 3.
- 3 resources.
- A discarded card.
And what does it cost my opponent to deal with it?
- One card.
That's the kind of momentum loss that can cost you games.
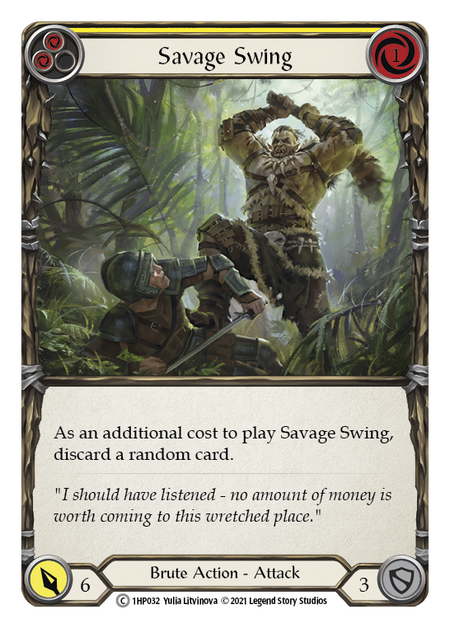
My early drafts of a dominate-focused Kayo still followed the Brute rule of thumb: any 6 that pitches for 2+ is worth a slot. While I had shifted my mindset in-game toward a defensive posture that wouldn't necessarily throw any old 6 that came into my hand, I still included those cards, and found myself having to hold 3 cards in hand just to play an attack I didn't really want to play. Foolishly, I had also opted for the only Brute weapon that didn't look for a discard from another source; Kayo's Ravenous Meataxe was a failed experiment in every way.
This led to a critical examination of the attacks I was using after my dominate suite was locked in. I still needed discard effects- Predatory Assault demands them, and after all, I am a Brute- but they needed to be the last detail on an otherwise useful card. I settled on 8 cards with 'discard-as-cost' effects: Swing Fist, Think Later (blue), Savage Swing (yellow), and Wrecker Romp (in both yellow and blue). All of these cards are pitch first, defense second, and synergy-based plays last, should the need for them arise.
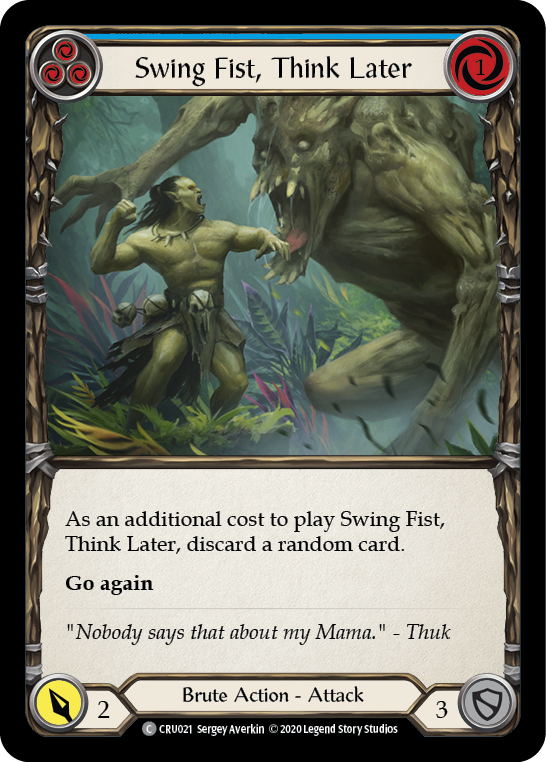
Swing Fist, in particular, is all about the synergy. It's in the deck to assist Predatory Assault, as a blue pitch can pay for both and give Predatory the discard trigger it requires. For this reason, Predatory Assault is one of my high priority arsenal cards; you don't want to risk discarding it when you're looking to proc it!
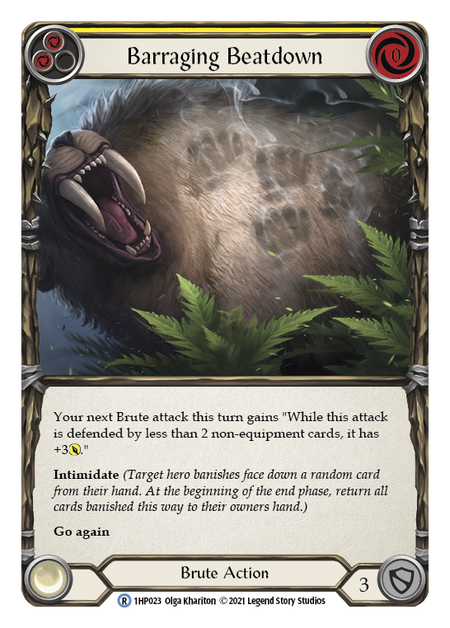

Tear Limb From Limb looks like overkill, and it is; its maximum potential is adding 6 to an attack that Kayo is also doubling, representing an 18 damage attack that, ideally, also has dominate. But perhaps its larger value lies in redeeming an unfortunate low roll- and when your dominated 3 gets a +6, you're once again threatening meaningful damage. Barraging Beatdown is meaningful for the same reason, though its modifier is much less dramatic. Planning for low rolls is important, but it's often the last thing you think about when building Kayo.
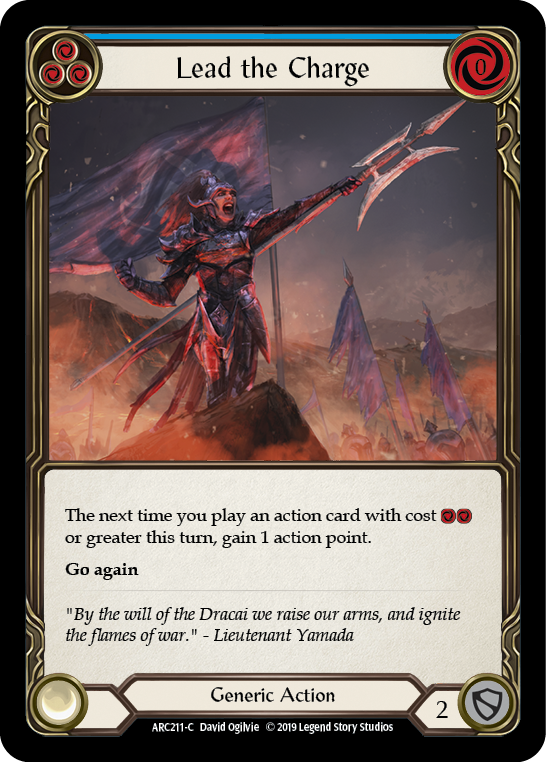
Lead the Charge is a flex spot in this deck, in that it's still an experimental inclusion for me personally. I'll defer to OggiK from the Kayo channel on the FaB Discord for this one:
"Lead the Charge is consistent: almost, if not all, of your attacks cost 2 or more, so with a 4-card hand you can play a big attack, [and whatever the outcome from Kayo's roll] you can still come through with Club or another attack. Plus you’d play it in blue, again allowing you to pitch it very happily. It never feels dead in hand." -OggiK
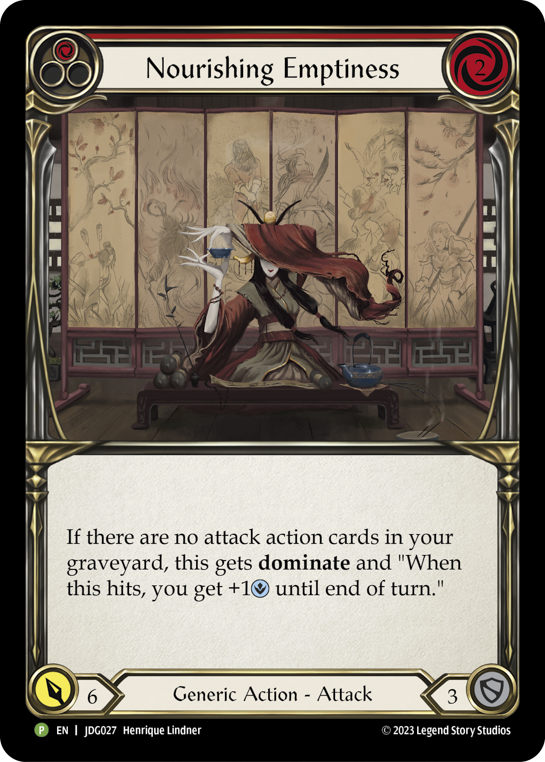
Finally, we've got two generics making unexpected appearances here. Nourishing Emptiness is a simple 6 attack, 2 cost, 3 block without a discard cost. That's literally a card we'd run if it was Brute stamped. But if you get lucky on turn 1, it's also a source of dominate that's online immediately. Assume it's a blank text box, and be pleasantly surprised when it's not.
As for Exude Confidence, I've simply found the card to be so impactful in other games that it feels like it's worth a single slot as unexpected spice. Safe from the whims of the dice gods, Exude comes in at that 4 breakpoint and can climb if you need it to.
Why Kayo?
I'm not going to purport to holding the keys to a new meta darling. But Kayo is a wildly fun character who has been off the table for the past several months while Classic Constructed reigned as the dominant format. Moreover, he's unexpected- and if you roll up with a build like this, doubly so!
Finally, Kayo is intimidating, with your opponent spending most of the game in range of lethal. You will often lose while an enemy has double digits for a life total, but you'll just as often win from there- and many opponents won't even see it coming!
Pace yourself, wait for everything to line up, and then dominate your opponent with unrivaled damage.
We don't know much about Everfest, but we do know this: Blitz is back in center stage!
by: Alex Truell