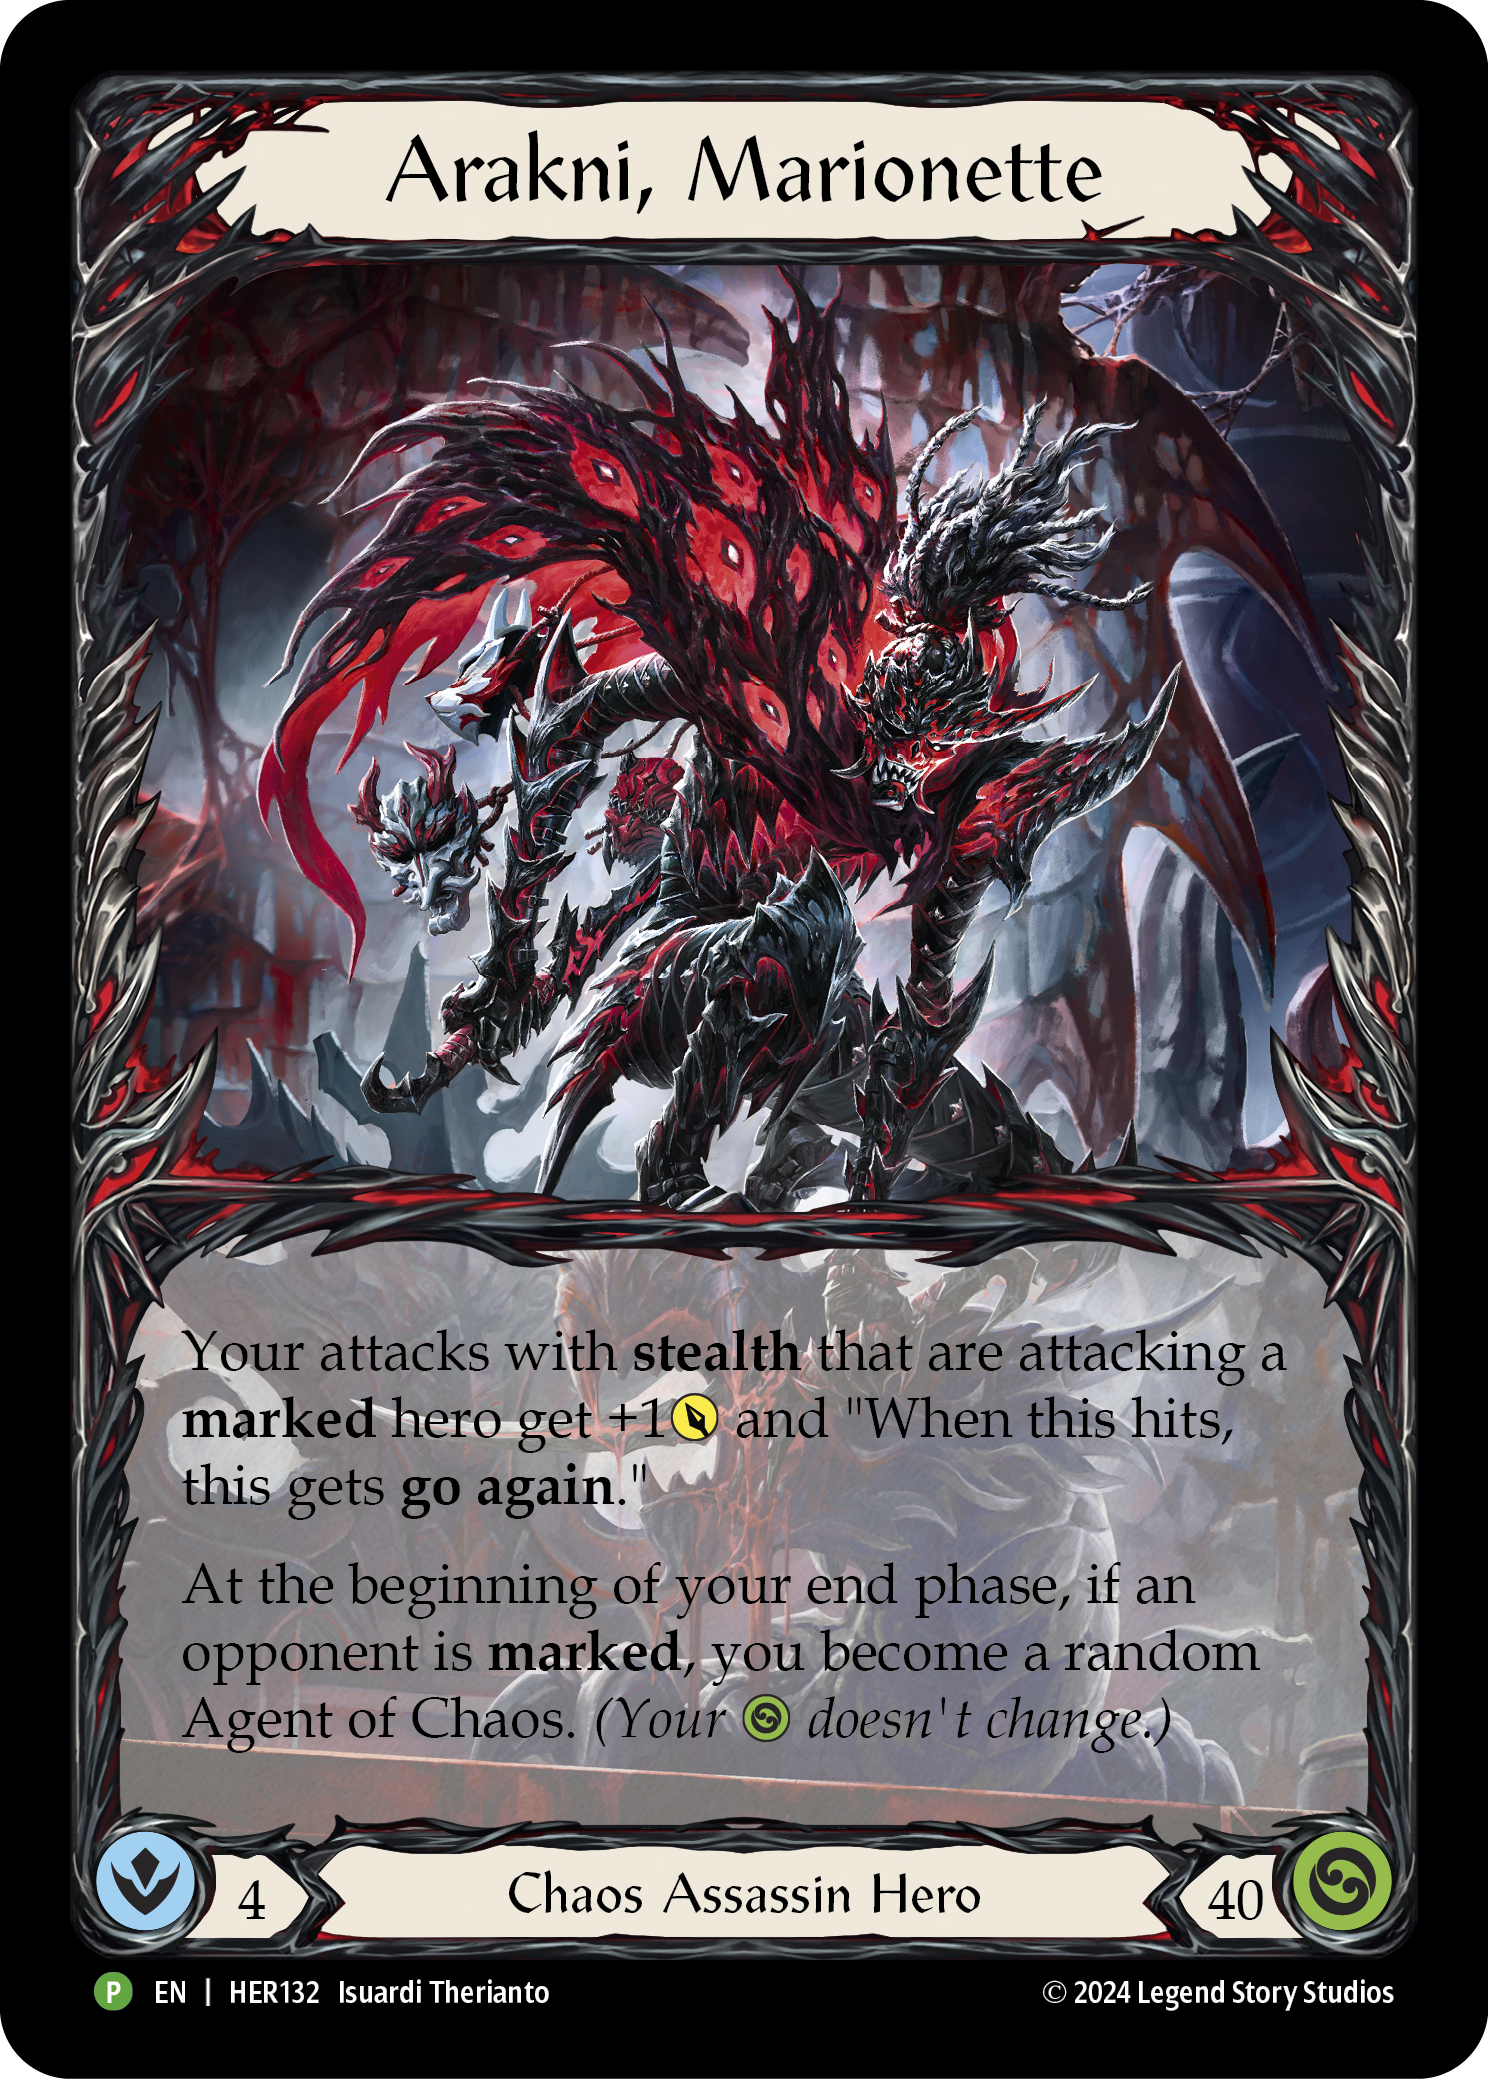
Since the release of The Hunted, I have been elated at the idea of Arakni, Marionette. I began the game as a Lexi player, drawn to the gameplay of providing multiple disruptive attacks that left the opponent repeatedly asking if this was the attack to block. Marionette provides just that. If you decide to present no blocks repeatedly, then Arakni’s semi-disruptive barrage will leave you regretting your choices; but if you repeatedly block, he will find the appropriate ways to maneuver around your strategy.
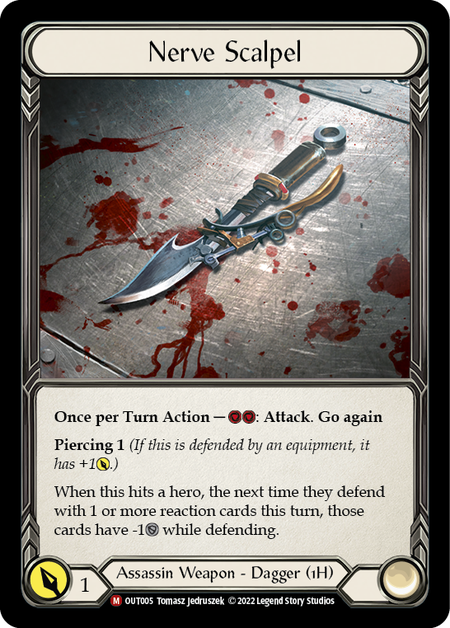
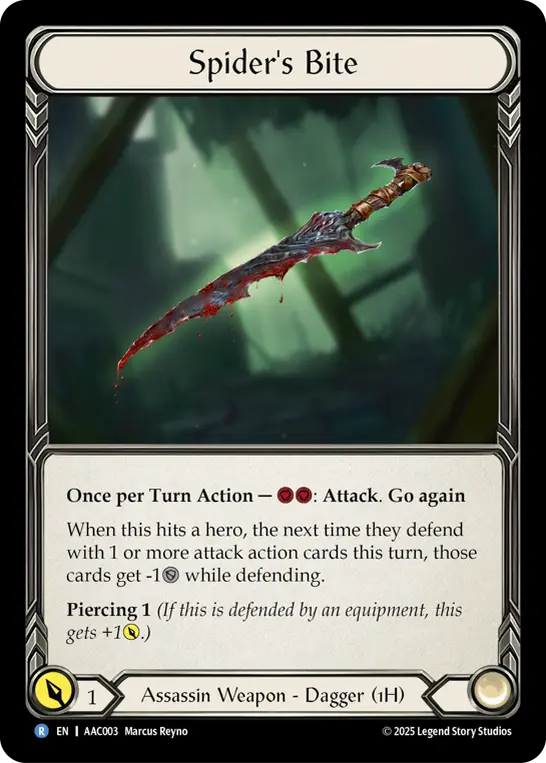
It's often said with an ironic flourish that Arakni is the best Warrior in the game, and it's easy to see why. The Assassin class already has a suite of daggers at their disposal - Nerve Scalpel, Scale Peeler, Orbitoclast, and Spider’s Bite predate Marionette; and while these tools may prove useful in the future, currently the best starting dagger is Hunter’s Klaive. Hunter’s Klaive has the basic principles of the other daggers - piercing, go again, an attack of one, and a two-resource cost to swing. The novel effect is that, on hit, it will mark an opponent.
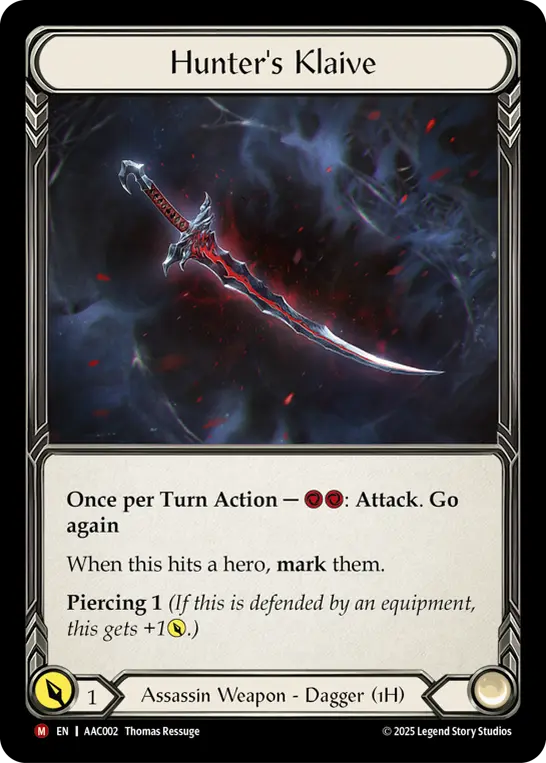
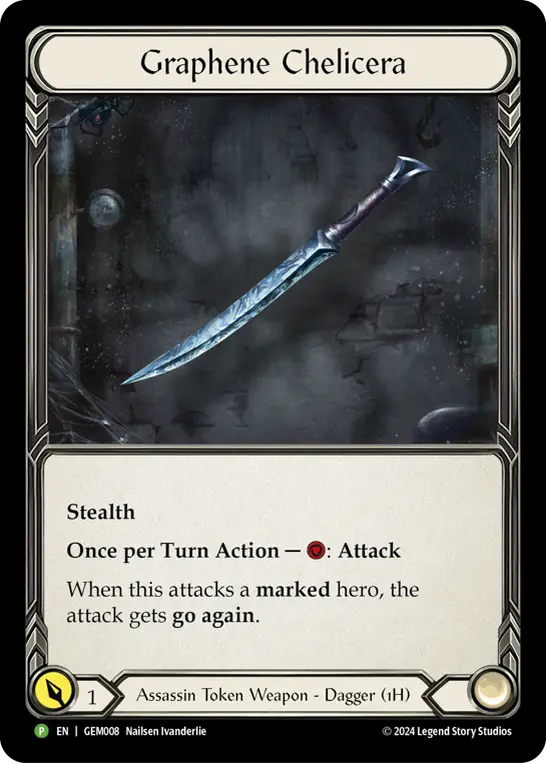
The largest issue for all Assassin daggers is the cost. Two resources for Klaive’s ability is on par with the other daggers, but to swing two daggers will cost four resources and exceed what you can really do with 1 card. Enter the Graphene Chelicera. The Chelicera attacks for 1 and has go again if it attacks an opponent while they are marked. Once this dagger is equipped, you can now swing both daggers with 1 blue card.
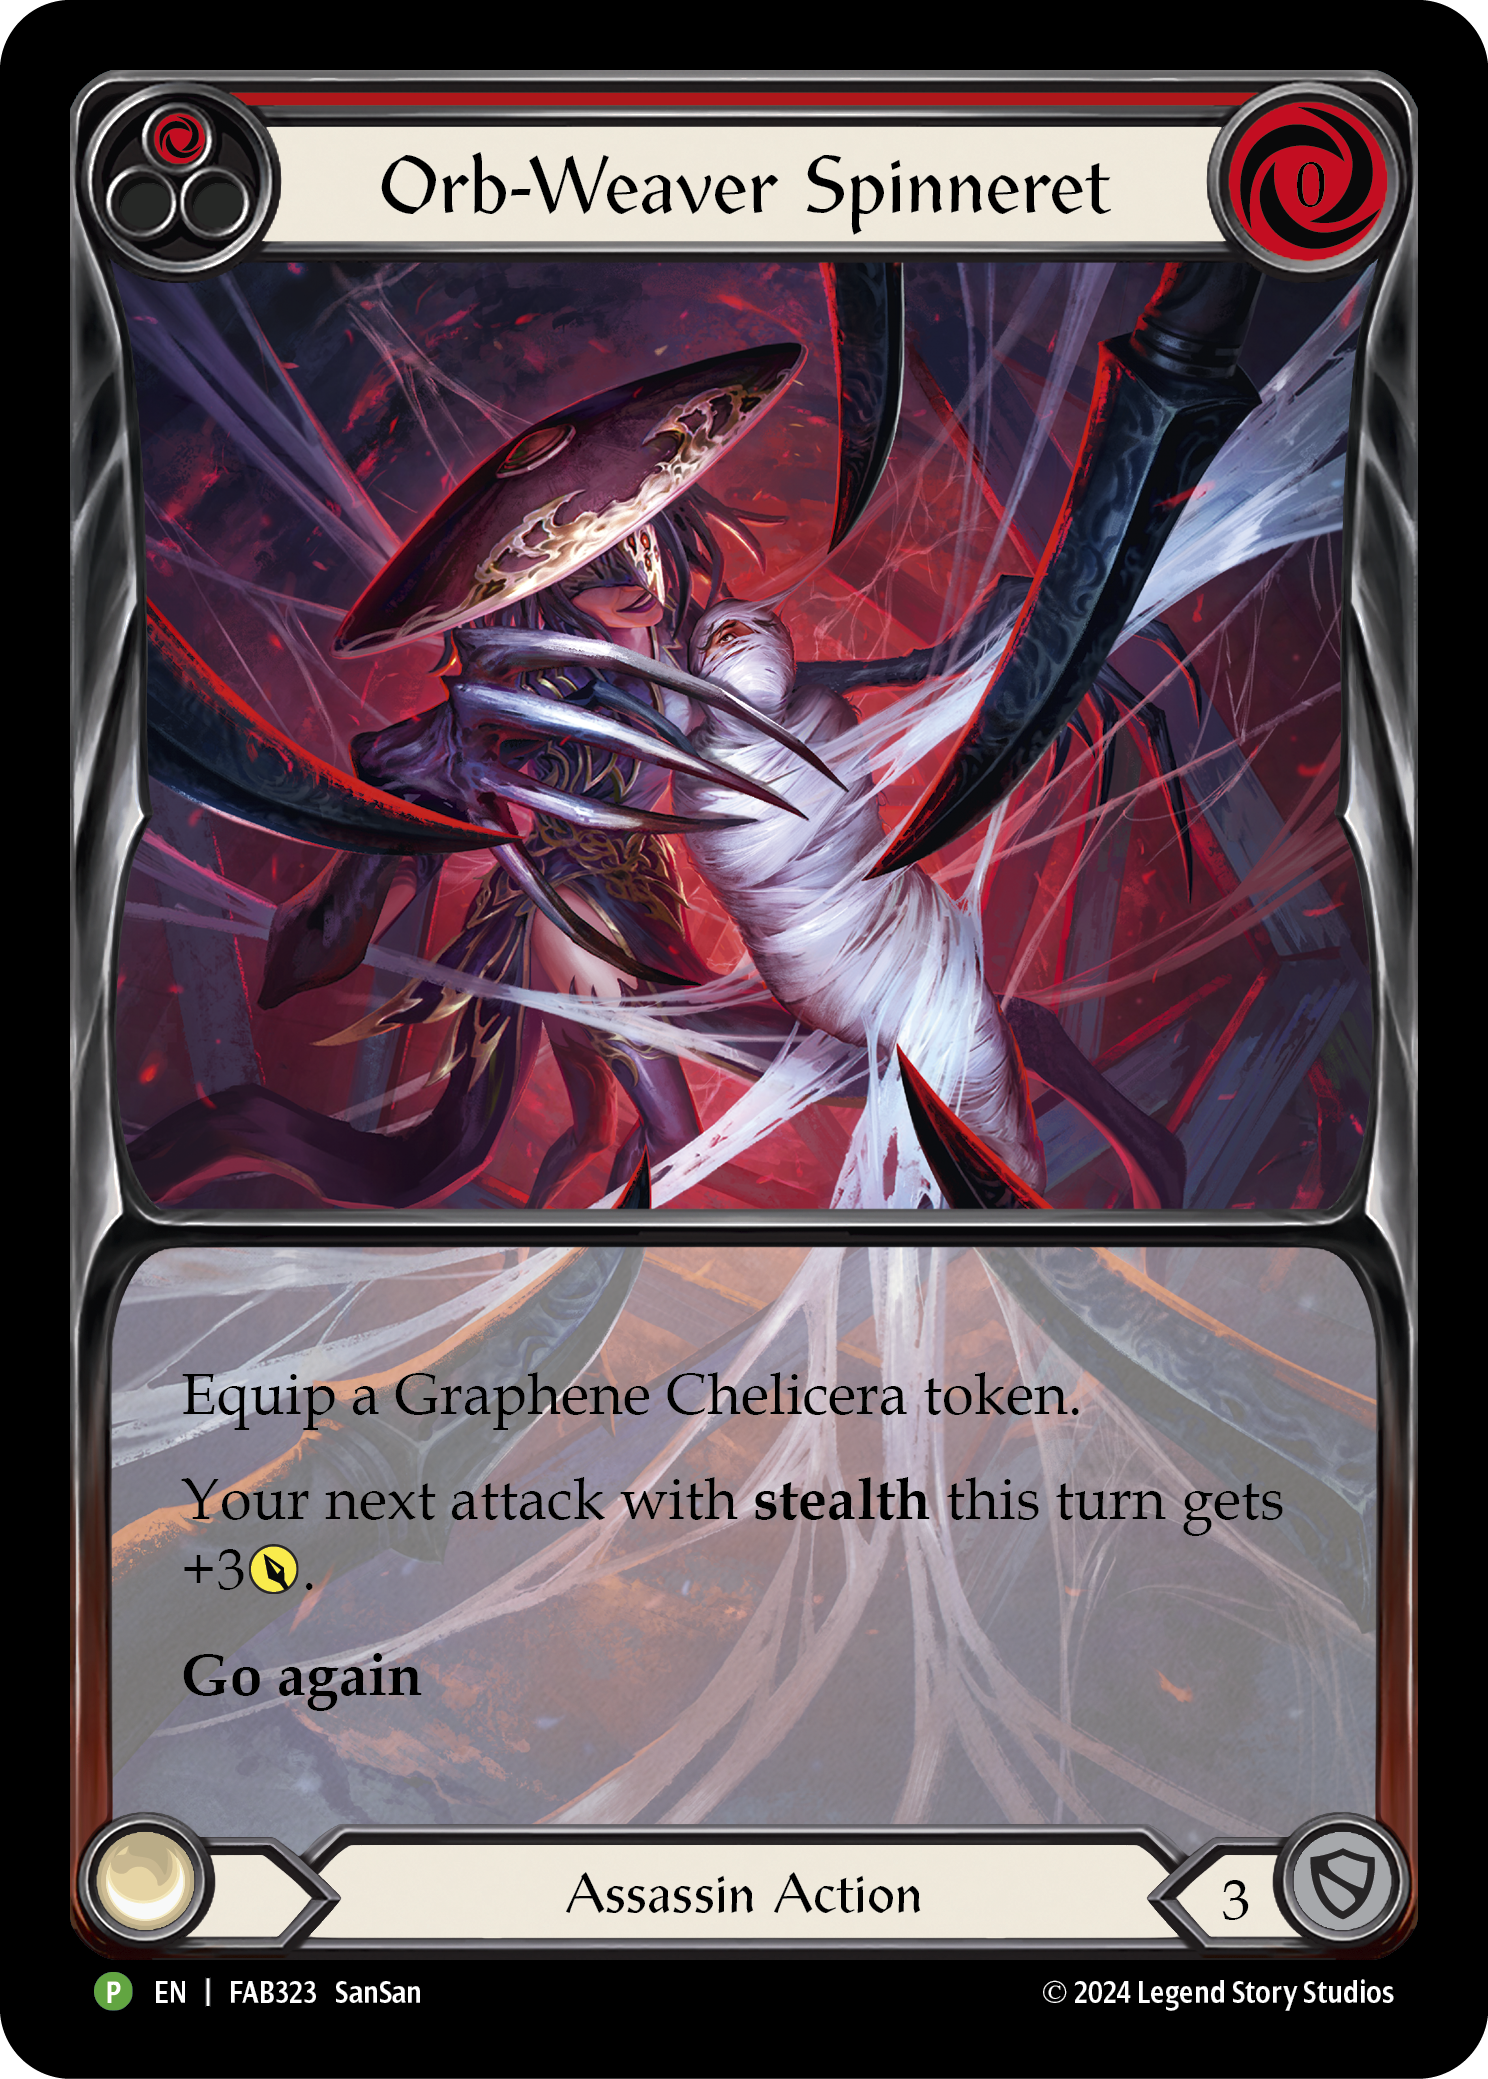

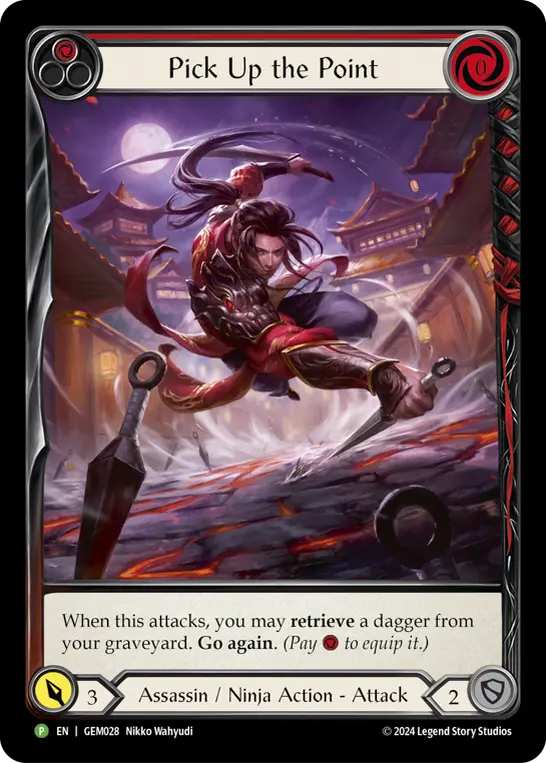
The dagger package is easily complemented by cards like Orb-Weaver Spinneret, Up Sticks and Run, and Pick Up the Point. This makes a total of 9 cards that can equip a dagger to your empty hand. From there, we can see some great cards like Cut From The Same Cloth, which is not only a +4 buff but lets us see the opponent’s hand. This knowledge helps us plan our offense and our defense for the next turn. On top of that, it marks if the opponent has an attack reaction. The power and utility of this card is off the charts if you know how to use the information given. This card’s only drawback is it being 2-block. Similarly, Savor Bloodshed gives +4 to the next dagger attack, and if a dagger hits a marked hero, then you get the benefit of drawing a card. And this card is a 3 block!


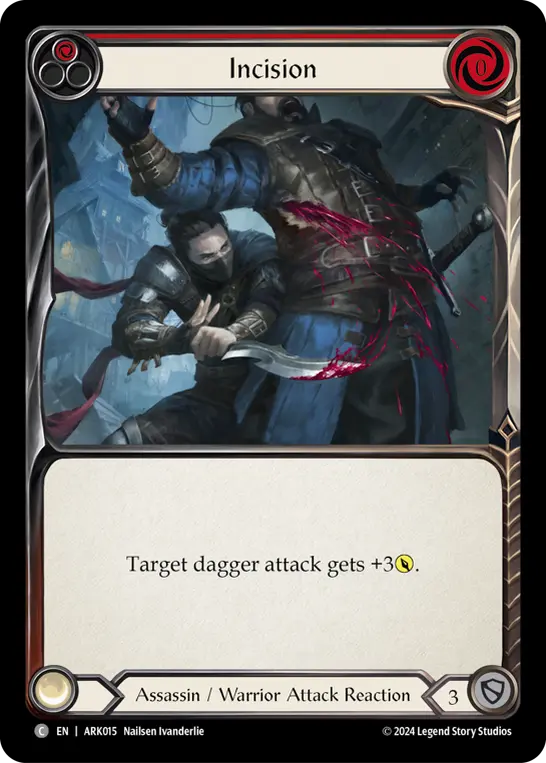
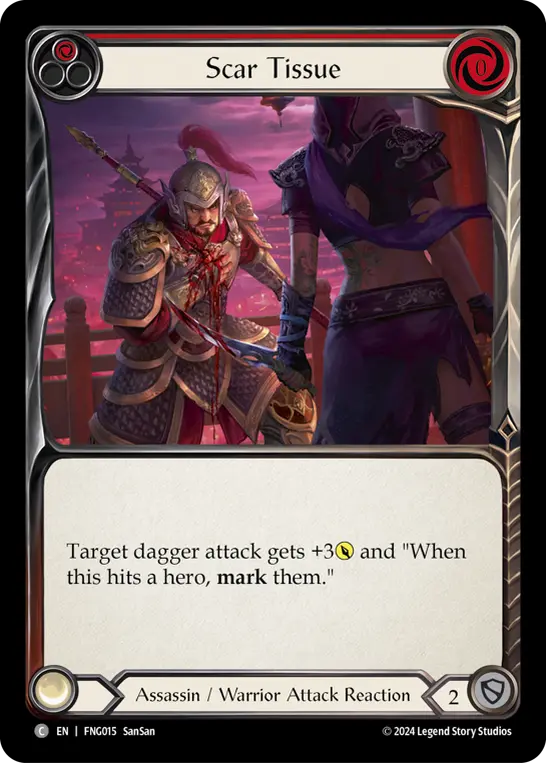
From there, we plan reactions that can really help our daggers. Scar Tissue is a popular one; regardless of the dagger, it gains the ability to mark on hit. From there we can use To The Point, which can give +4 if the opponent is marked. Incision only gives a +3 modifier, but blocks for 3. Take A Stab lets you attack again if a dagger hits a marked hero. Lastly, we have Perforate, which lets us swing a dagger again. This costs 1, but blocks for 3 and replaces itself when played.


If that was really all you'd see from Marionette, it might compare unfavorably to Fang. But Assassins are known for their disruption, and Marionette isn’t a slouch for that. From their debut in Dynasty, we have had disruption cards that are a cut above anything seen in other classes. Most notably, Leave No Witnesses and Surgical Extraction.
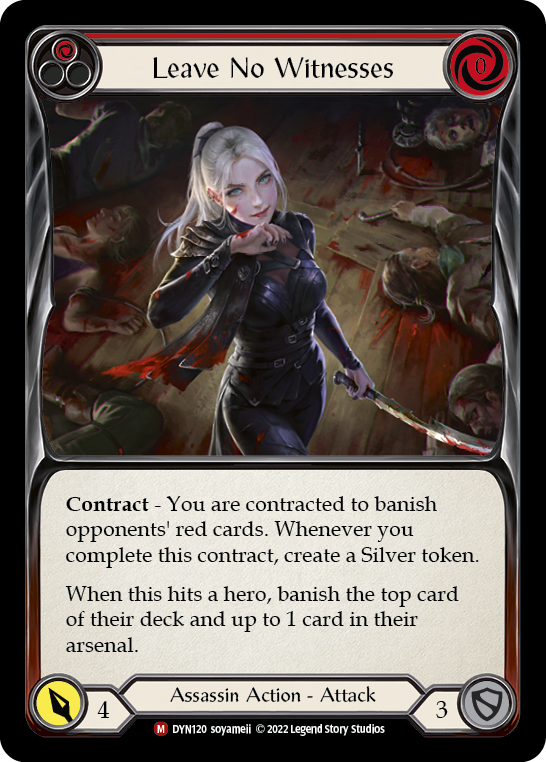


When it comes to the cards we want in our deck, the most important inclusion from Outsiders is a Codex. Codex of Bloodrot, Codex of Inertia, and Codex of Frailty all place a card in your arsenal and afflict your opponent with some ailment. While the other 2 books have their specific place, Codex of Frailty has a high floor and the ability to provide a massive swing. If you are presenting an aggressive turn, this may rob the last card out of someone’s hand. Then you can attack with the titular Command and Conquer or Leave No Witnesses to force the final card out of arsenal.
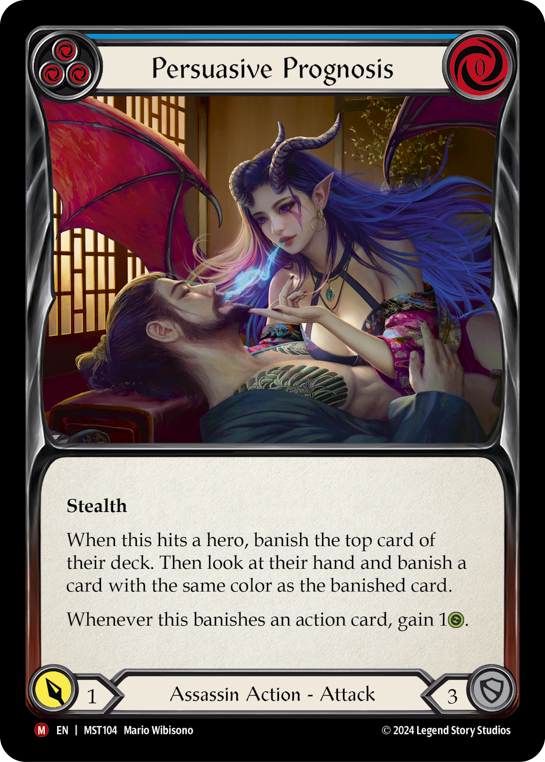
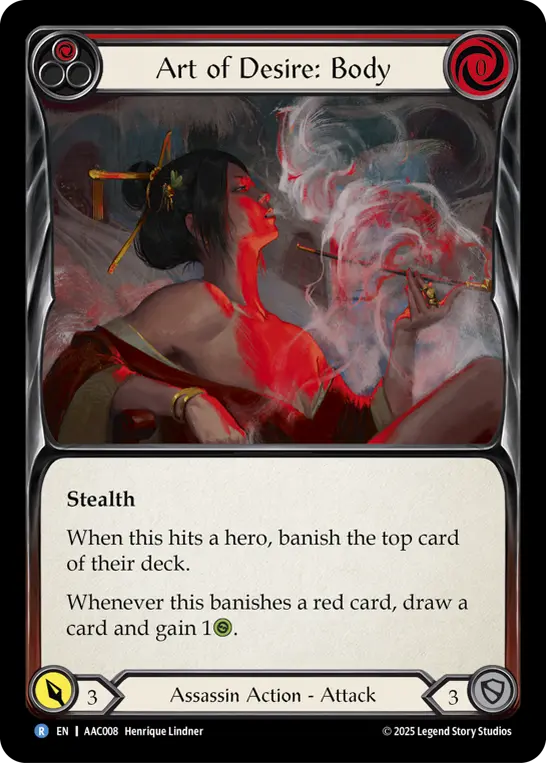
Part the Mistveil fills out our playable stealth pool. Persuasive Prognosis and Bonds of Agony were the most reviled of the new cards, but the suite of Art of Desire, Bonds of Attraction, and Double Trouble are notable as well. All of these cards banish from the top of deck on hit, but the first two mentioned also attack the hand under certain conditions. Massive bonus points if you manage to rob someone of their needed cards to win the game - Lumina Ascension, Bloodrush Bellow, Aether Wildfire, Gone in a Flash... you get the picture.

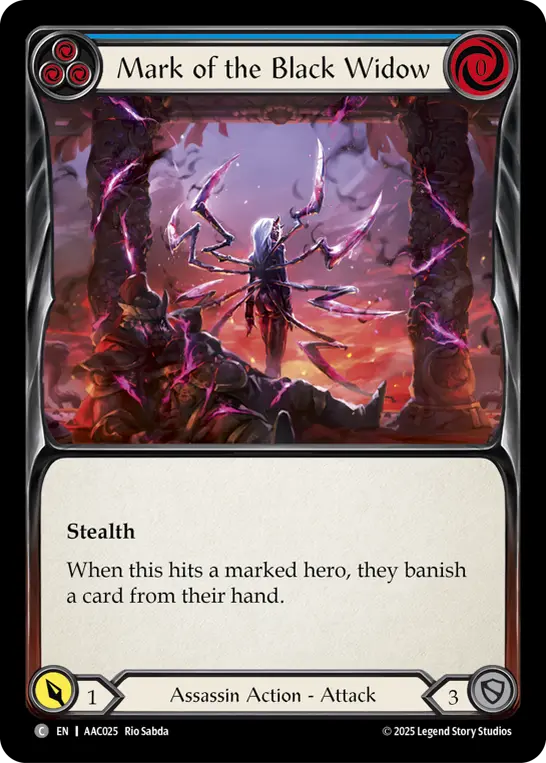
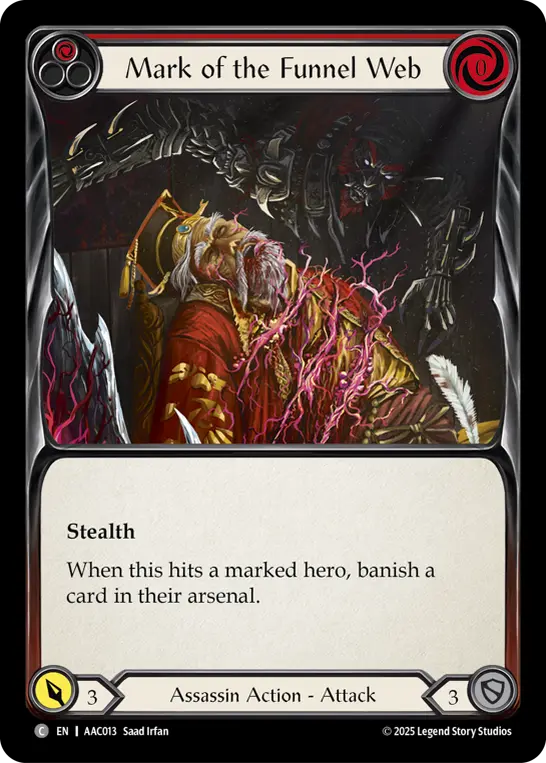
The suite of Hunted stealth cards synergizes with an opponent being marked, which is typically accomplished by hitting an opponent with Hunter’s Klaive. Mark of the Black Widow banishes a card from hand; Mark of the Funnel Web will banish a card from the arsenal. Reaper’s Call can be discarded to mark an opponent, while Under the Trap Door can be discarded to search up a defense reaction.

But the most empowering stealth attack we got from the new set is Kiss of Death. This is an attack action and a dagger attack. In a vacuum it doesn’t seem that strong, but there's a lot of support to build around it. Simply consider all the dagger-related cards we've already discussed!
Daggers provide a consistent base to work from, but there is some romance to be found in inflicting disruption via attack action cards. The freedom of Marionette is that we don’t have to choose. Graphene Chelicera is a stealth dagger; Kiss of Death is also. While Take Up the Mantle can surprise you with an unexpected on-hit, Tarantula Toxin simply turns an easy block into a blowout hit. If the opponent can't afford to lose any life, and you hold a Kiss of Death and a Tarantula Toxin, they would have to effectively block 9 to avoid any damage.

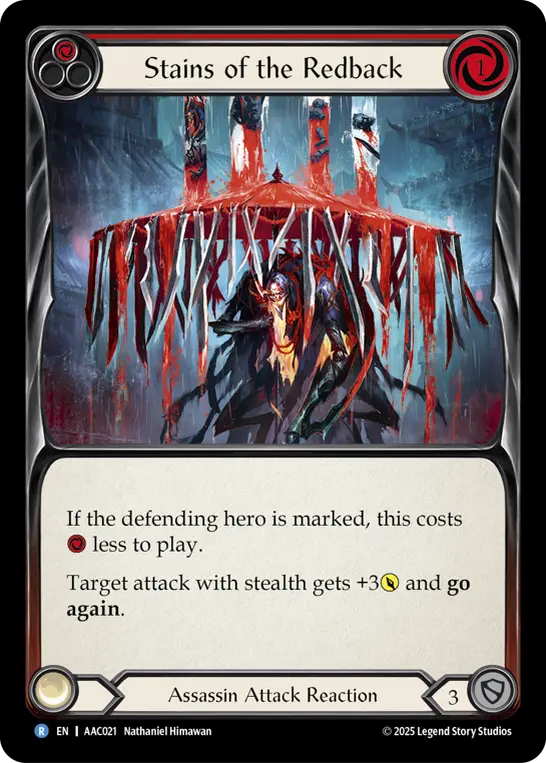
With these top cards identified, we can begin to flesh out the form of a deck that offers the consistency of daggers with but the devastating disruption of attack actions that demand a response from our opponent. I start by including 9 flexible attack reactions: Tarantula Toxin, Two Sides to the Blade, and Stains of the Redback. I’ve seen many lists incorporate Stains of the Redback as yellows, but I think the reds only are fine.

The list continues to build itself in these early stages. We want to be able to equip the Graphene Chelicera, so we'll need Orb-Weaver Spinnerets. In case we end up getting rid of a dagger in an emergency, then we need Pick Up the Point and/or Up Sticks and Run. (In my original list I decided I liked Up Sticks and Run better, but ran one of Pick up the Point in case I needed to use a Codex to grab it and bring back a dagger.) If we are running daggers that mark, then surely we're on Savor Bloodshed. If we are swinging daggers, then we're going to need to pitch blue cards for it - start with Bonds and Persuasive, then look beyond to Reaper's Call, Under the Trap Door, and whatever else may appeal to you. As far as devastating attacks go, we need Kiss of Death due to its versatility, and Take Up The Mantle to provide opportune swings. Codex of Frailty demands a spot in any Assassin list, and Leave No Witnesses is always the prime target for a Codex of Frailty.
Let’s see where we are:
- 3x Orb Weaver Spinneret
- 3x Up Sticks and Run or Pick Up the Point
- 3x Savor Bloodshed
- 3x Persuasive Prognosis
- 3x Bonds of Agony
- 3x Codex of Frailty
- 3x Leave No Witnesses
- 3x Kiss of Death
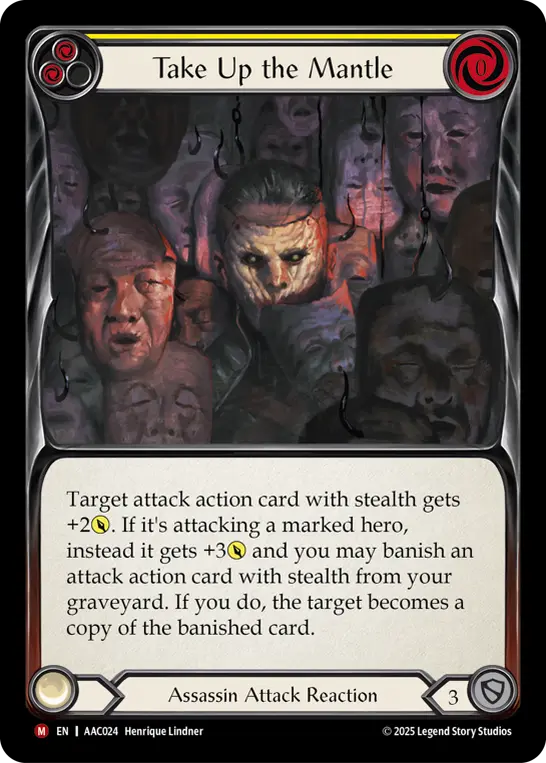
- 3x Take Up The Mantle
- 3x Stains of the Redback
- 3x Tarantula Toxin
- 3x Two Sides to the Blade
That’s already 36 cards that are in our deck! Add in 3 Reaper's Call, 3 Mark of the Black Widow, and 3 Under the Trap Door to serve our blue base, and we're 2/3 of the way there.
The Decklist
I was able to pilot Arakni, Marionette to 3rd place at Battle Hardened: Minneapolis, and I used this list to do it. I made some decisions that ultimately worked well this day, but I quickly saw a gaping hole in the deck. Allow me to provide an updated list and mention how I plan to attack each matchup.
Weapons
- Hunter's Klaive (2)
Equipment
- Mask of Deceit (1)
- Flick Knives (1)
- Fyendal's Spring Tunic (1)
- Widow Back Abdomen (1)
- Widow Web Crawler (1)
- Snapdragon Scalers (1)
- Widow Veil Respirator (1)
Loadout
- Codex of Frailty (Yellow) (3)
- Den of the Spider (Red) (1)
- Kiss of Death (Red) (3)
- Mark of the Black Widow (Red) (3)
- Cut from the Same Cloth (Red) (2)
- Bonds of Attraction (Red) (3)
- Death Touch (Red) (1)
- Bonds of Agony (Blue) (3)
- Orb-Weaver Spinneret (Red) (3)
- Command and Conquer (Red) (3)
- Lair of the Spider (Red) (2)
- Leave No Witnesses (Red) (3)
- Tarantula Toxin (Red) (3)
- Savor Bloodshed (Red) (3)
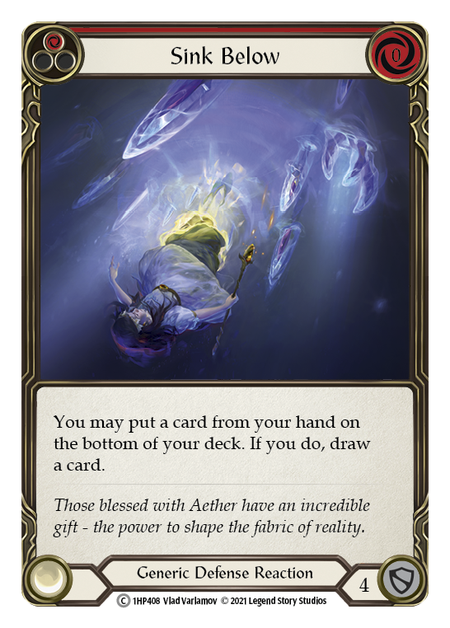
- Sink Below (Red) (3)
- Just a Nick (Red) (3)
- Orb-Weaver Spinneret (Blue) (1)
- Mark of the Black Widow (Blue) (3)
- Pick Up the Point (Red) (3)
- Persuasive Prognosis (Blue) (3)
- Under the Trap-Door (Blue) (2)
- Up Sticks and Run (Red) (2)
- Two Sides to the Blade (Red) (3)
- Reaper's Call (Blue) (3)
- Take Up the Mantle (Yellow) (3)
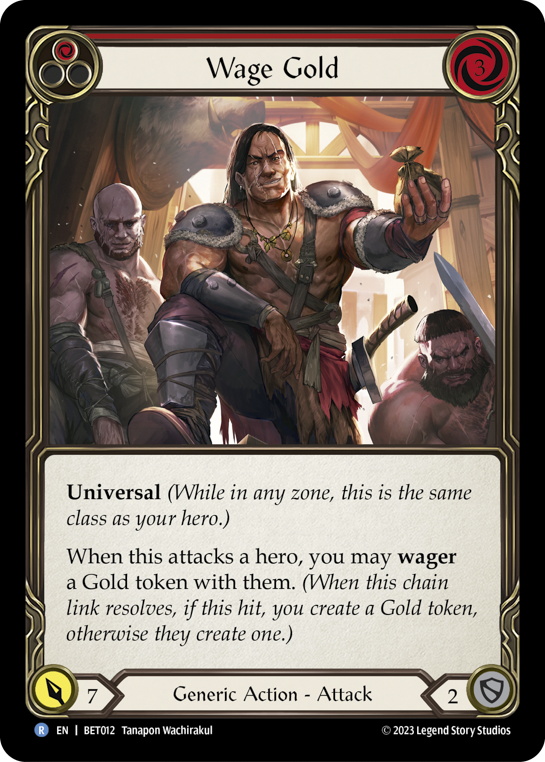
- Wage Gold (Red) (3)
- Stains of the Redback (Red) (3)
Let’s talk first about how everything functions. You’ll see there is a slight influence from Taotao Chu's list from Battle Hardened: Santa Clara, but ultimately, I decided his list was a little too defensive for what I wanted to be. For the weekend of BH: Minneapolis, I decided to keep Sink Below and Shelter from the Storm in my list, as Aurora was still legal. With that behind us, I decided to drop Shelter from the Storm. These were replaced with Wage Gold to shore up my match into Prism.
Once High Seas hit the scene, Gravy posed a constant question to the Marionette players. Marionette’s base ability doesn’t really work if he’s attacking an ally, and everything really gets clumped up. I originally ran Pain in The Backside, as this has natural go-again; but I’ve since decided to just run extra copies of Pick Up the Point. In the end, it gives me more freedom to flick and retrieve, and it still has base 3 power. I’ve only seen rare instances where Pain in the Backside is not blocked, and in this current meta it wasn’t worth it for me, as a 3-block feels the same on either card. If it’s blocked, I still get an upside from Pick Up the Point.

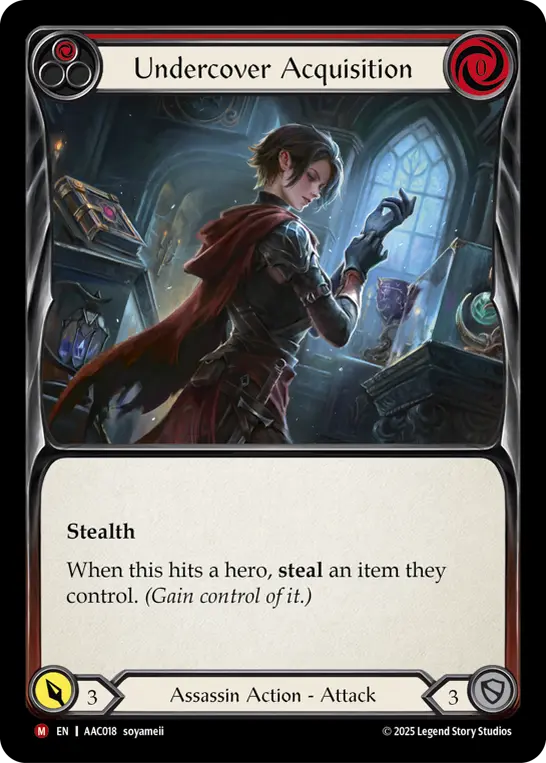
Art of Desire: Body was my go-to stealth attack for Cindra and Slippy, but Gravy put a little extra strain on this card as it really wasn’t useful. In the moment, I'm using Bonds of Attraction so I can banish allies from Gravy, daggers from Cindra, and a Take up the Mantle targets from other Assassins. Undercover Acquistion can also work well, but I don’t feel it has any other uses than against gold-touting heroes - yes, you can steal the occasional Energy Potion or Spirit of Eirina, and it really can take some valuable pieces from Mech too, but I just didn’t feel like I needed to do those things.
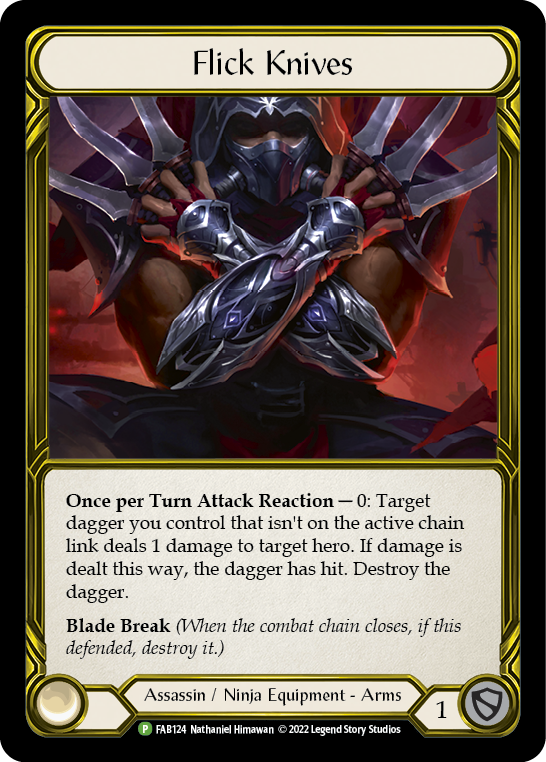
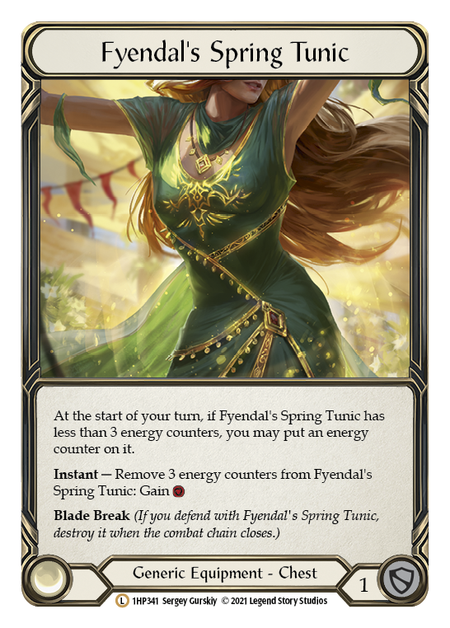
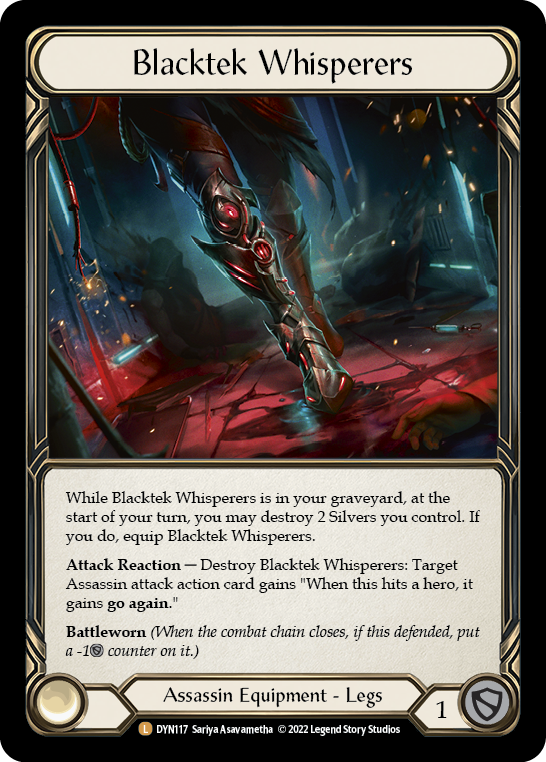
Equipment is going to look pretty unified among most lists: Mask of Deceit, Fyendal’s Spring Tunic, Flick Knives, and either Snapdragon Scalers or Blacktek Whisperers. There really is no surprise. If you are going for a faster dagger-based game, then you may side in Blood Splattered Vest. I will say that Flick Knives feel like a needed piece of the deck - get ready to pony up the dough for competitive play if it's not yet in your collection.

The Brood
The Agents of Chaos are an elephant in the room if you have not understood them. When I first began to pilot Marionette, Black Widow was king, and all else left a lot to be desired. With the presence of Enigma, Trap Door felt like I was stepping back from what I needed to do, and I was too attack-focused to realize how to use Orb-Weaver effectively. Once the meta evened out a bit, I could really dive in and see how these could be useful.
Arakni, Marionette is your base form. You get a +1 modifier and go again on hit if attacking a marked hero. Marionette turns your 3 attack stealth cards into 4s and it’s a great way to put the hurt on strong heroes like Cindra. Despite this being the base form, often transforming will make you feel weaker. Ultimately, when I chose to switch from Blacktek Whisperers and go to Snapdragon Scalers a lot of this feeling went away, as I could drive the go again on a turn with a defensive deck if I needed.
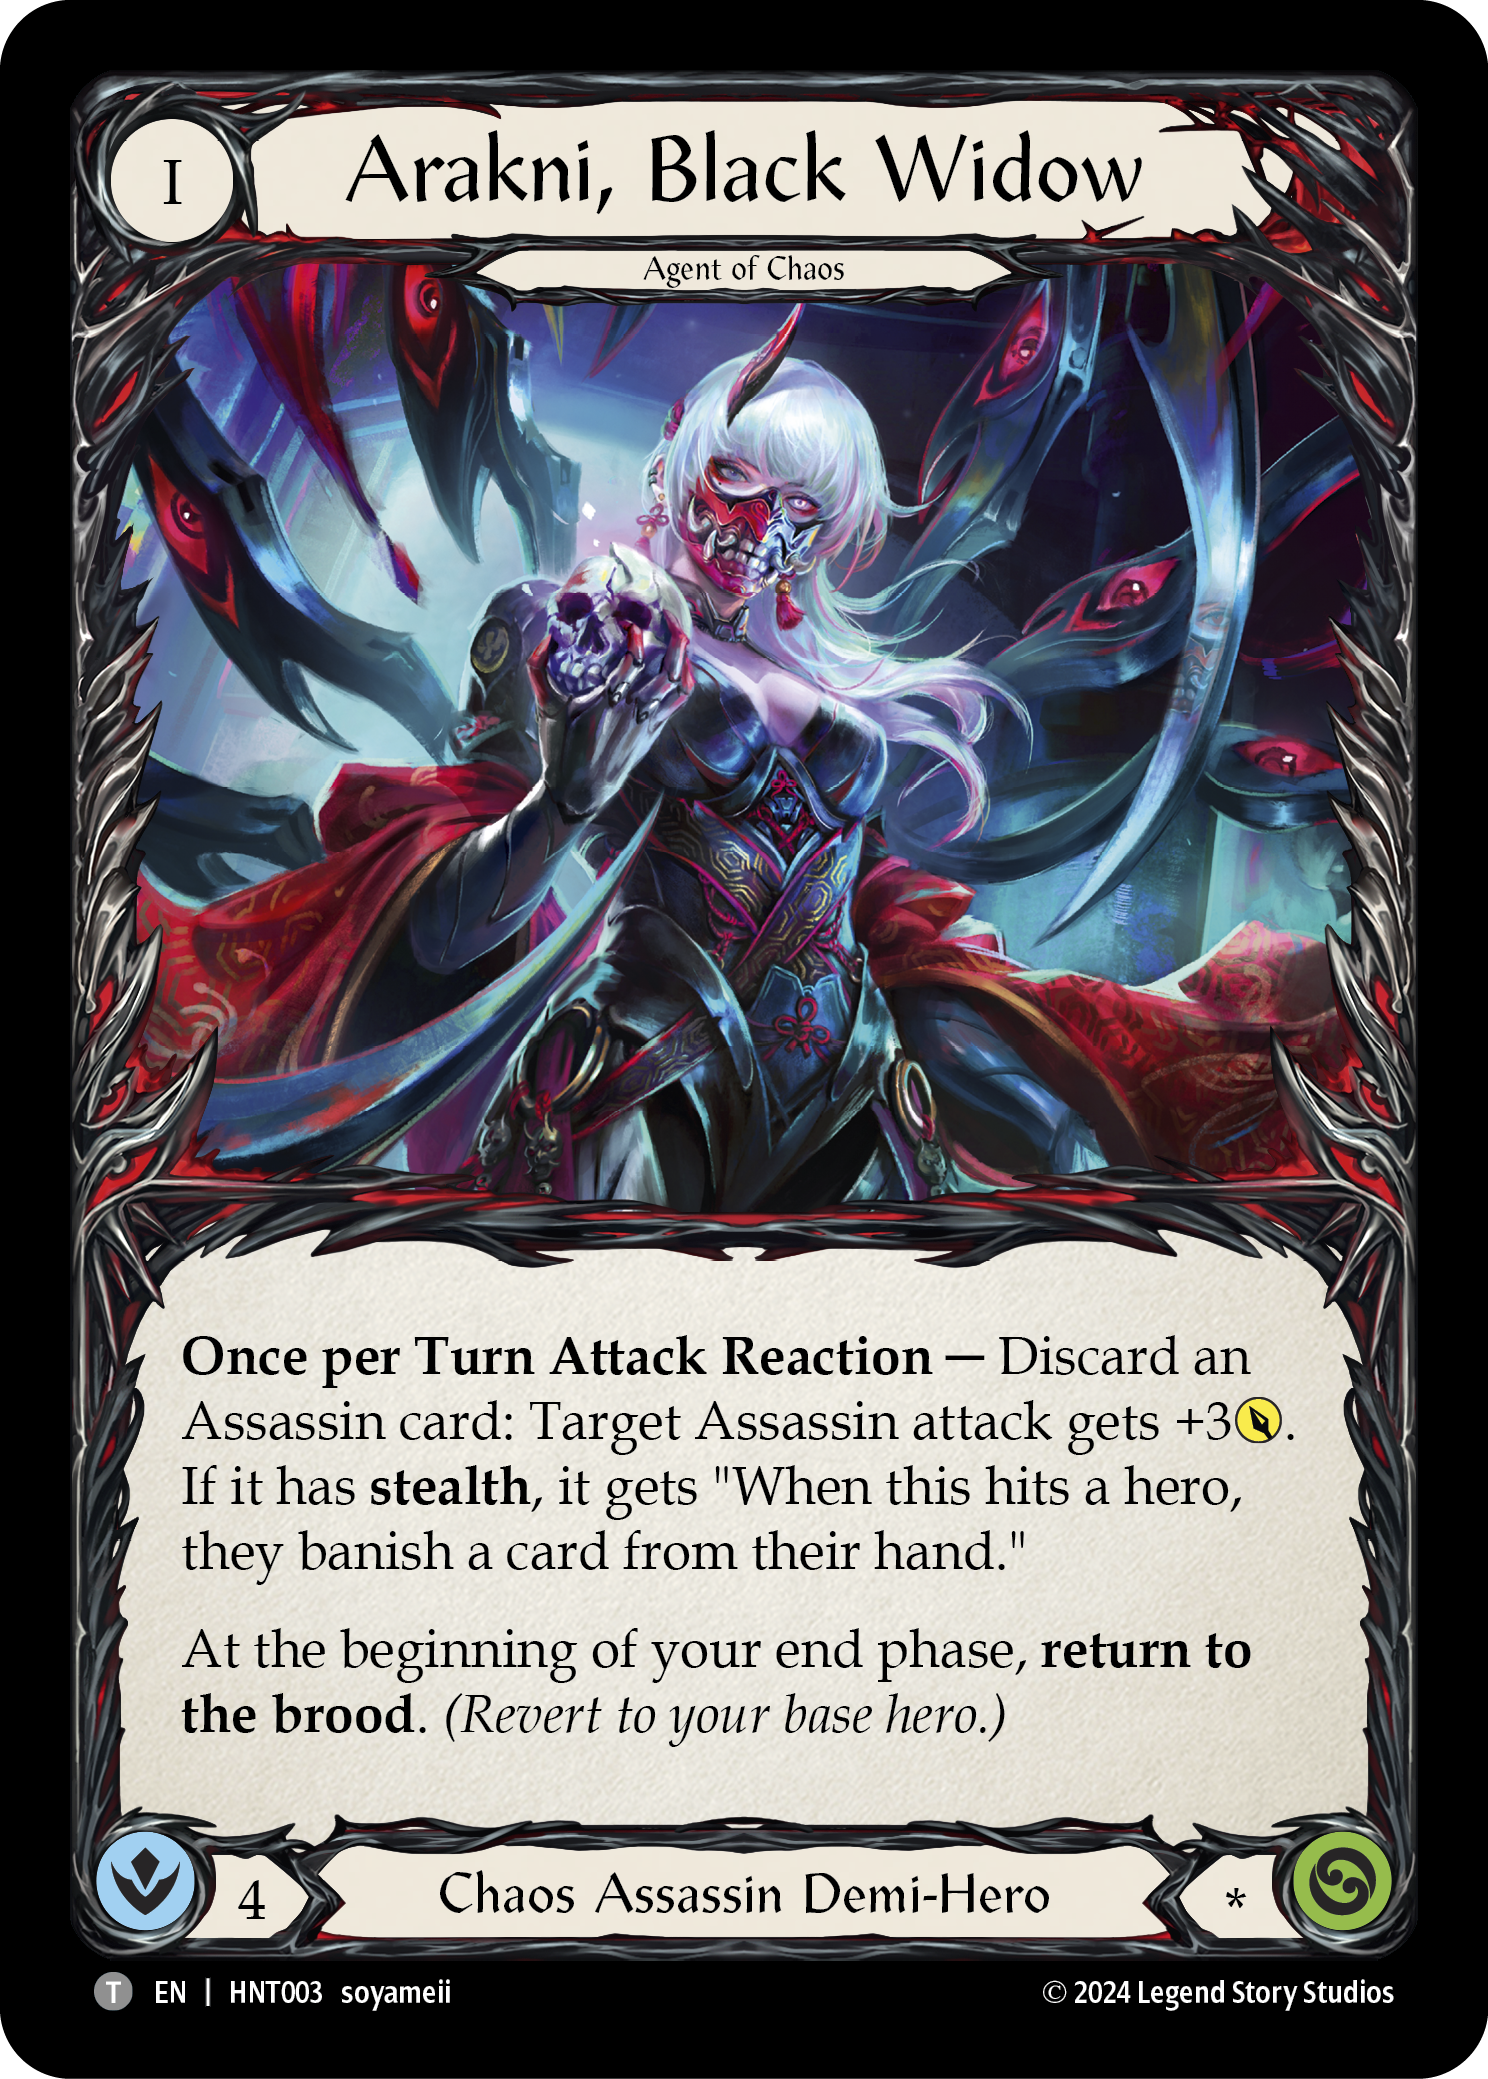
Arakni, Black Widow provides a lot of threats to the opponent, turning any stealth Assassin attack into a +3 reaction that banishes a card. Ultimately, Black Widow will probably bait over-blocking or not blocking at all so that your opponent can keep a card back when all the disruption is through. When you become Black Widow, if you have reactions in your hand, you can easily feel out what the opponent does and act accordingly. If they under-block, push a lot of damage and make them regret that choice; if they block too much and you don’t mind them keeping what's left of their hand, you can save the cards in your hand to sculpt your next turn.
Remember this important interaction, as it's among Arakni's most dangerous! If you attack with Kiss of Death, react with Snapdragons, and activate Black Widow, the opponent will have to banish from hand; then later, if you decide to flick the Kiss of Death, Black Widow's ability will trigger again! This is one way you can force 2 banish from hand effects.

Arakni, Funnel Web is generally thought of as the weakest form. It functions identically to Black Widow, but disrupts arsenal instead of hand. Until recently, I fell into the camp that believed it was the weakest, but I have since started to look at it from a new perspective. People will say, “If I see you become Funnel Web, then I just don’t arsenal”. At face value it feels like the value of Funnel Web is missed out, but I just stopped the opponent from having an arsenal by its presence. Furthermore, it may have caused the opponent to sub-optimally force a card into their turn because they didn’t want to deal with losing it. By mere presence, it sculpted my opponent’s turn; and if they aren’t working with an arsenal, then I can imagine their ceiling to be lower. If the opponent counters with “I’ll just arsenal a d-react", based on the way you draw in Flesh and Blood and the pattern by which you attack, they were going to do that anyway before you became a different form.

Arakni, Orb Weaver is one of the few forms that do not have a reaction-focused ability. As an instant, you may discard a card to equip a Graphene Chalicerae and give your next attack with stealth a +3 modifier. It’s also worth noting that Orb Weaver makes the Graphene Chalicerae cost one less resource to swing, effectively making it free. This is a powerful form in the end game that allows you to swing twice at a marked opponent, and gives you the liberty to flick a dagger at an opponent without worry of feeling behind. Couple the danger of free dagger swings with copious dagger reactions to really make this form a threat.

Arakni, Redback is a return to form with reaction-based abilities. The +3 modifier goes to any assassin attack, and if it has stealth then it gains go again. The ability here feels pretty basic. There are a lot of reasons to be excited about becoming this form, and there are a lot of reasons to not be. If you find yourself with an attack action-focused hand, then this comes as a boon. If you find yourself focusing on daggers, then it really isn’t that great of a situation.

Arakni, Tarantula focuses on providing value to the dagger-based plan. The reaction-focused ability doesn’t apply to an Assassin attack, but only dagger attacks. There are combos available here, to be sure. If you play Poisoned Blade, then Kiss of Death with a Tarantula activation, the opponent will lose 3 health when the attack hits. If you manage to flick Kiss of Death, that's another 3 health lost. One damage is suddenly worth much more. It creates a value-oriented gameplan toward the beginning of the game, and a tight situation if the opponent is less than 5 health.
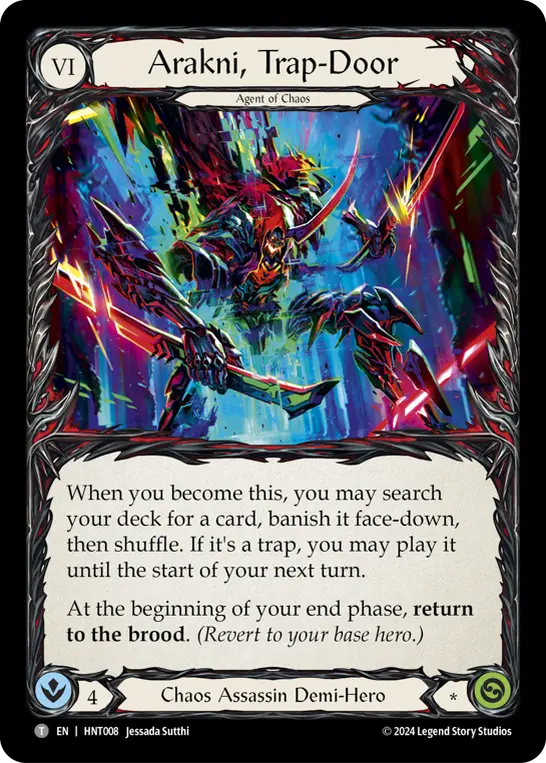
Arakni, Trap Door proves to be different, as it allows you to tutor a trap and play it from banish. This really gives you a 5 intellect turn, with 1 card being limited to blocking only. If the opponent was faced with a weak turn, they will likely arsenal and skip their attack upon seeing you become Trap Door. If the opponent has a substantial turn, they will likely have a 3-block interruption in their gameplay. You can also feign a bluff from the opponent as well; some players have elected not to attack upon seeing me banish a card, when in actuality I tried to push this decision and banished a worthless non-trap altogether so I could keep a 4-card hand.
A Word on Strategy
With Marionette, I feel about 30% of the gameplay is in how you construct the list. You have daggers, attacks, attack reactions, defense reactions, non-attack actions, and some instant abilities in the form of discard. It’s all there. The strength in Marionette is that, because of all these variables, you can be as freeform and as creative as you need to be. Compare that to Cindra, who is a very linear deck.
I said 30% of the gameplan was on the list, and I’ll gladly say another 35% is understanding how to effectively pilot the list - by which I mean basic piloting of seeing lines, options, and understanding what to do with those variations.
The last 35% occupies being unpredictable and deceitful to the opponent. You could lump that in the piloting, but it really is a great skill that comes into play.
There are two cards that interact with your graveyard: Codex of Frailty and Take Up the Mantle. Your opponent wants to see neither of them. If your opponent was given the opportunity to remove 6 cards from your deck, these would likely be 2/3 of the possible choices. Just paying attention to your graveyard periodically puts your opponent on edge to one of these threats. Also keep in mind what isn’t in your graveyard. If you punish the opponent with a Tarantula Toxin against a dagger, then they feel like blocking a dagger with stealth is too much of a risk and you can punish that all day.
You need to be able to constantly read your opponent throughout the match, lead them to a decision, and punish them for making it regardless of what they decide. If you can do this in a few small steps toward the beginning of the match, they will be conditioned to fall right into your hands late in the game as your threats dwindle. It’s important that you aren’t predictable throughout the match, so your opponent is never comfortable with any decision they make. This is something you need to find out how you best do with your list, and I really can’t curate how this will work for each situation.
The best advice I can offer is this: once you provide some situations with unavoidable outcomes, punish them for making minor plays. Bonds of Agony sometimes doesn’t need to have 3 reactions if the opponent respects it too much or doesn’t want to lose their power card. But if you play a Bonds of Agony with no reactions, it may condition the opponent to disrespect your Bonds later - so you can decide to punish them when they don’t block.
Matchups
Vynnset has a pretty good matchup into Marionette, depending on how many blues the Assassin decides to run. Regardless of the plan, do damage first and foremost. If you have an opening to destroy Spellbound Creepers, then I would take it. Your banishes from hand or the top of the deck can fuel Vynnset to have wider turns than initially planned. Always be thinking of what she can do on offense, as some of her gameplan can be face-up in her banished zone. Although this isn’t optimal, you shouldn’t try for fatigue unless you are really on the back foot. Haymaker banishes from Bonds of Agony are great for lining the player with blood debt, although you could be fostering the Vynnset player’s next turn.
Florian was previously the big bad of the format, although he dropped off a bunch. Whether they played for stack or value, you could overwhelm their numbers with daggers before they were able to be online from decomposing. If you prioritize stealth cards that banish, you could inadvertently turn their ability on. I would try to dagger through this match, and send an attack action when they have roughly one card left in hand. Command and Conquer or other attacks that prohibit defense reactions are a good way to prevent Rootbound Carapace. Take out all or most or your defense reactions and plan to be as aggressive as you can. I would plan to use only arcane barrier 1, and I usually use the barrier in my foot slot since I’m mostly spamming daggers until the end game and I don’t feel as pressed for go again. Keep this plan on and you will likely mow Florian down.

Verdance can be a little trickier. Unfortunately, sometimes she can just draw what she needs quickly and decide to tear off and walk away with the win. It’s your job to stop this. Bring in cards that stop defense reactions like Back Stab or Command and Conquer to stop Rootbound Carapace. Then prioritize damage through daggers and finish it up with whatever haymaker of an attack you can deliver. Make sure to be tricky about your order of attacks. In the beginning you’ll catch Verdance off guard, as she will likely throw defense reactions to your daggers, leaving you open to punish with an attack. Once the Verdance catches on and start to save defense reactions for the inevitable attack actions that follow, switch back to daggering. Being unpredictable is your best bet in this matchup.

As far as the other Wizards go, it’s likely best to do a different approach. The more cards in the Wizard's hands, the more damage they are able to do. Prioritize stealth attacks that can rob from hand, and whenever they provide a block, react over it if possible. As long as you can keep Oscilio from a full hand, you shouldn’t have to weather the storm of a lethal combo. For Oscilio, you can easily get away with 2 arcane barrier.

Anytime Kano has an arsenal, he should be regarded as a threat. Aether Wildfire can be played from hand via Ragamuffin’s Hat or Potion of Déjà Vu. They start having the pieces to go off in a 1/20 chance, and it just gets better. If Kano presents any blocks, then this turn he will not plan to go off or throw significant damage on his turn. Provide fast damage. Your game against Kano should not last longer than 4 turns. Bring AB 3 and be ready to respond in case the Kano player tries to string together their combo on your turn. This may go without saying, but I would take the defense reactions out against Kano.
The Ninjas all have similar plans. Most Ninja classes can block for 2 on average - save for Ira, who is a little bit of an exception in her game plan. The recent release of the cards in the Armory Deck may streamline her game more, but if that does, it becomes closer to what we want to see. Prioritize stealth attack action cards during the turn, or cards they need to block. Sending any dagger damage you have during the turn is relevant, but always make sure you keep the Ninja player in a 3-card hand. Against all Ninjas, Lair of the Spider should be included, as well as any 4-block defense reactions you have. As long as you block appropriately and keep whatever Ninja it is to a 3-card hand, you’ll stroll into victory. Classic Ira can provide a different dilemma. She may be running more 3 blocks and decide to race you with her damage, or block appropriately and send back a Kodachi and a Command and Conquer for 7. If you see this, then try to string your turns to guaranteed maximum damage and put disruption on the backburner.

Warriors are the trickiest you can go against, but we’ll start with the classic: Dorinthea. Try to pocket defense reactions and prioritize playing them from arsenal if she is coming at you with her signature Dawnblade. Beware Ironsong Determination and forcing a turn to get some counters built up on Dawnblade. If you try to play midrange, you can outpace her. Sometimes there is good reason to block the first swing, but it can be easier to block the second swing to ensure Dawnblade doesn’t get a counter. The Warrior class is good at playing a value game if it comes down to it. If you can spike her with some strong Kiss of Death or Bonds of Agony turns, then you’ll come out ahead. If you're facing a dual-wielding Dorinthea, the gameplan should be to focus damage through daggers first and foremost - but if you sit down against a Dorinthea you should always side toward Dawnblade. Try to cycle through your defense reactions and play defensive through the start of the game. When you can take tempo and the d-reacts have run out, then you can swarm Dorinthea with a barrage of damage. The dual wield build is very consistent, but the damage ceiling is capped unlike Dawnblade.
Boltyn is another warrior who may dual wield, but he may use his signature weapon Raydn. You should side defense reactions in and take out 2 Pick Up The Point and a Cut From the Same Cloth. Keep his hand diminished; Boltyn will need at least 2 cards in hand to send 1 attack, and most Lumina hands he’ll need to focus 4 cards to output a lot of damage. When a Lumina Ascension turn does appear, you can look at the life totals to see if you need to block it at this point. Beware Boltyn attacking with an unbuffed weapon, as he could try to spike the game with Beacon of Victory. If you see a dual-wielding Boltyn, try to maintain the game by prioritizing dagger damage and attacking him while marked. In most cases Boltyn will try to block until he has an opportune moment to strike, but if your stealth attacks are attacking him while marked then he’ll have to commit more cards to keep blocking your on-hits. Use Codex of Frailty to weaken him and attack his arsenal constantly. You may also use cards like Bonds of Agony or Persuasive Prognosis to try to steal a Lumina Ascension from his deck. Once you see 2 eliminated from his deck, you can breathe a sigh of relief, but don’t let your guard down.
Fang is probably the biggest viable pushover of the class, as his deck doesn’t block the best. Until he gets 3 Fealty, he’ll want to keep at least 2 cards back to have any kind of turn. Usually you can leave the Sinks to the side and just bring in the traps that mark the opponent. Just like most Warriors, it’s best to leave Cut From the Same Cloth and 2 Pick up the Point on the wayside. You can choose to bring in 1 Command and Conquer for this match. Most of the non-Draconic pitch cards will be 3-blocks, so if you see one hit the chain it reduces the blocking power of his deck. Stop his go again to ensure Valiant Dynamos do not reset and you’ll have this match in the bag.
Olympia exists, but I’m going to skip right over him and go for Kassai. Since she can have a combo turn with Blood on her Hands. my original step was to side in defense reactions and try to stop her value. Looking more closely, a lot of Kassai players run multiple fables and copies of tech cards like Snag. There are enough non-blocking cards here that lends some credence to attack mainly with daggers, and Snag puts a damper on your plan. Currently the best plan is to take out defense reactions (except for the traps that mark) and bring in the dagger pain and retrieval. Once you bring in the Graphene Chelicera, you can swing both daggers by pitching a blue and ensure a barrage against Kassai. I’d keep blocking to a minimal unless the damage output from your hand just isn’t up to snuff. You’ll need to race her before Kassai is able to output meaningful damage from some combo. Her damage isn’t the highest, but she is a very consistent deck. If you prioritize stealth cards over daggers, then she has the ability to fatigue you.

Guardians require similar strategies to those we used for Florian, though our posture needs to become even more defensive. Move Lair of the Spider aside to bring in Den of the Spider and your 4-block reactions. Command and Conquer is another good include, in case they're on a defensive build. If you're fighting an aggressive Guardian then try to prioritize attack actions that cause disruption. Against decks like Victor who will usually not run defense reactions, you should try to be aggressive and deny his setup.

Against a defensive list such as Jarl Vetreidi, pivot to a strong reliance on daggers. If you are playing against Jarl and he puts a –1 counter on your Flick Knives, make sure you immediately open up a spot for a Graphene Chelicera. As a reminder, the list I showed you has most of its reactions work on daggers and attack actions, so be prepared to amend your plan of attack if you feel the Guardian catching on. Make sure you punish any blocks on Chelicera or Kiss of Death with Tarantula Toxin.
Slippy should be a simple match for you, but I’ll lump in some Marionette advice with this. Throw stealth attack actions because just as Slippy gives his own attack actions go again, the same will be true for yours. As long as you threaten cards in his hand, his damage and disruption will be hindered. If Bonds of Agony presents itself, you really need to evaluate how this will affect you if it hits. If you block with 2 cards and it hits, then you will likely lose the last of what you have; the other Assassin will get full tempo. However, losing all 3 Codices or Take Up The Mantle is a large blow to your threats. In the long run, this game easily goes to Marionette, but Slippy has the most potential to high roll. As a last little warning, watch the Slippy who uses Mask of Deceit. If he decides to block against one of your stealth cards, you will no longer have his go again ability applied; you’ll have to use your own.

Prism will be one of your strongest adversaries, but this match snowballs quickly. Only leave Lair of the Spider in your deck as far as defense reactions go. You can bring in all of your phantasm poppers to this match. If you have a few dedicated poppers, then ensure they have 7 power to get around Herald of Triumph or the Prism activating Halo of Illumination to bring in Figment of Judgment. As a popper, I recommend Wage Gold, as it has the universal keyword and can be discarded to an Agent of Chaos’ ability. Once you put Prism on the back foot and are able to keep her to roughly one big attack per turn, you’ll find this game very manageable. Send a disruptive attack that can gain go again at the beginning of the turn to help mitigate the strong effects of Arc Light Sentinel. If they play it on your turn, destroy it and move to the next turn. Prioritize disruption and getting certain figments out of the game. Once you remove Figment of Erudition and Figment of Protection, the match will become significantly easier.

The most significant match I’ll touch on is Gravy Bones. This match can really make the game feel unfair, but you can also casually stroll through it from time to time. At the moment, in my testing it feels volatile. To reiterate, Marionette’s ability of +1 and go again on hit only happen if attacking a marked hero. Any ally you attack will not award you the benefits listed. As such, any ally that hits the board with more than 4 health will take roughly 3 cards to kill: a 3 attack from stealth, and a pitch to play a reaction. Priority targets are Chowder and Sawbones. Sawbones can be used to stop dagger flicks or breakpoints, so take him out quick. If the player sees a hand that refuses to block, then you can take this match by force. If the player has hands that block plentifully, it can be hard. Riggormortis and Limpit can easily be killed by a dagger swing, and Swabbie can be taken out if convenient. The threat of allies is dynamic throughout the game, so you should constantly evaluate how much damage that 1 Anka is going to do each turn. I originally tried Gravekeeping for this match, but it didn’t feel too great. A few friends rave on Looking for a Scrap, but I try to be mostly class aligned in case I am an Agent of Chaos. The 2 best go again cards to chose from seem to be Pick Up the Point and Pain In The Backside. In my opinion, Pick Up The Point gives you more utility as you can return a dagger. More dagger retrieval in your list means more chances to flick. Once you are accustomed to how Gravy’s play interacts with Marionette’s play, it becomes much more skill intensive, but the game can still be swayed strongly by cards drawn from the top. At the moment, Gravy has had a dynamic deck and is consistently adapting to Cindra, Prism, and Slippy. Once Gravy settles in a bit, it’ll be easier to develop a strong gameplan against him. At this moment, most Gravy Bones players are opting to include more attack actions and by doing so it only makes your Marionette plays stronger; ally-based decks are currently what he struggles against.
By now you've likely seen a pattern, and we can quickly cycle through any remaining heroes. Defensive decks prioritize daggers, and offensive decks prioritize attack actions. If we go against Brute, we want to stop big Bloodrush Bellow turns, and this can be done by attacking hand and arsenal. Levia suffers even more by adding cards that we banish to her blood debt count. Dash should lose a card or two every turn to keep the player from being able to play Maximum Velocity. Marlynn needs resources if she is on the harpoon plan, so attacking her hand is best. Whenever you see a Riptide, you should ask how many cards they are presenting. If it’s 60, then assume they are aggressive and send disruption. If they say 73, you're in for a long and boring game; focus on daggers when possible, and Command and Conquer can stop his defense reactions. The rest of the heroes can be tied up in a bow nicely, as they don’t currently pose as much of a threat to Marionette. This game is dynamic, and each sets gives new cards to classes all of the time. Be prepared to adapt this information as new heroes come out.
A Final Note
The last thing that’s relevant is to know when you want to be an Agent of Chaos. When I started playing Arakni, I came up with a tier system of who I actually wanted to be. Marionette was great because he made attacks break points. Black Widow became my favorite form, and everything else was meh. I didn’t ever want to transform, if I am being honest. As I’ve spent some time on Marionette, I now realize that each form gives me options and there are only 3 situations where they aren’t as strong. Sometimes your opponent panics and lays down a wall of blocks even if your threat was empty! When you have an opponent with no options and become Arakni, Trap Door, it can feel lackluster. Arakni, Tarantula’s ability to strictly for a dagger and not an Assassin attack; it feels like a bummer when you aren’t really prepared to send a dagger attack (or worse yet have no daggers).
The final instance I don’t like to be Agents of Chaos is pretty simple: I need to block with 3 cards to stay alive. Trap Door can add a card to my hand and maybe I can get 2 cards to work with, but the breakpoint of 4 at a marked hero can feel much better. You’ll find naturally against aggro heroes your attacks will get through and you’ll become an Agent of Chaos less. Against defensive heroes, you are likely to become an Agent of Chaos more. Ideally the Agent’s ability makes everything a little more consistent and ensure you can use more of your hand. Embrace the Agents, and you will find fun situations to be in.
With all of their abilities, Marionette is one of the most dynamic and influential heroes in the meta. You can continually find new lines you can perform with them. Make sure to always keep your opponent guessing, and be prepared to deliver punishment for any decision they make.