When it comes to building a Fai deck, there are a wide variety of options for cards to include. Even in the most basic decisions, you have to consider what your priorities are and what matchups you want to improve. How do you want to play turn-to-turn? And what do you want your power turns to look like? And with the banning of Belittle in Classic Constructed, there is more to consider than ever.
Obviously, many of your deckbuilding decisions rely on one another to build a cohesive whole. It is impossible to refer to all of these elements in each section, so I hope you will be able to consider these connections as you go through this article, perhaps even returning to certain sections to consider how different decisions support or synergize with one another. Where possible, I will call this out myself, but my goal is to have each section stand alone.
The Blue Base
While Fai is obviously an aggressive deck with a large percentage of red cards, he still relies on seeing at least 1 blue in every hand to be his most effective, most efficient self. Because of this, some of your most important deckbuilding work goes into what cards you choose to include in your blue slots.
In the past, the Belittle/Minnowism combo let you fit 3 additional blues in your deck for the price of 2. While that is oversimplifying the math a bit, the bottom line is that, if you're adjusting a Fai deck that previously relied on Minnowism, you will likely want to include 1-2 more blues in your deck in addition to the 2 that replace them, for a total of around 15.
There are a few strategies to consider when including blues.
- A Good Rate - The simplest plan with your blues is to take the 2-power, 3-block attacks so they can serve triple duty. They're reasonable to pitch, attack with, or block with, depending on what you need for the turn. This was seen to great effect in Dan Rutkowski's list for US Nationals, where the marginal value to be found in these cards' flexibility (as well as other deckbuilding choices) led him to a 2nd place finish.
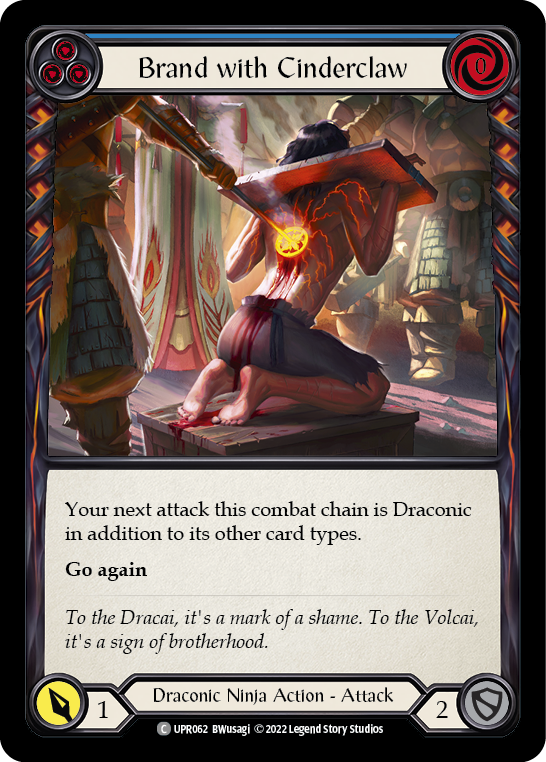
- Consistency is King - Another strong plan is to fill your blue slots with additional Draconic chain starters. Cards like Brand with Cinderclaw, Mounting Anger, and Rising Resentment, among others, ensure that you will always be able to play out your turn if you draw 2 blues, and can significantly increase the consistency of your deck. The downside is that all of these attacks block for 2, so it greatly reduces your durability and forces you to close out the game faster. Fortunately, your increased consistency should enable you to do so. With the Belittle ban forcing you to include more blues in the deck overall, your odds of drawing 2 at a time go up marginally; including a few of these chain starters is the safest bet for gaining advantage from hands that would otherwise brick.
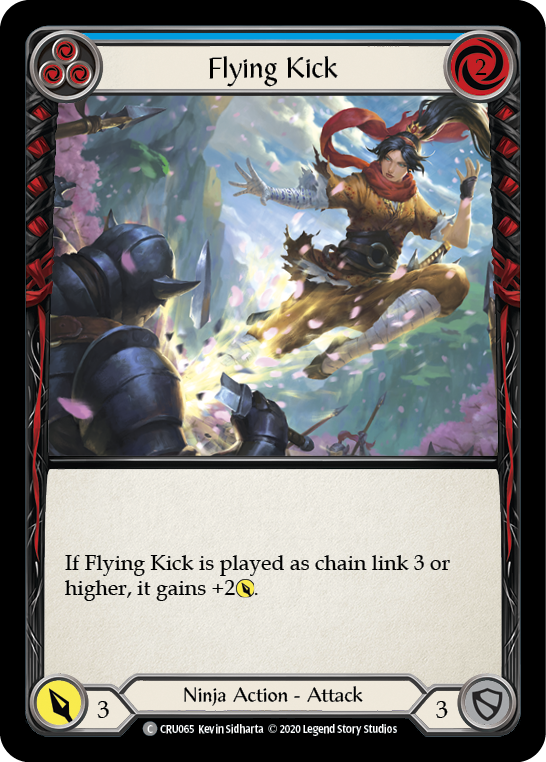
- Strong Finishers - A third option is to include blues that can actually serve the role of ending the combat chain with some punch. The premier choices for this task are blue Snatch and blue Flying Kick, but blue Soulbead Strike is also an interesting choice as it has added utility against Dromai for its free go again when clearing a dragon.
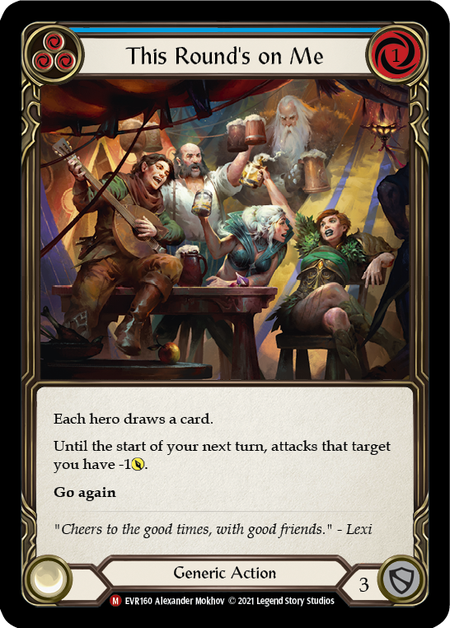
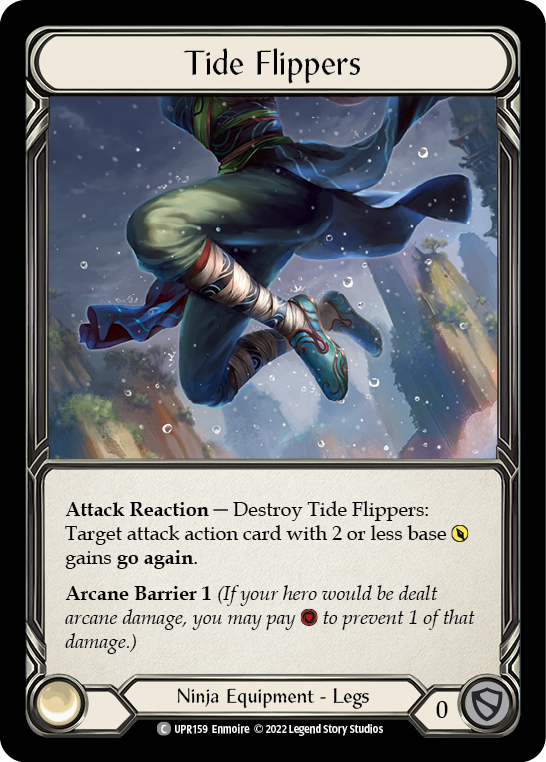
- Utility Please - Finally, the blue slots in your deck can be filled with cards you don't ever intend to play, except in certain matchups where they bring additional value. This includes things like This Round's on Me and Energy Potion. There's even something to be said for a card like blue Razor Reflex that can be part of a sneaky strategy to give cards like Snatch or Enlightened Strike go again. You won't use these cards every time they come around, but they can fill niches in your deck that you don't otherwise want to dedicate red slots to. Admittedly, it is a bit more difficult now to dedicate slots to this type of card, given the overall lower consistency of the deck without Belittle.
What to Wear
Your choice of equipment has a profound effect on how you play your games. This is especially true for Fai, as his different equipment choices operate so vastly differently from one another. It is essential for you to settle on a gameplan for your deck when considering what equipment to include in your loadout.

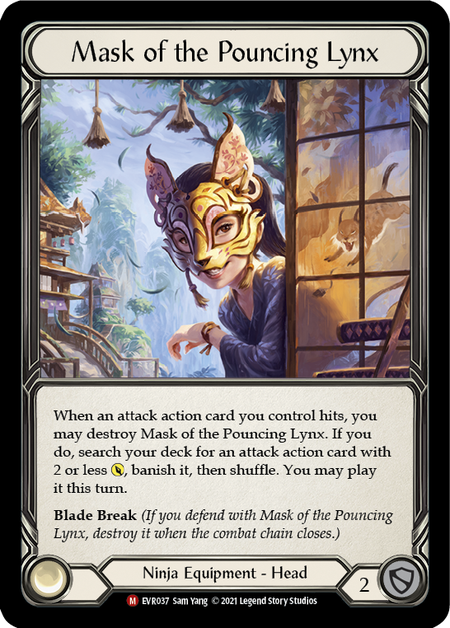
The choice between Mask of Momentum and Mask of the Pouncing Lynx is probably the most important deckbuilding or sideboarding decision you'll make as Fai. In short, Mask of Momentum lets you play long, while Mask of the Pouncing Lynx lets you play fast.
Previously, Fai players assumed they would want to play Momentum into aggro mirrors, as those decks do not want to block and thus you are likely to get value out of the hit trigger. Over time, that strategy has shifted to deciding that Pouncing Lynx can race the opponent down faster, resulting in a situation where the opposing aggro player cannot set up big counterplays due to being so low of life. Because Fai is the most consistent aggro deck in the game right now, he should win that exchange.
So where do you play Momentum nowadays? Generally speaking, you get your value playing it against Dromai, Bravo, and Lexi. Dromai is for obvious reasons - dragons are easy targets for on-hits. Bravo and Lexi are both disruptive decks that require quite a few cards in hand to be able to put together an effective turn; if you threaten them with a Mask of Momentum trigger, you put them in a position of either giving you a card draw and taking even more damage, or blocking your attack and having less they can do to disrupt you on their own turn. In addition to this advantage, Mask of Momentum will still block for 2, potentially turning off a devastating on-hit effect if you use it at the right time.
Your choice of chestpiece as Fai requires you to make decisions about blocking and resources. The four main options available to you exist upon the following continuum:
Resources > Blocking
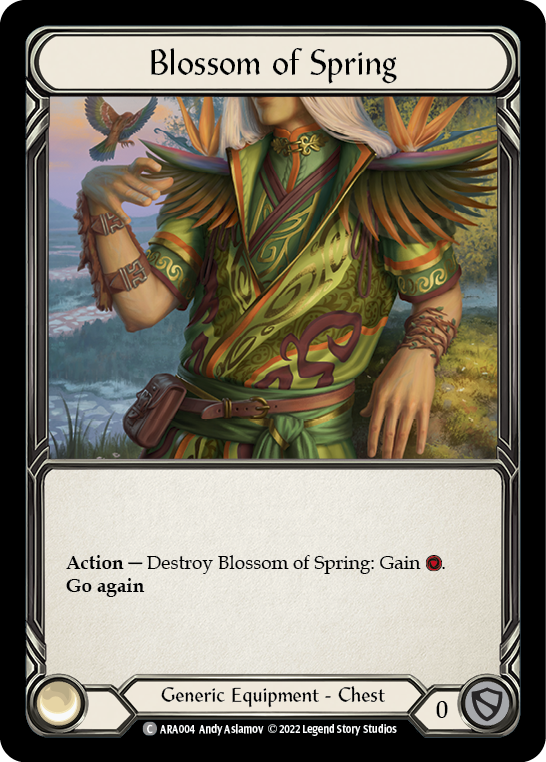
Blossom of Spring
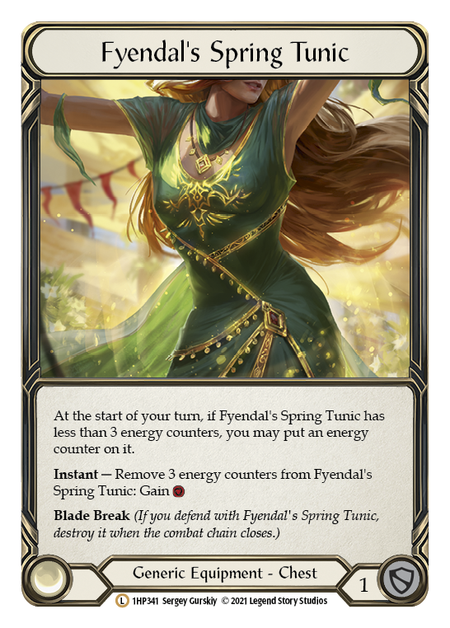
Fyendal's Spring Tunic
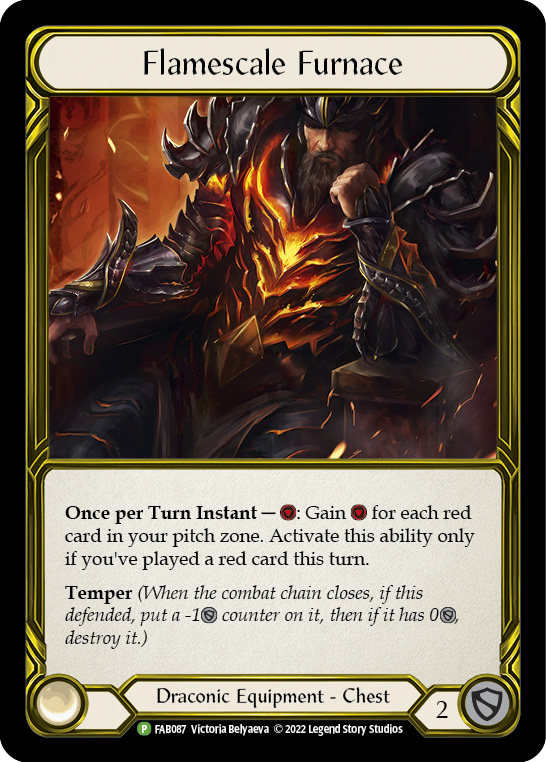
Flamescale Furnace
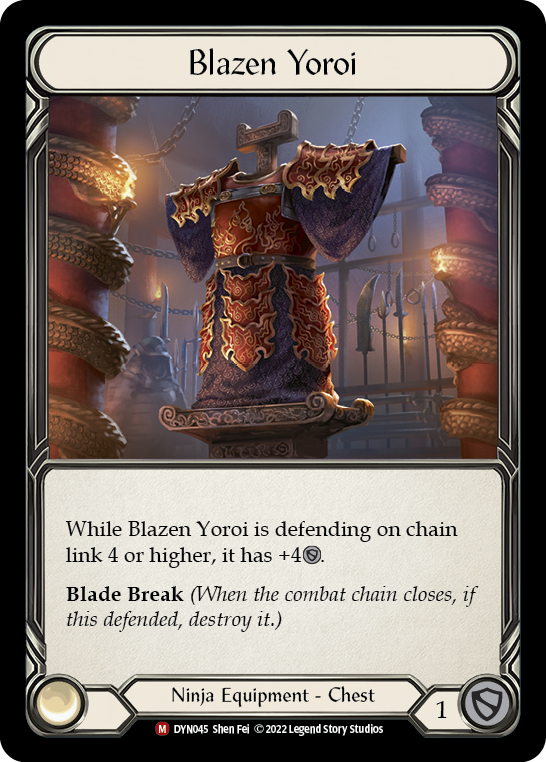
Blazen Yoroi
Blocking > Resources
It is more than likely that you will include multiple chest options to run depending on the matchup. Moreso than that, however, your choice of armor here will likely come down to how you want the rest of your deck to play.
- Do you want to run fewer blues but still be able to use the power of a few strong 1-cost cards like Spreading Flames or Art of War? Blossom of Spring can let you play a combo-style Fai deck by giving you that one extra resource for that crucial turn.
- Do you want to frustrate your opponent's plans and protect your own turn by shutting down key on-hit effects? What about turning an all-red hand into a functional turn? Flamescale Furnace can do both.
- Planning for a long game? Hate discarding cards to Coronet Peak? Fyendal's Spring Tunic is your friend.
- Finally, if you want to add a strategic dance to your Fai mirrors, Blazen Yoroi can blank an opposing Lava Burst or even something like a Snatch if your opponent isn't careful.
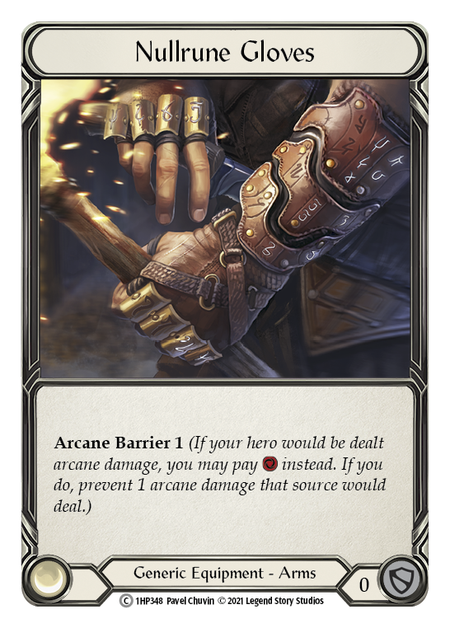
When it comes to deciding how much arcane barrier you want to include in your Fai list, you primarily want to think about your plan into Iyslander. 1 AB lets you absorb a little bit of damage against something like an Aether Icevein while still holding onto 2 resources to pay for the discard effect. With Amulet of Ice banned, this kind of approach is even more reliable as you'll know reliably how many resources you need to avoid the discard.
Going up to 3 AB will let you prevent a larger share of damage. However, this is generally not something you want to devote your relatively meager supply of resources to doing, as you need those resources to attack. The exception would be when you're under the effects of Channel Lake Frigid. During those turns, your attacks are less effective because it costs you so much more to commit to them. As a result, you may decide that turtling up and preventing as much damage as you can until the dreadful aura is gone and you can begin attacking in earnest again is a better strategy, especially considering your arcane barrier is not taxed by the lake.
Bringing the Power
Finally, we come to the question of how will you defeat your opponent. This is surprisingly the easier part of the equation, considering so many of Fai's cards are basically the same effect (0-cost, 3-power, attack with go again). But there is still a lot to consider when it comes to making the deck your own.
Let's start with the essentials though:
- Art of War - Run it. Don't even think about not.
- Ronin Renegade, Brand with Cinderclaw, Rising Resentment - Your bread and butter chain starters. No reason not to include them.
- Lava Burst - The finisher. Works with Pouncing Lynx. Works with Tiger Stripe Shuko. Almost always the strongest thing you can do at the end of your turn.
- Phoenix Flame - You will always include at least one, otherwise you lose Fai's entire hero ability.
So with those inclusions, we're at 16 cards already, plus around 15 blues as we discussed earlier. That still leaves a lot of space to fill with the cards and combos that you find will give you the most power. A few of these options are explored below.
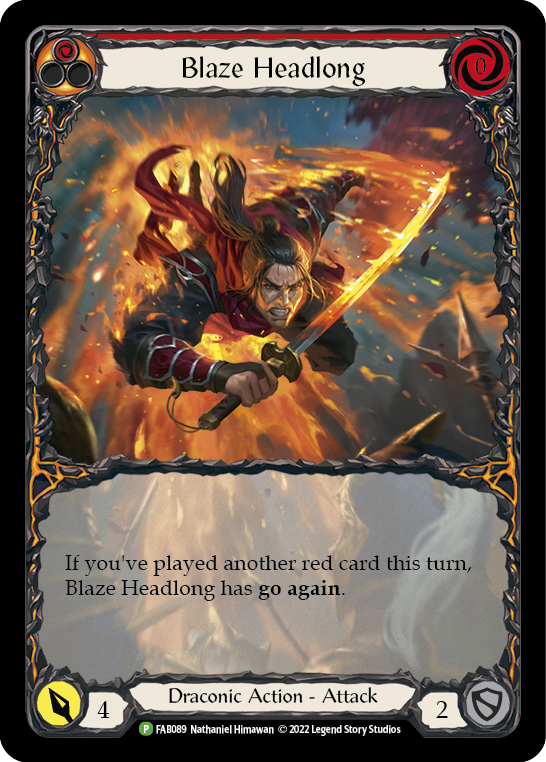
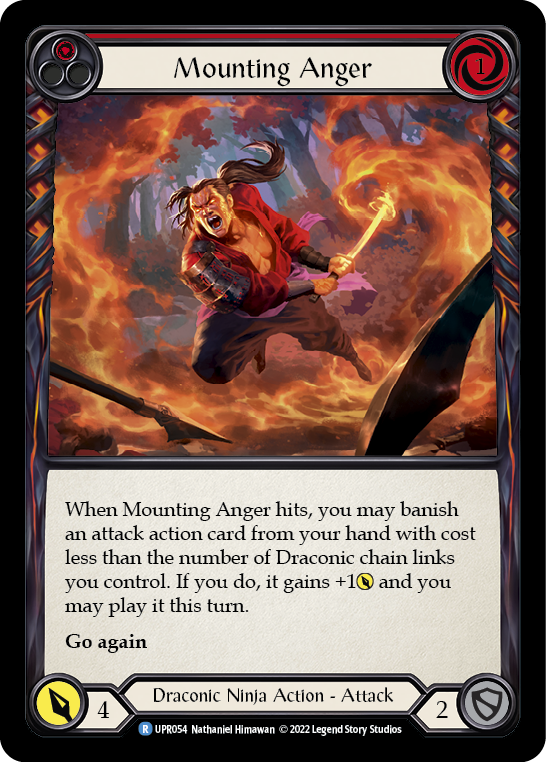

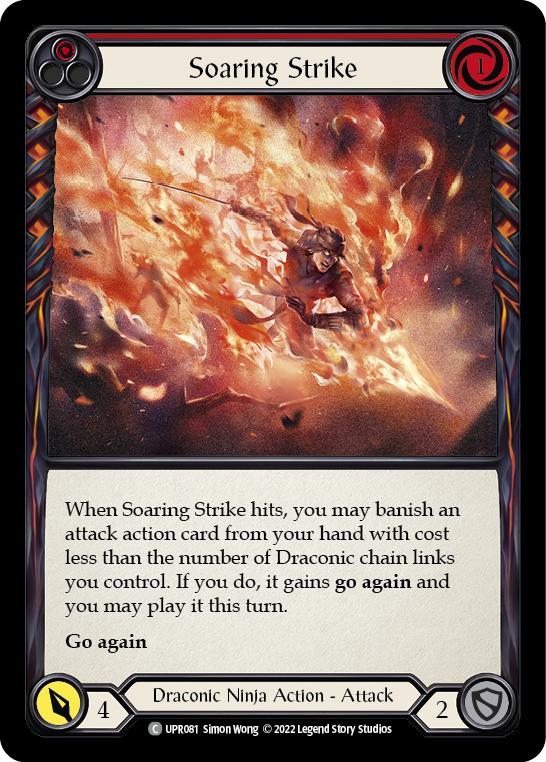
Blaze Headlong, Snatch, Mounting Anger, Soaring Strike - Fai's biggest weakness is that his cards are all merely on-rate. Everything attacks for 3, and against a deck that can reliably block 3, it can be difficult to push through damage consistently. By bringing in more cards that push to a breakpoint, you can increase the overall damage your deck is doing. Unfortunately, with Belittle's ban, it could be more difficult to reliably play 1-cost attacks like Mounting Anger or Soaring Strike while still presenting enough Draconic chain links to get your Phoenix Flame for the turn.

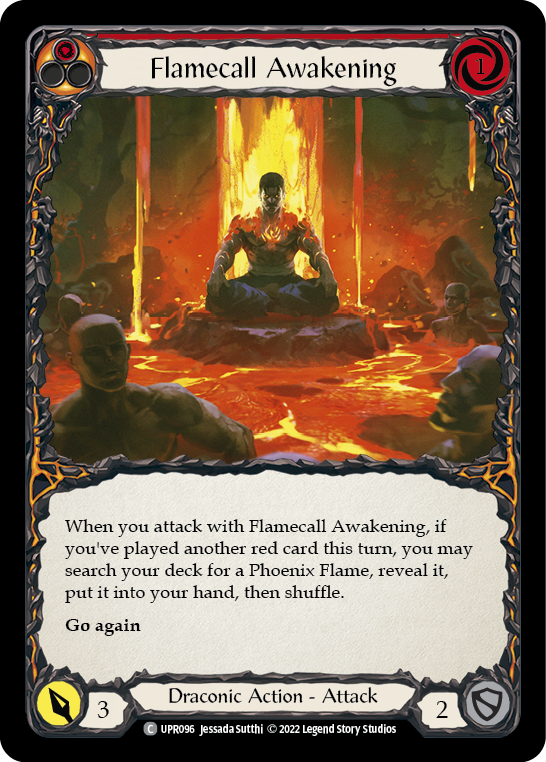
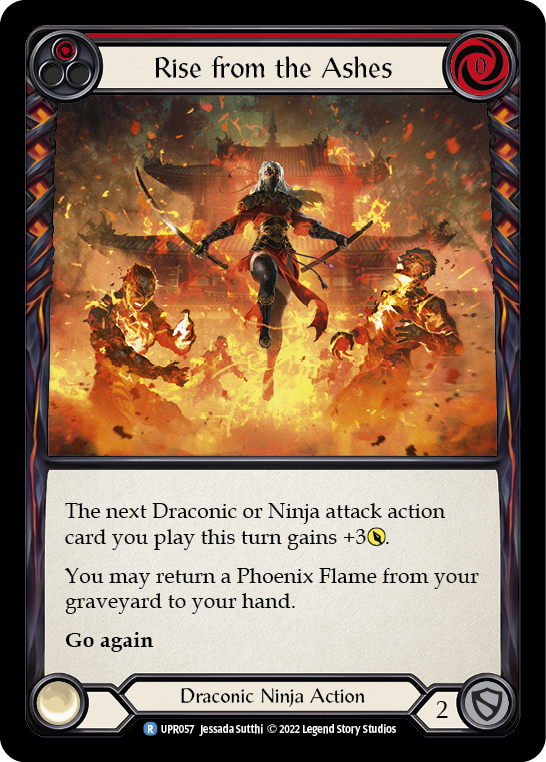
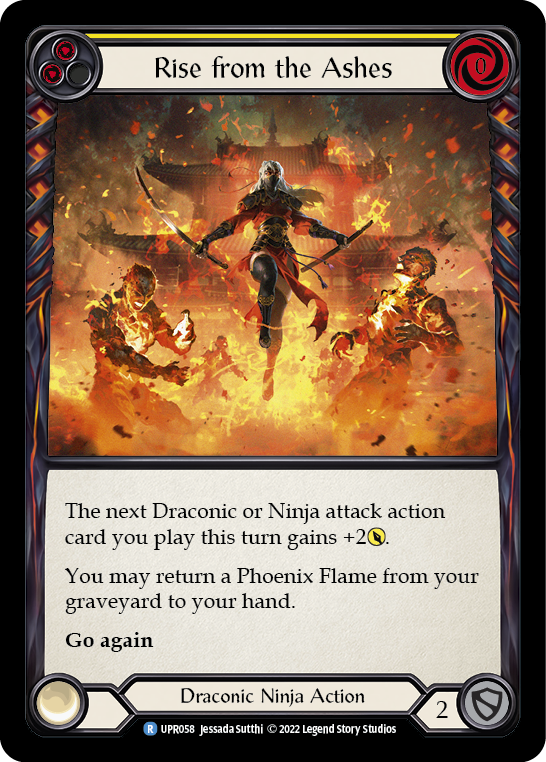
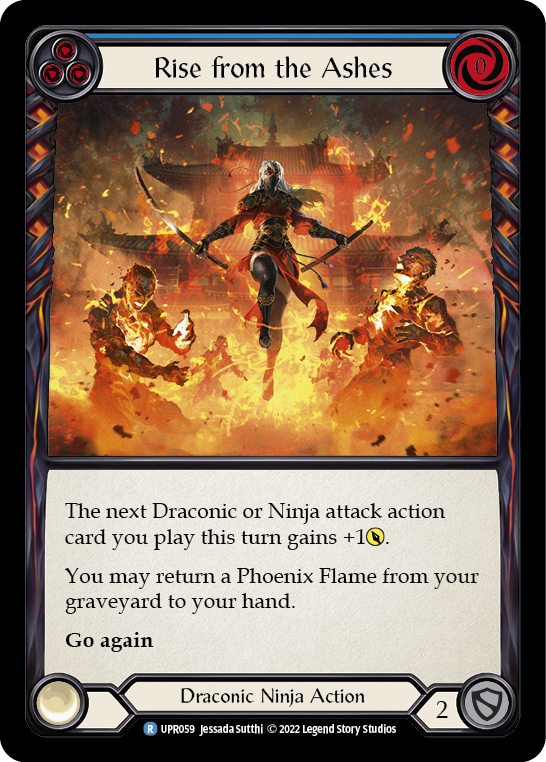
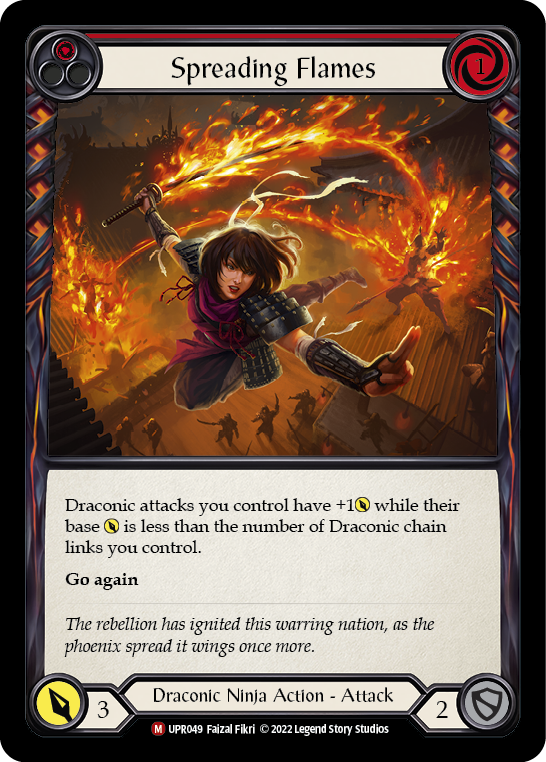
Flamecall Awakening, Enlightened Strike, Spreading Flames, Rise from the Ashes - If you're wanting to include multiple Phoenix Flames in your deck, you'll want to include ways to get more advantage out of them. Enlightened Strike is easily the best trade you can make for a Phoenix Flame by turning the 0-power flame into a 7 power attack. Spreading Flames can require some tricky sequencing to get the full value out of its buff, but any means to push your attacks to more inconvenient breakpoints can be very powerful. And of course, Flamecall Awakening synergizes strongly with these other two cards.
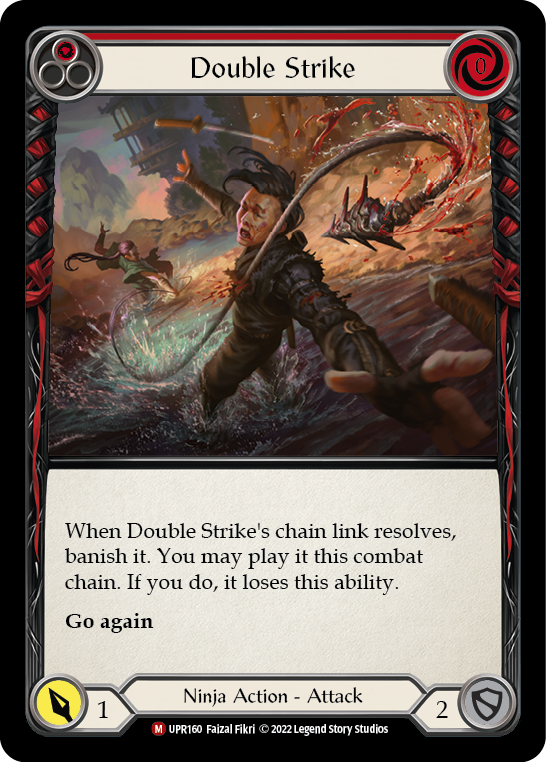
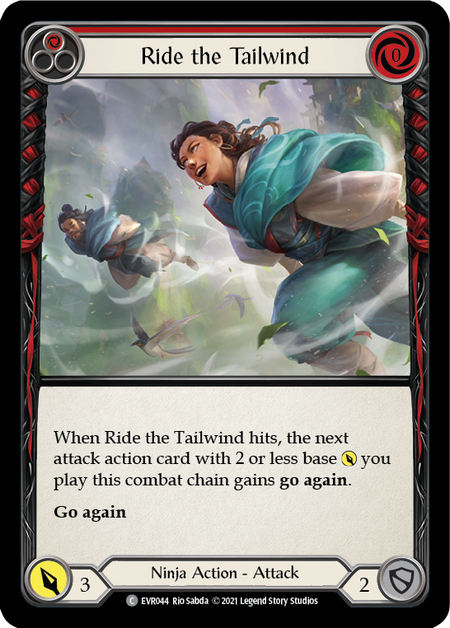

Salt the Wound, Ride the Tailwind, Double Strike - Another strong finisher and target for Mask of the Pouncing Lynx, Salt the Wound can sometimes be even stronger than Lava Burst. Meanwhile, Ride the Tailwind can be another 0-for-3 attack on your combat chain that gives you the potential double-whammy of two Lava Burst-level attacks in a single turn.

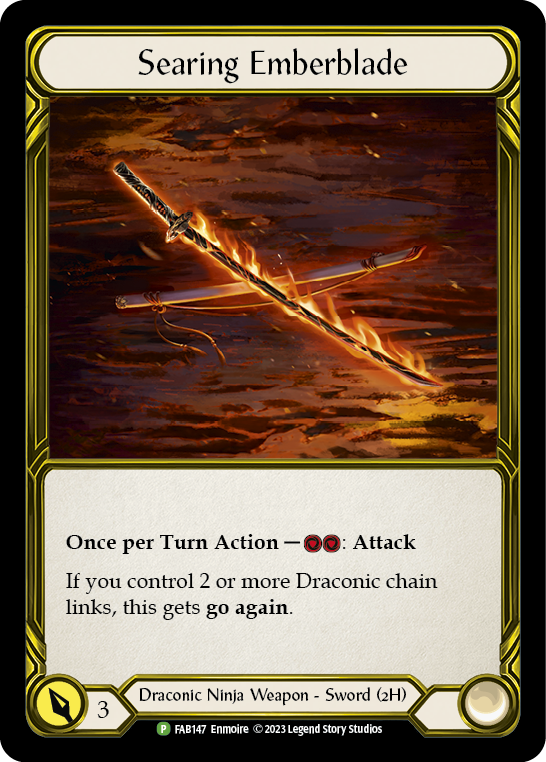
Emberblade versus Kodachis - Finally, there's the question of which weapon to use. Unfortunately, I don't think there is space in the meta for Kodachi Fai as long as Oldhim exists. The ban of Winter's Wail means more Oldhims are running Earth cards again, which makes it so they can utterly blank your Kodachi swings by pitching a single card. The Emberblade/Phoenix Flame endgame loop is not much better for avoiding fatigue, but if you have Tiger Stripe Shuko still in play, at least you'll be taking a card from them every turn cycle. I'm willing to be proven wrong, and honestly hope that I am, because I think weapon diversity is one of the coolest aspects of this game.
Odds and Ends
There are a few remaining tools that most Fai decks will want to have, but they're only for very specific matchups.
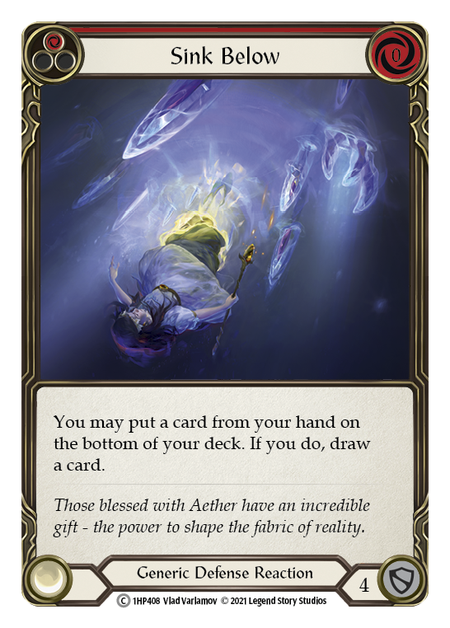
Sink Below - The best defense reaction in the game. Definitely want this into Bravo. Probably want this into Azalea and Dorinthea. Surprisingly don't want this for Lexi or Oldhim; Lexi will tax your Sink Below with her frostbite at the start of the turn, otherwise it would be an all star in the matchup.

Energy Potion - Probably worth including against Iyslander, if only for the insurance it can grant you against discard effects while on the field. Especially worth including 3-of in your sideboard if you're on the AB:3 plan, as you'll want to add to your overall blue count in the matchup to increase your likelihood of having the resources to pitch on the turns you're tanking. Outside of Iyslander, Energy Potion is more of a liability because it does not block.
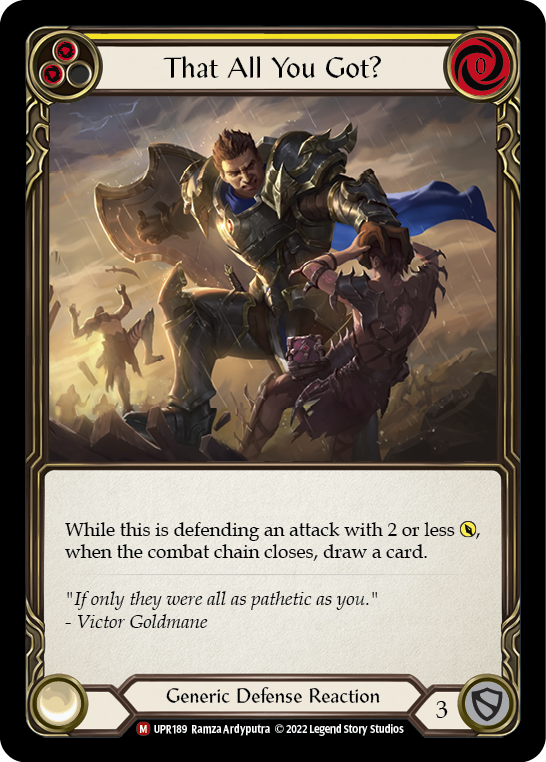
This Round's on Me, That All You Got? - Often considered to be the tech cards for playing against Fai, the results of playing these cards can often feel very mixed. Both cards replace themselves, which in the primary reason they're even considered playable in the first place. The math checks out on paper in terms of value generated. In practice, however, it can often feel you lose as many games as you win because you end up drawing these off of an Art of War or you're in the late game with momentum and could get the kill if you just had one more attack but instead you drew one of these. Again, the effects can be powerful. But the consistency hit should not be underestimated when considering adding these to your deck.
Fighting with Fire
Despite the loss of Belittle, Fai is still one of the most consistent and aggressive decks available in Classic Constructed. With a new Ninja set just around the corner, there's no telling what this Draconic Ninja will be capable of.

Fai pushes the Ninja's wide combat chain toward explosive conclusions, making powerful use of a full hand.
by: Joshua Kehe
Fai, Rising Rebellion, is one of Uprising’s hottest new heroes; and while he may seem like a straightforward aggro deck, there is plenty to consider.
by: Frank Hung

Even without Stubby Hammerers, Fai is a strong choice in the current meta. As he's done with Boltyn, Will analyzes cumulative value across Fai's gameplan to create a framework which can evaluate possible card choices.
by: Will Reinhardt