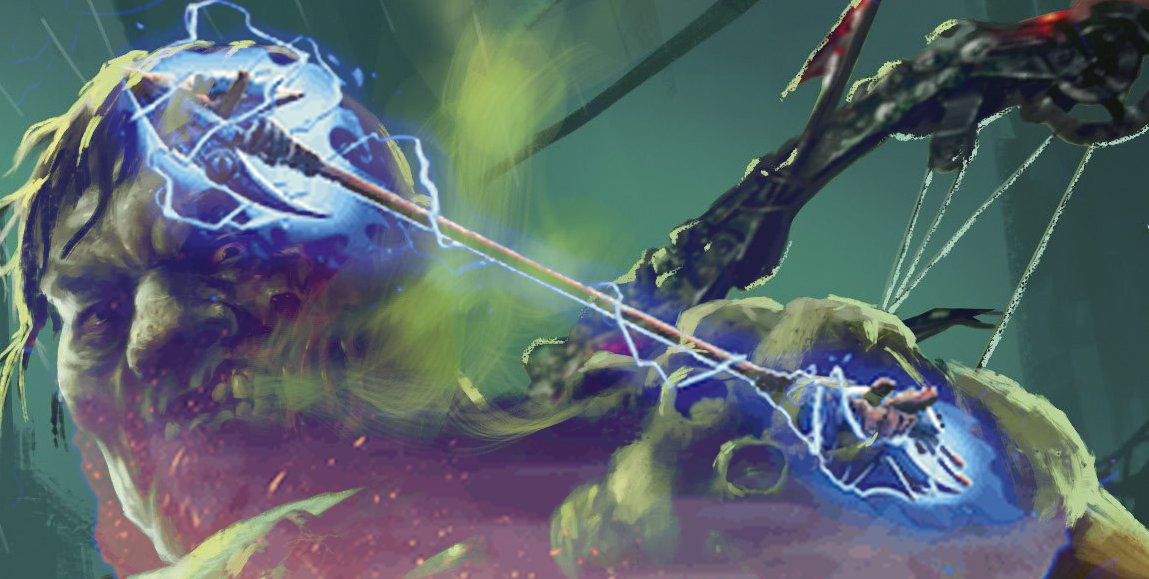
It’s a tale as old as time — or at least as old as March 2023. A new player ready to start their journey peruses the heroes available to them. After passing by your usual spell-slinging Wizards and sword-wielding Warriors, they stop at a hero more unique to the fantasy world: a bloated corpse of an archer named Riptide.
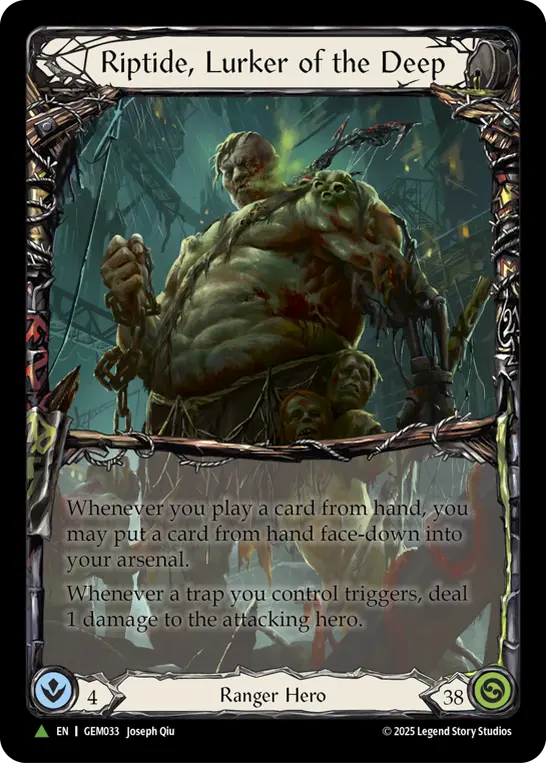
Lured in by the idea of methodical play with perfectly placed traps, the young player soon realizes that is seldom the reality of a Riptide main. There are traps, sure, but the best Riptide decks are low-cost and aggressive. Riptide’s most interesting piece of identity is relegated to just a few points of damage across the game.
Such is the identity crisis of Riptide.
Traps want a slower, more meticulous game plan that is able to whittle away health with his hero ability. However, as a Ranger, Riptide struggles late game; and his shallow card pool makes traps situational. Against the right decks, double digit trap damage is possible - but against others, it might as well be zero.
I did not build this deck to solve Riptide’s identity, but that is why this deck has stuck with me so persistently. It started as a pressure test, a simple question: what would happen if I ran 9 Salvage Shots and built a deck to support it?


Over the last month of testing, refining, and discussing with Garrett, Nyx, and Limulus, I have been pleasantly surprised by the deck’s strength. The traps here excel, Codex of Frailty is put to work, and Dreadbore offers a frustrating kind of evasion that pairs well with the heavier Command and Conquers or Battering Bolts. Its matchup against fatigue decks and Wizard significantly improved with extra resources to pay for Arcane Barrier. Dominated attacks are easily blocked, and the healthy combination of both offensive and defensive generic attacks leads to a flexibility that allows for efficient turns regardless of matchup.
This deck does it all while also feeling like what I imagined Riptide should feel like when he was first spoiled, finally convincing me to play Flesh and Blood.
The Deck
The deck's thesis is to use Riptide’s unique defensive capabilities to draw out a game and close it with above-rate recursive arrows.
Weapons
- Dreadbore (1)
Equipment
- Arcanite Skullcap (1)
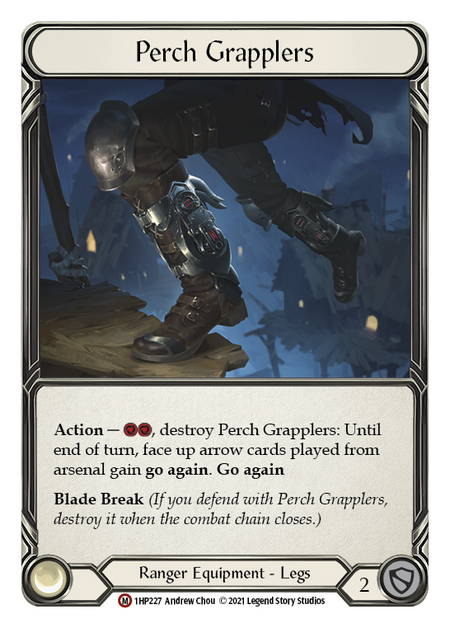
- Perch Grapplers (1)
- Nullrune Gloves (1)
- Nullrune Boots (1)
- Quiver of Abyssal Depths (1)
- Ironhide Gauntlet (1)
- Trench of Sunken Treasure (1)
Loadout
- Battering Bolt (Red) (3)
- Collapsing Trap (Blue) (1)
- Buzzsaw Trap (Blue) (1)
- Cadaverous Contraband (Red) (2)
- Codex of Frailty (Yellow) (3)
- Down and Dirty (Red) (2)
- Infecting Shot (Blue) (3)
- Enlightened Strike (Red) (3)
- Endless Arrow (Red) (3)
- Fate Foreseen (Red) (2)
- Frailty Trap (Red) (3)
- Salvage Shot (Red) (3)
- Boulder Trap (Yellow) (3)
- Brothers in Arms (Red) (2)
- Command and Conquer (Red) (3)
- Sink Below (Red) (3)
- Pitfall Trap (Yellow) (3)
- Inertia Trap (Red) (3)
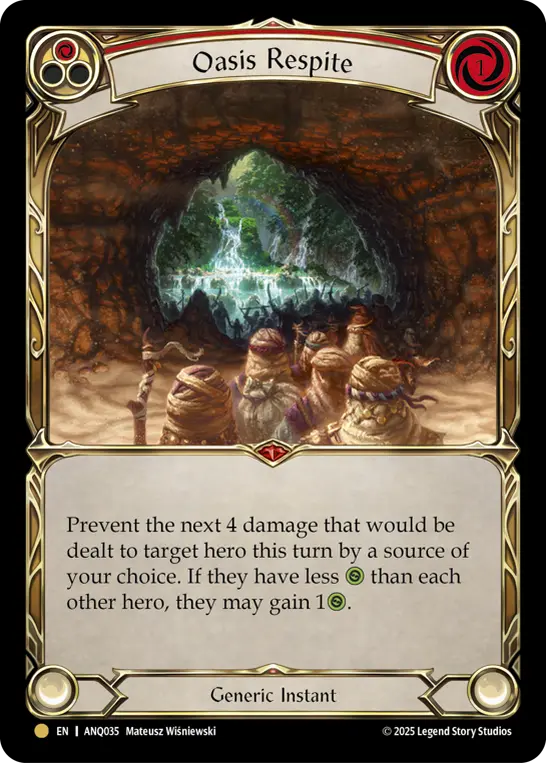
- Oasis Respite (Red) (3)
- Intoxicating Shot (Blue) (3)
- Remorseless (Red) (3)
- Remembrance (Yellow) (2)
- Rockslide Trap (Blue) (3)
- Sigil of Solace (Red) (3)
- Salvage Shot (Yellow) (2)
- Tarpit Trap (Yellow) (3)
- Take Cover (Red) (3)
- Spike Pit Trap (Blue) (1)
- Warmonger's Diplomacy (Blue) (2)
The following is general discussion and strategy regarding card choices. The exact numbers shift day to day based on the meta, testing, and personal preference.
The deck links below are the most recent lists. If you want to check past iterations, I’ve saved them all in the ‘Versions’ tab on Fabrary.
Equipment
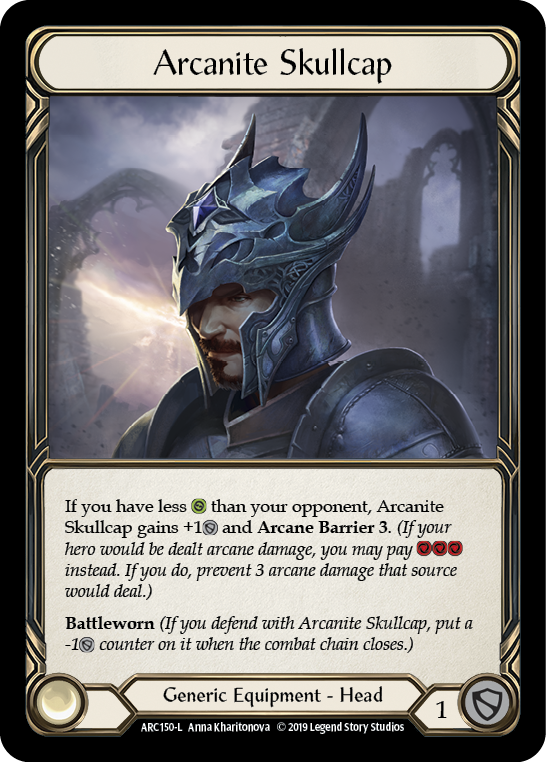
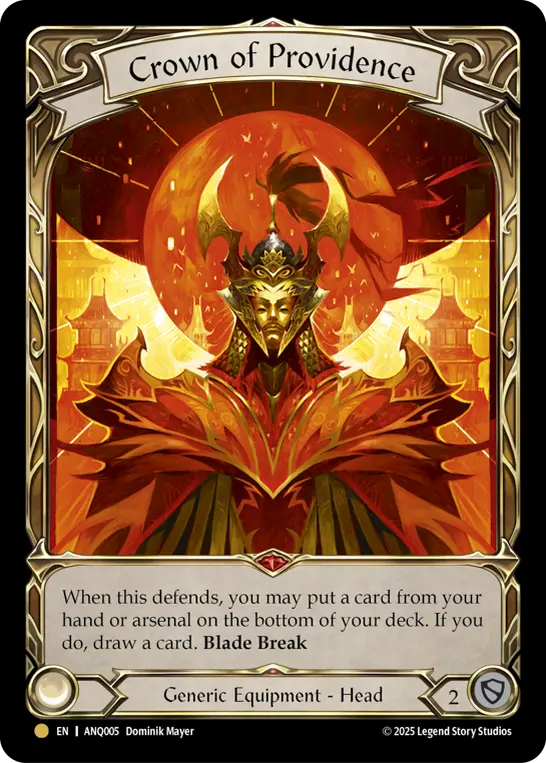
I prefer Arcanite Skullcap as it blocks 3 damage and has some helpful AB. Some folks like Crown of Providence to help filter for the right defense reactions.
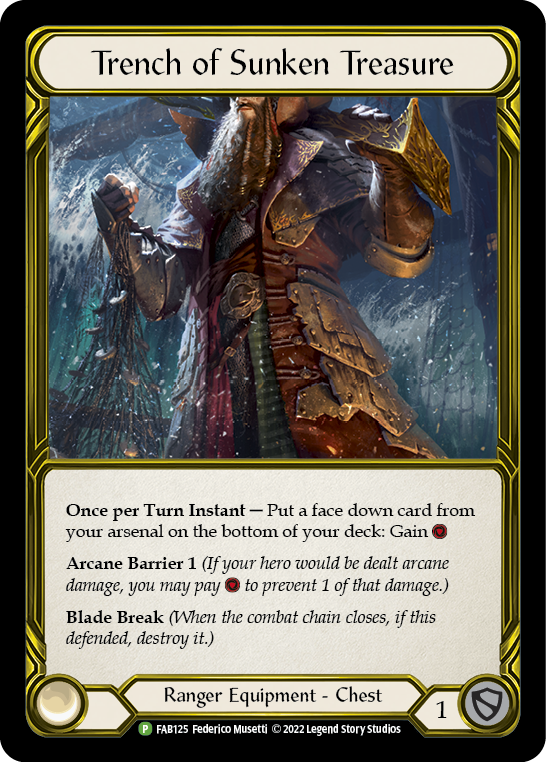
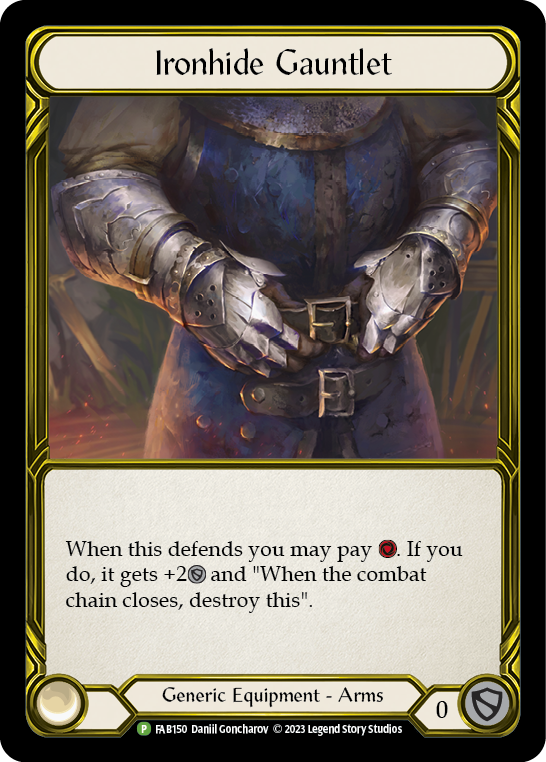
Trench is the most useful equipment here. It turns cards in arsenal into resources for Oasis Respite, Brothers in Arms, or Ironhide Gauntlet. Plus it clears cards from arsenal, and has AB to boot. Allows for two card Codex plays, such as…
Play Codex,
Load card into arsenal with Riptide’s ability,
Trench away arsenal at instant speed, then
Grab and fire a 1-cost arrow.
Blocking for 2 is great and it’s as simple as that. We don’t need the damage from Bracers of Belief and we don’t have enough arrows for Hornet’s Sting. It also has the added benefit of being good into T-Bone if you block with it but don’t pay.
One option to explore is Goliath Gauntlet to push our CnCs and Cadaverous Contrabands above breakpoints. Still testing.
As you can see, the equipment game plan is extremely straightforward: block for as much damage as you can. Since we’re not looking to throw cards aggressively, we don’t need cards like New Horizon or Snapdragon Scalers.
That said, I'd like to explore the option of New Horizon more. While it doesn’t work as cleanly as decks with lots of go again, there may be benefits to sitting on an arrow face up, allowing us to still fire back after a massive blocking turn. This is something I plan to test more after PQ’s.
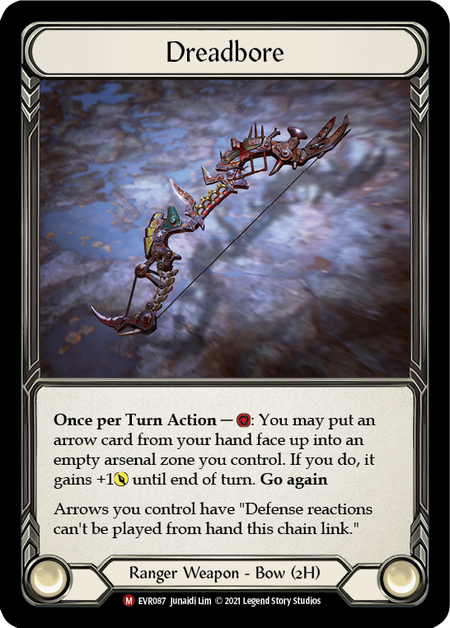
Dreadbore is the weapon for Riptide at the moment. Shutting down defense reactions on arrows is huge, especially into any other fatigue deck - even most aggro lists run Sink Below or Fate Foreseen. Making those more clunky to play gives a lot of value and shakes up the play patterns your opponent is used to.
Additionally, it gives +1 attack. This is super useful in a list like this. Endless Arrow and yellow Salvage Shot can no longer be blocked with a single Sink Below. Even blue Salvage Shot gets pushed above a breakpoint. Battering Bolt, the only 6-power arrow available to Riptide, becomes an extremely formidable 7 attack that can’t be blocked with d-reacts from hand. I very rarely cast an arrow that wasn’t loaded with Dreadbore.
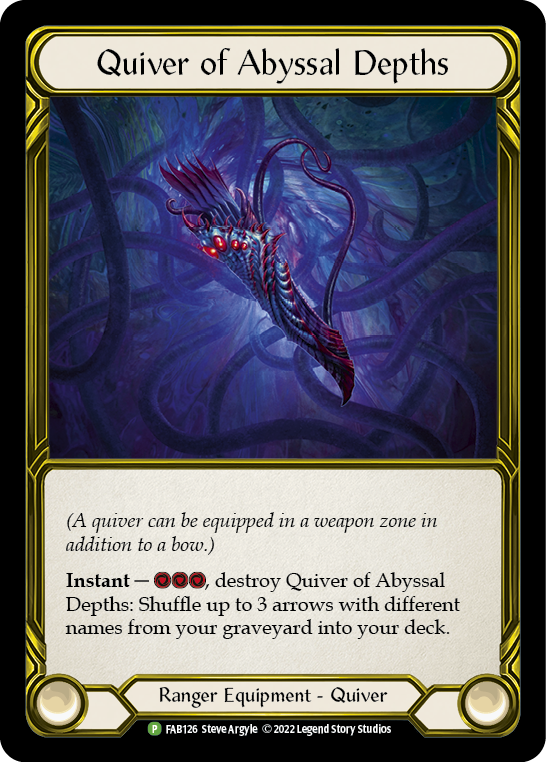
Quiver of Abyssal Depths is an easy inclusion for a fatigue list. Not only does this help us get back recursion arrows, but it allows us to more comfortably block/attack with those cards early.
Arrows
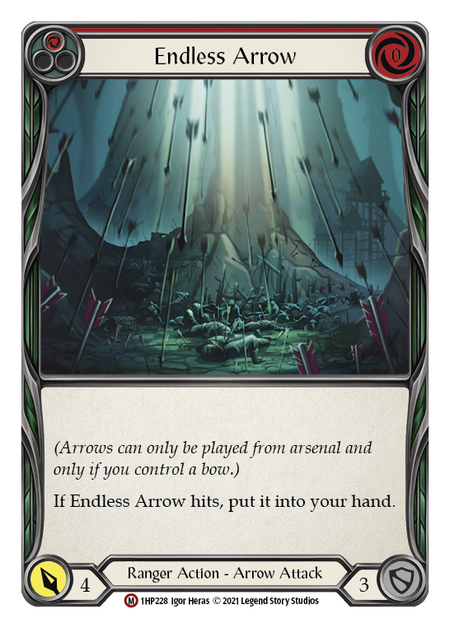
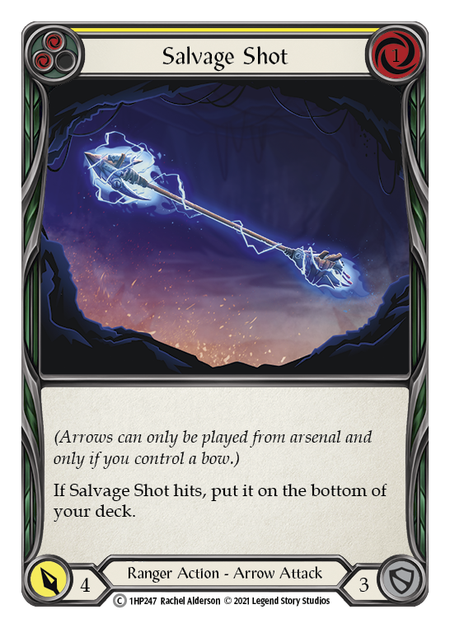
Endless Arrow: The best recursion arrow. It constantly comes back to hand, allowing you to just fire it off every turn until they block. One of our only real tools against Dromai too, as the on-hit still procs on dragons. People will likely block this. It's good for drawing out equipment as well. This is our only 0-cost attack (except Enlightened Strike), so don’t be afraid to attack with one early so you can have it as a Codex target later.
Salvage Shot: The real meat of the decklist. Salvage Shots are not normally scary, but here they pack an extra punch. Against fatigue, your job is to send as many of these to the bottom of the deck as you can, whether that’s through Trench, Sink Below, E-Strikes, or pitching.
With Dreadbore, reds swing for a respectable 6, yellows come in above Sink Below at 5, and blues can poke above a standard 3 block at 4 attack. In the late game, these all demand at least 2 cards, driving your opponent to fatigue. While most fatigue lists are limited to a 4-attack weapon, we get to throw these extremely above-rate attacks. If they block them out – which many opponents will be hesitant to do – we can bring them back with Codex, Quiver, or Remembrance.
I have cut blue Salvage Shots from my recent lists in favor of blue Infecting Shot. I found blue Salvage to be underwhelming, and I had more than enough tools to fatigue without them. I can see a meta where they come back.
Between Endless Arrow and Salvage Shot, you will have 9-12 recursion arrows in your deck.
Against aggro, attack with these whenever you like, especially the reds. Either leak damage or strip cards from hand. You will still be able to fatigue them with the additional recursion tools. Just keep track of what cards you still have left in your deck. If you are running low, it may be worth saving a few arrows for fatigue.
Against fatigue, stockpile these recursion arrows. Pitch them to the bottom, get to 2nd cycle, and swing in with these above-rate cards.
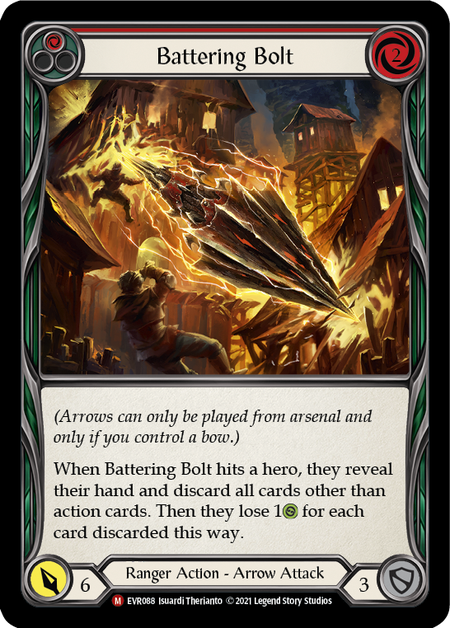
Battering Bolt: An extremely powerful card. Swings in for 7 with just a blue; and if any of that hits, all the d-reacts that are stuck in hand because of Dreadbore will be discarded. Good as a powerful attack, really good against certain decks (Warrior).
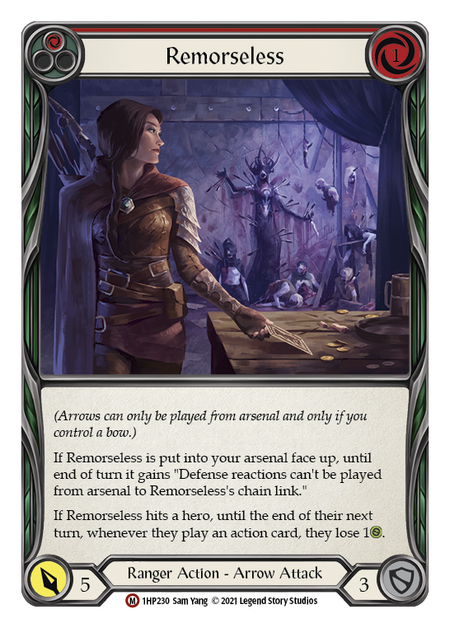
Remorseless: There are a lot of arrows that could theoretically take this slot. I like Remorseless because of the extra evasion. Try to save these for a turn where you just feel that they have a d-react in arsenal. Aggro decks will almost always block this.
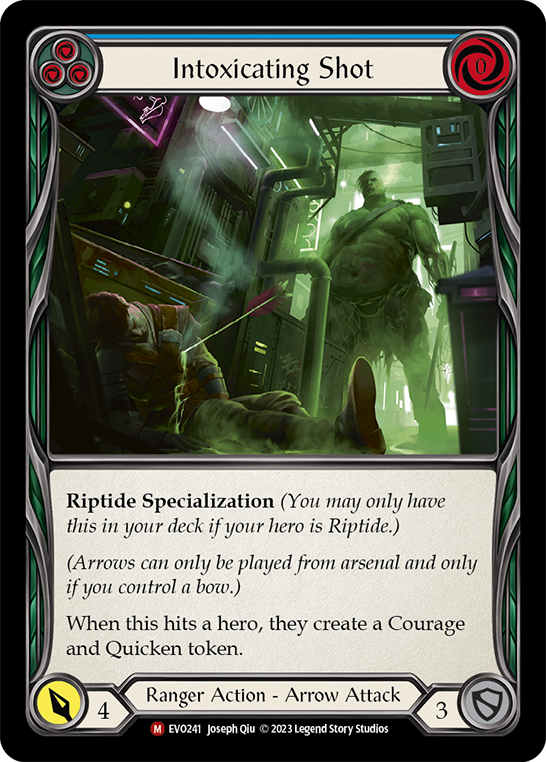
Intoxicating Shot: This is simply a 0-cost blue block 3 that attacks for 4. Most of the time I’m pitching or blocking with this card. Every now and then, a 4 attack is just a solid play late game. Very, very rarely am I ever attacking with this to help set up traps. I only take that risk if I have the traps in hand and the damage/effects are relevant.
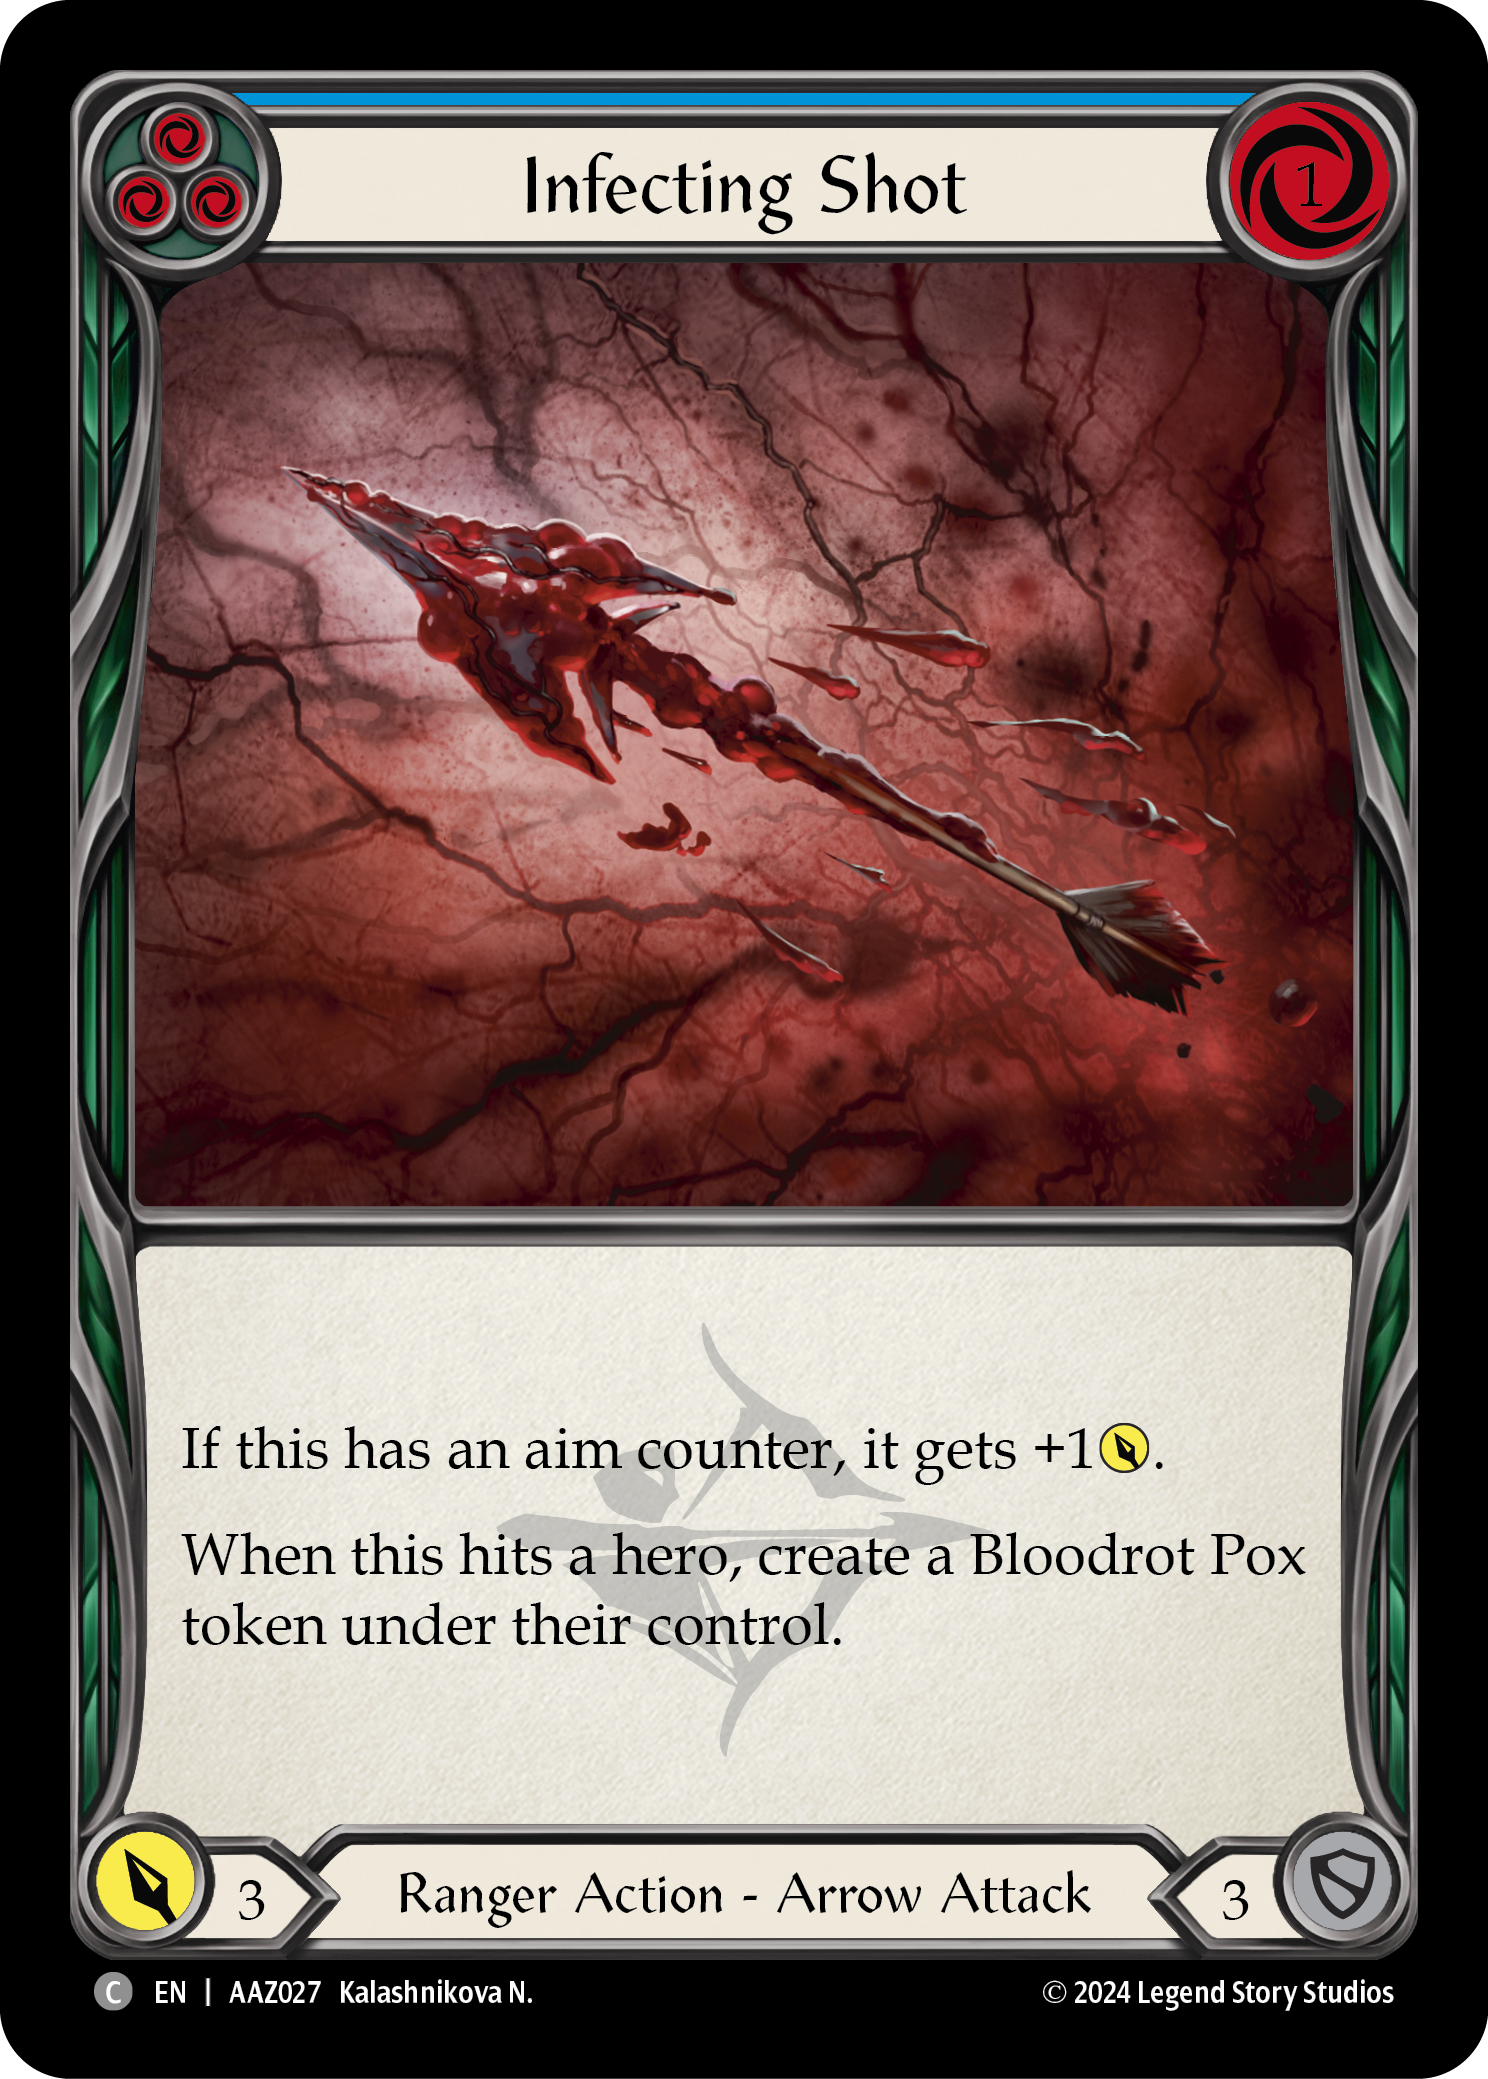
Infecting Shot: A solid offensive option. I run 3 blues as an endgame threat, and in some builds I run 1-3 yellows. I already have plenty of reds that I like better, but red Infecting Shots could easily be included.
While there is flexibility in deckbuilding here, we need at least one non-recursion arrow as a 3rd Quiver target.
Other Attacks
These attacks all serve a variety of functions. Most importantly, they apply extra pressure to eat d-reacts and equipment. Some are more defensive, some are more offensive, but you should feel fine attacking with any of them.
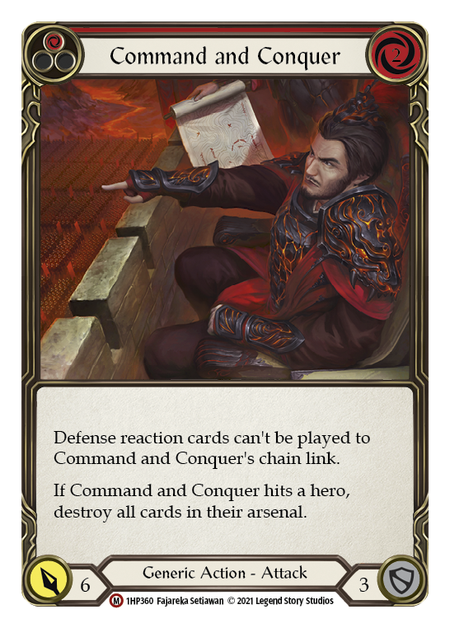
Command and Conquer: It’s CnC, need I say more? Powerful attack, evasive, and clears out arsenal. Perfect for getting rid of a d-react they have in arsenal due to Dreadbore. This is also one of my favorite Codex targets if I’m trying to close out a game and don’t need recursion.
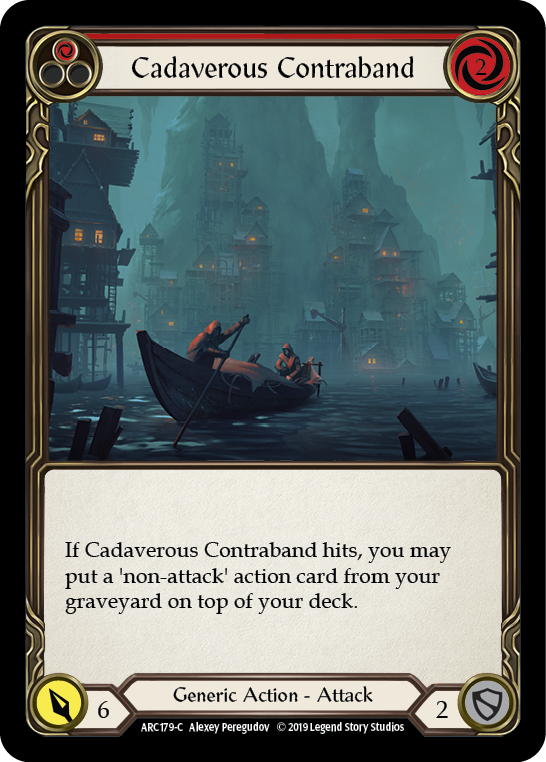
Cadaverous Contraband: This is a card we included early, cut, but have since brought back. The basic combo with Codex of Frailty:
Pitch blue to Dreadbore (don’t load)
Codex
Grab Cadaverous
Swing with Cadaverous
Grab Codex
Draw and load Codex with your Ponder token.
As long as you draw blues and yellows, you can block with 2-3 cards and swing for 6 every turn while giving them permanent Frailty until they block. Most decks will block the Cadaverous early, stripping two cards from hand.
This is an extra source of infinite attacks for the end game, but it’s effectiveness changes depending on the deck. This is good against Dromai where you can reliably clear any dragon every turn, even the 6-health dragons that sit above Endless Arrow range. I also liked this against Lexi, where the constant Frailty put in a lot of work. It’s also a nice card to grab off the opponent’s Codex.
As always with Codex plays, be wary of what they have in their discard.
Give and Take is another alternative, though I think it is better suited for aggro lists. Folks will gladly take 3 damage to stop an infinite combo. I am also happy to let Cadaverous take 2 cards from hand. Cadav is also better at clearing dragons.

Enlightened Strike: Versatile, powerful, and helps us pitch stack in secret. This card is especially great in this deck.
If you have a card in hand and no other available attacks, buff power (75%)
If you have no cards in hand, draw a card (20%)
If you have extra cards to attack with, choose go again (5%)
I find that most of the time, I am buffing power to either leak damage, eat 3 cards, or start whittling down equipment.
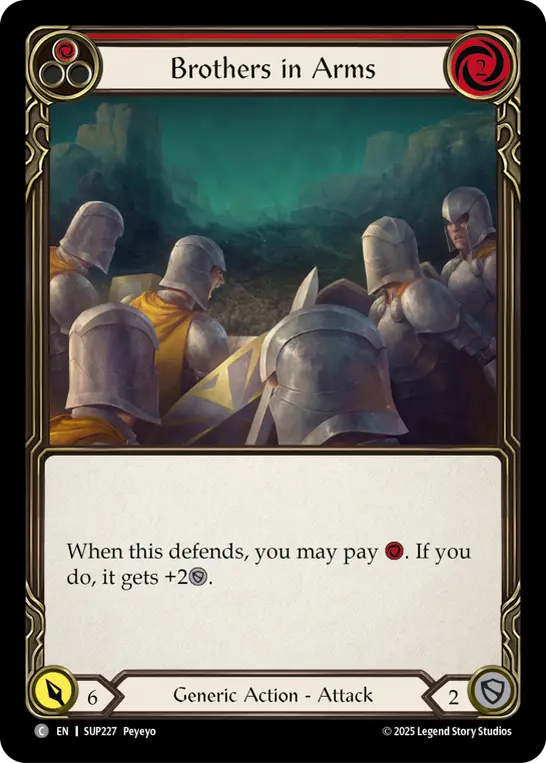
Brothers in Arms: If you want to stand a chance against Bravo, you need block 4’s. This blocks for 4 and is a popper. Swinging for 6 isn’t half bad either. Just a nice card that has flexibility turn to turn. Pairs well off a yellow with Ironguard Gauntlet or Oasis Respite.
Other options:
Fyendal’s Fighting Spirit (yellow): This is good insurance into go wide aggro. If your meta has a lot of ninjas, I’d consider this addition. When people are swinging with a bunch of 1 or 2 attacks, we lose a lot of value overblocking on our traps. By gaining a life, this spreads its defensive capabilities by “blocking” an additional damage later. It’s also a popper, and every now and then I’ll swing for 6 if I think it’ll help keep up my tempo.
I run yellow, as most of our turns require two resources, such as loading and firing a Salvage Shot or attacking with Command and Conquer or Cadaverous Contraband. The only time I really need blues is grabbing a CnC off of Codex or loading/firing a battering bolt.
Death Touch: This is a fun 1-off to have as an AMAZING 1-cost Codex grab. It’s flexible, allowing you to Frailty for defense, Inertia to keep arsenal clear, or Bloodrot to apply pressure. Just try to get one into discard for powerful Codex turns down the line.
Non-Attack Actions

Codex of Frailty: A+, 10/10. Strips cards from hand, brings back recursion arrows (or whatever else works best). Gives Frailty to help defend and keeps your arsenal stocked with Ponder.
My only word of warning is be wary of what cards your opponent has in their discard. Giving them an opportunity to grab a CnC or Crippling Crush can easily lose you a game if you’re not careful.
One crucial play pattern that I rarely see discussed is the ability to play a 2-cost card off of Codex. This can work with any bow that says you “may” load an arrow into arsenal. It goes like this:
In hand you have a blue and Codex
Pitch blue to Dreadbore
DO NOT load anything with Dreadbore
With two resources floating, cast Codex
Grab a 2-cost card (I suggest CnC or Cadverous)
Fire off that big hit!
You can also cast a 2-cost card with 3 in hand by pitching a yellow to Dreadbore, then Trenching away the other card in hand. Just make sure to load Dreadbore before you do any Trenching, otherwise the resource from Trench will pay for Dreadbore’s activation.
If you want to follow this play pattern but have another card in hand you don’t want to discard, simply load it off of Codex with Riptide’s ability and Trench it away, as described above in the Trench section. This could theoretically allow you to cast a 3-cost card. While I rarely recommend it, I can see its usefulness if there is no CnC in your discard OR if you really need to gain a life off of Fyendal’s Fighting Spirit.
Other options:
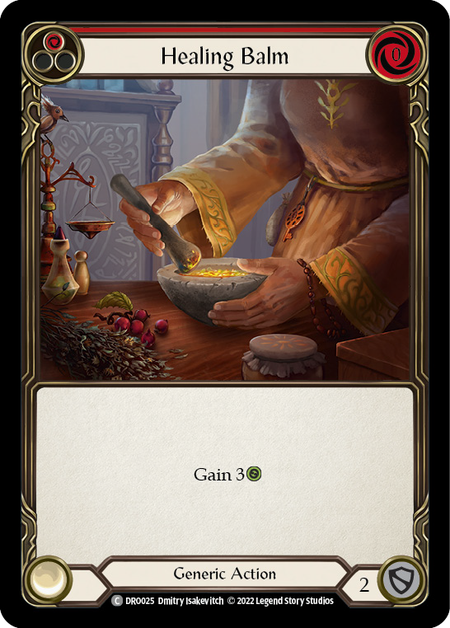
Healing Balm: I didn’t like it, but if the meta gets more aggressive/go wide then it gets a lot better. Especially with Cadaverous.
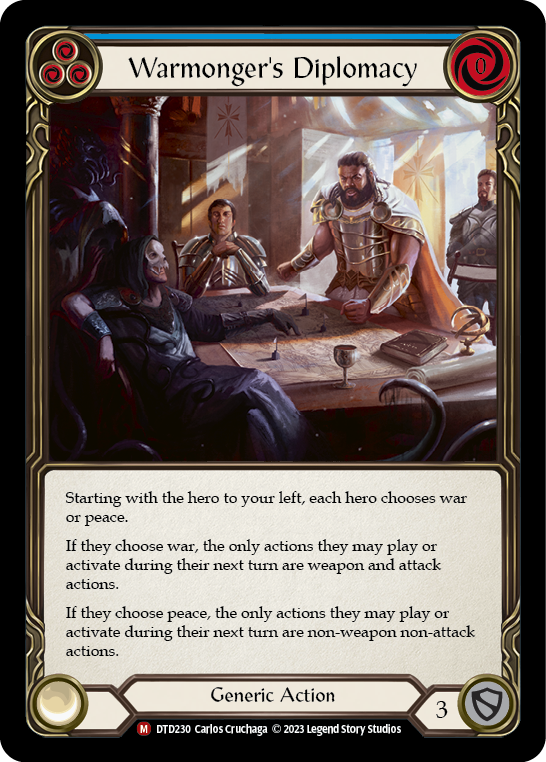
Warmonger’s Diplomacy: This is one of those cards that people tell me is good but I always feel is underwhelming. (And yes, I know it’s actually good.) What finally sent me over the edge to include it is Cadaverous Contraband. At one PQ where I only had 1 Warmonger's in deck, I was able to cast it 3 times against Azalea. I’m not convinced it’ll be as good now that Lexi has rotated, but if Azalea or Riptide steps up as a present Ranger hero then I can see it staying a top choice.
Defense Reactions
Oh boy, it's finally trap time!
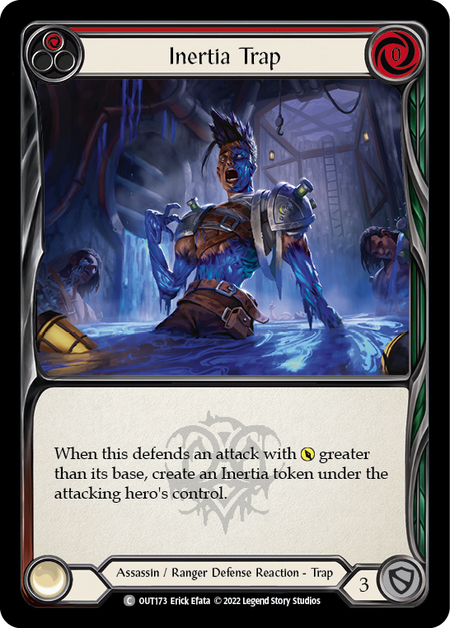
Inertia Trap: An easy trap to trigger. Inertia is great because it keeps their arsenal clear of d-reacts. If I got off an Inertia Trap, I feel much better about swinging in with an early recursion arrow.
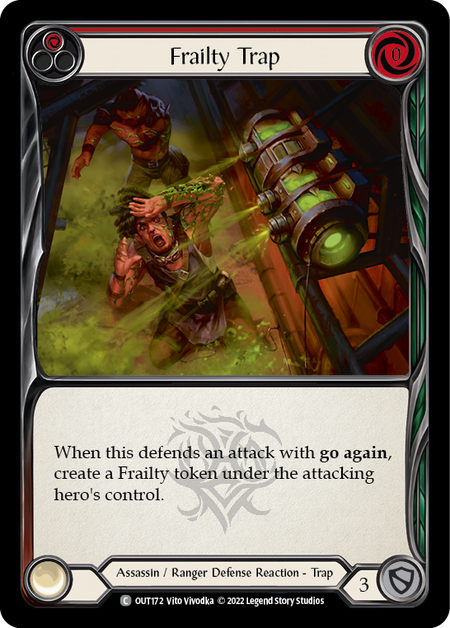
Frailty Trap: One of the most reliable and effective traps. Also easy to trigger, and if you’re lucky you’ll get an extra point or two of value off of the Frailty.
Remember that if they cast a card with go again from arsenal and you block with Frailty Trap, the Frailty applies to the card. This was great against Lexi in particular where a single Frailty Trap could shut down a yellow or blue Bolt'n’ Shot.
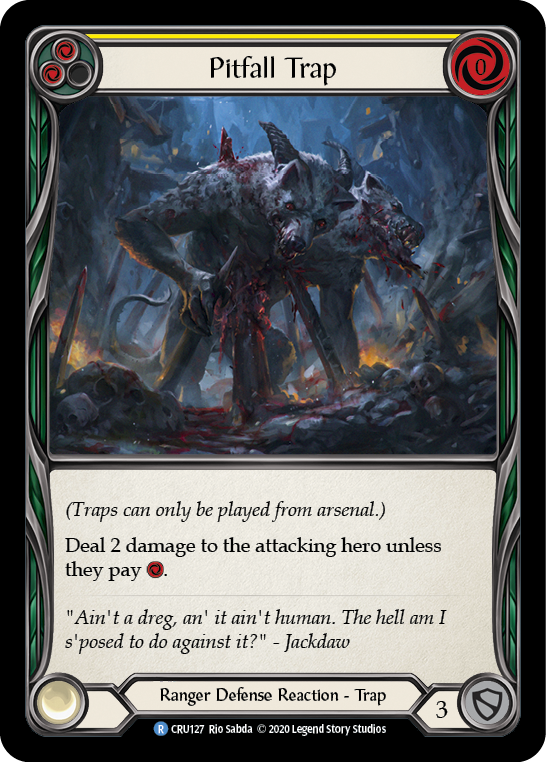
Pitfall Trap: The only Crucible trap I currently run. It pitches to fuel most of our turns, it always deals at least 1 damage, and if you time it right it can deal an additional 2. Helpful for closing out close games. Some decks will always be able to pay, some won’t. Try to play when you can get maximum value.
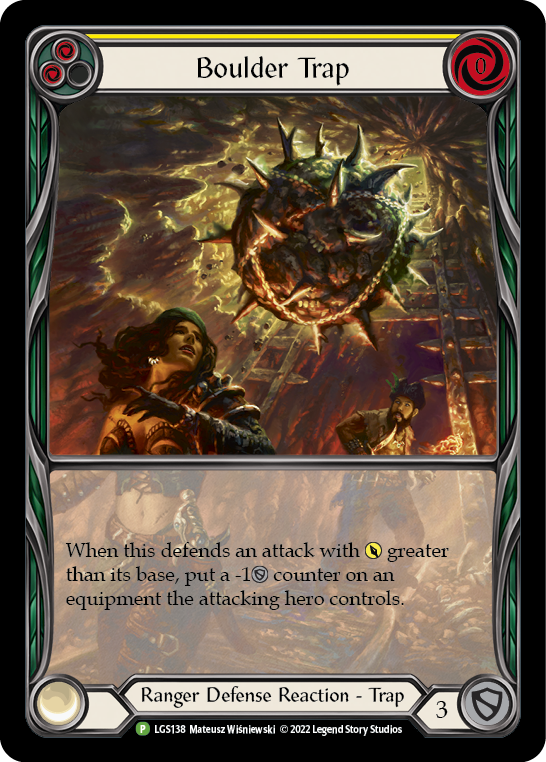
Boulder Trap: If you can get these off early, GREAT. Shredding through equipment means they have to block with more cards from hand. If you can’t trigger this early, it’s no big deal. It blocks 3, maybe gets off a point of damage, and as a yellow it turns on most of your turns.
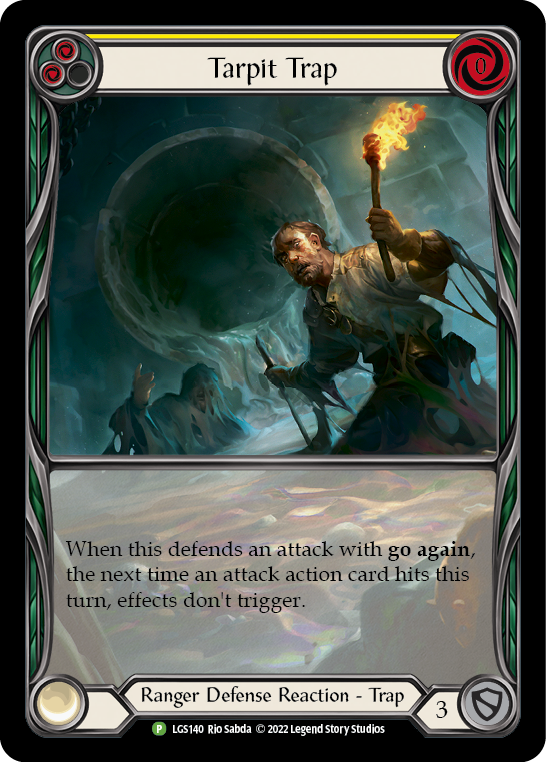
Tarpit Trap - Probably my favorite trap, really good at shutting down various on-hits.
Remember, Tarpit's effect carries until the next attack action card hits. If you time it right, it stops Mask of Momentum. It’s also one of the few traps to trigger on dragons.
The dragon attack has go again, which triggers Tarpit
No damage is dealt from Riptide because there is not an attacking player
Since the dragon is not an attack action card, even if it hits the Tarpit effect will still be available
If they end the turn with a card like Snatch, it will not trigger when it hits
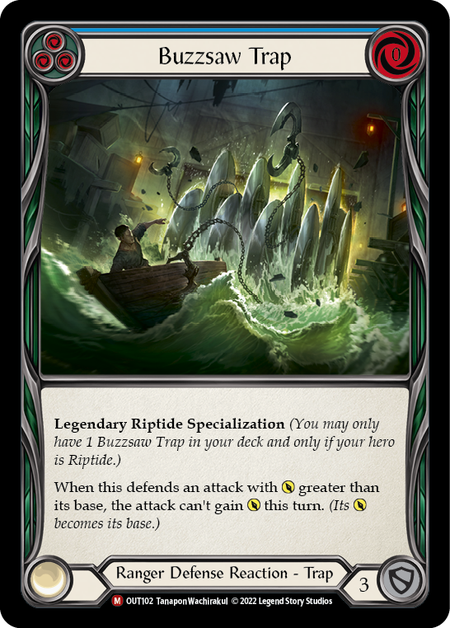
Buzzsaw Trap: The first of Riptide’s specialization cycle, this card can easily shut down a power turn. Dawnblade gets out of control? Buzzsaw Trap. Big Lumina turn? Buzzsaw Trap. 3 pumps on a Red in the Ledger? You guessed it, Buzzsaw Trap. It is so incredibly helpful, essentially a get out of jail free card. Always try to get as much value from it as you can. I try to save it for late in the game.
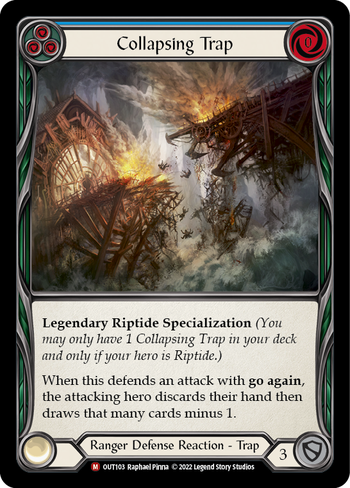
Collapsing Trap: Another A+ card, it can easily shut down power turns in nearly every deck. Forcing your opponent to discard 2, 3, or even 4 cards is extremely helpful in this fatigue list.
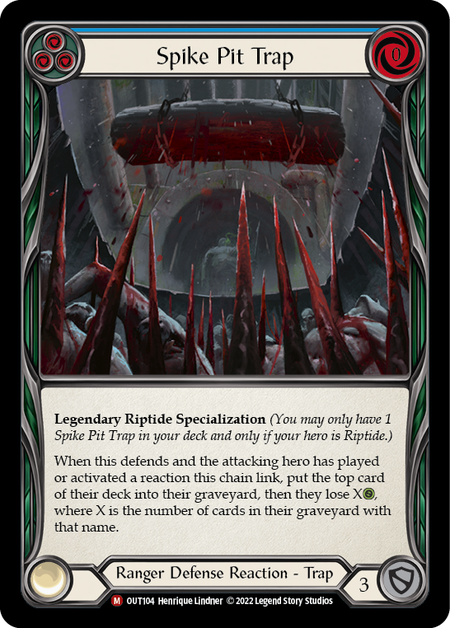
Spike Pit Trap: Ok, they can’t all be aces. Most decks aren’t running a ton of attack reactions; I wouldn’t worry too much about trying to trigger it. It’s best use case is against Assassin, when you can save it for late in the game, trigger it, and hopefully deal some real damage. Aside from Assassin and Warrior though, it’s just a blue block 3. If you wanted to cut a card, this would be a good candidate.
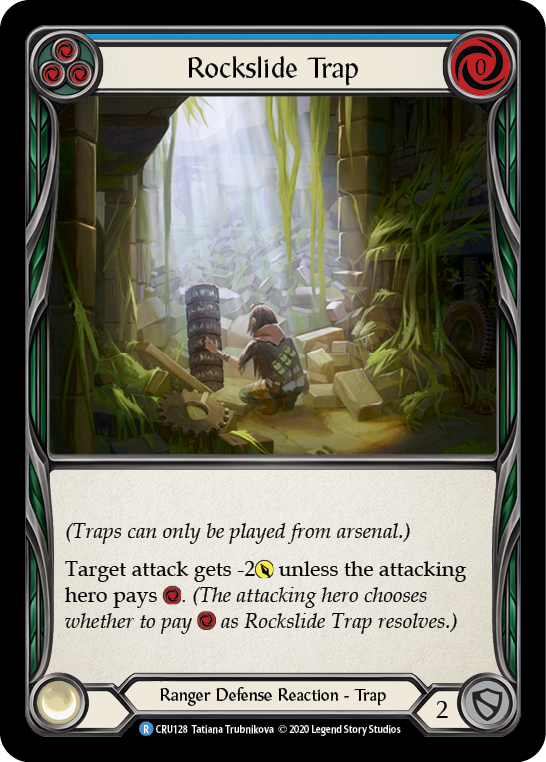
Rockslide Trap: I think this card is mostly bad. It’s clunky and the opponents will always choose the mode that works best for them. That being said, it’s a blue and I need more blues. Good for pushing through the last damage, and on the right turn can give a lot of surprise value.
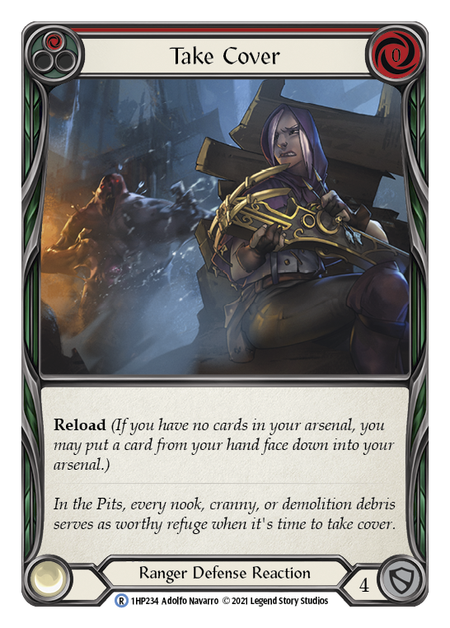
Take Cover: An extremely underrated card. It’s another block 4, and being able to reload twice is surprisingly useful. It helps to smooth out awkward turns with Pitfall Trap and allows you to load a Pitfall from arsenal. Also EXTREMELY helpful against dominate attacks. If you have three d-reacts in hand, you can block a dominate attack with all of them. It can also help with hand filtering if you need it. Most of the time, I prefer this over Fate Foreseen.
Here’s the play pattern for extra dominate blocking:
Block with Take Cover from hand
Load d-react with Riptide
Play new d-react before Take Cover resolves
Load 3rd d-react with Take Cover’s ability
Block
We also use Fate Foreseen and Sink Below. They're good cards and block for 4.
Other Cards

Sigil of Solace: Gain 3 life. Good against aggro, good against other decks. Allows you to load with Riptide. Cast these when you can.
Oasis Respite: “Blocks” 4 and if you time it right can give you an extra life as well. Good against dominate and Wizards.
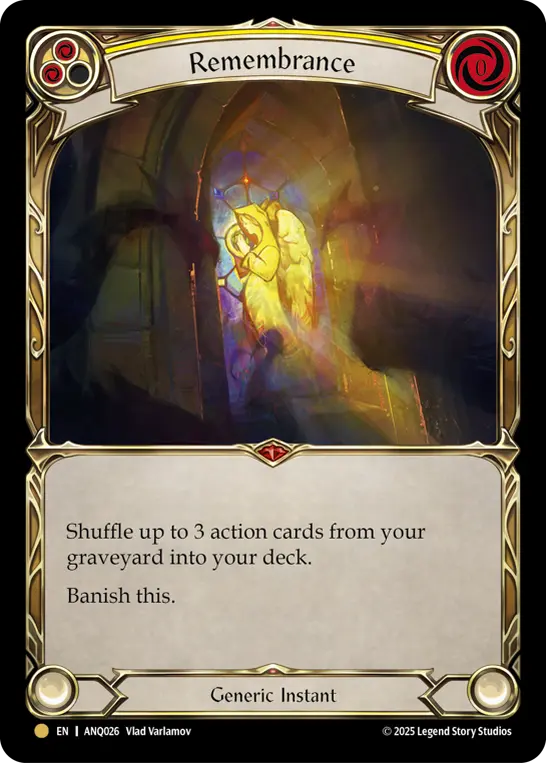
Remembrance: A great engine card for fatigue. I often run 1 main board and will side in a second against other fatigue decks or Dromai. Grabbing 3 poppers against Dromai is great.
Other options:
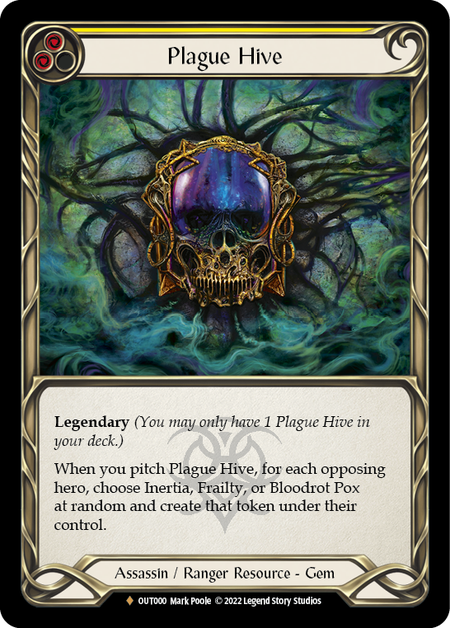
Plague Hive: I’ve cut Plague Hive from the list last minute. While I still like the card, not having a weapon to attack with really hinders its effectiveness. If it’s in hand, we can only really block with 3 cards, and then all we’re doing is giving them a random disease.
I think this is best as a sideboard card against fatigue/Wizard. It lost me some Lexi games at one of my PQ’s, I cut it, and then I missed it during a game against Bravo.
Strategy
The strategy is fairly straightforward: Get as many 2-for-1 interactions as you can to extend the game and overwhelm them with Recursion arrows.
How you do that will change match to match, but the big thing is keeping an eye on A) the value of your cards and B) the opponent’s strategy.
Value of Cards
For those unfamiliar, the basic idea is each card will get you a certain amount of “points”, or value. If a card swings for 4, you present 4 points of damage. If that attack has an on-hit, such as giving a Bloodrot, extra value can be added. A red Infecting Shot immediately presents 5 points of damage, but if they let it hit, the Bloodrot gives you an extra 2 points of damage for a total of 7.
A standard value for a card is 3. This is why most cards block for 3. If you can extract more than 3 value per card used (including pitching and additional costs), you will be in a good position.
Where this most comes into play here is with Riptide’s traps. All of the traps (aside from 2 exceptions in Crucible) block for 3, making them actually quite bad as far as defense reactions go. However, that value increases if you manage to trigger a trap, and the value increases again if the trap effect is relevant.
Frailty Trap is a great example of this.
Not Triggered - 3 points
Blocks for 3
Triggered - 4 points
Blocks for 3
Pings for 1
Triggered w/ Relevant effect - 5-6 points
Blocks for 3
Pings for 1
Frailty provides defensive value
Provides 2 points from shutting down daggers
Provides 2 points by making a 4 attack weapon easily blocked for 3, saving you an extra card
Provides 1 point by reducing an arsenal attack by 1
As you can see, the ceiling on some of these trap interactions are quite high, all for a single card.
Each time the opponent attacks, you need to evaluate whether you will get more value by blocking for 3 now without a trigger, or taking the 3 damage to have a more powerful block later. This is why you need to understand your opponent’s strategy and deck.
The Opponent's Strategy
Traps will not be equally good against every deck. Some decks, like Lexi or Warriors, will trigger just about every trap that we have. Others, like Bravo or Wizard, rarely trigger traps.
Frailty Trap against Lexi is huge. I will want to play it on a turn where I am getting as much value as I can, by shutting down a Bolt n’ Shot or lower the ceiling after they cast Three of a Kind. Because the value can be so high, I probably don’t want to play when they attack with an arrow with one card in hand.
On the flip side, Bravo and Brute rarely trigger Frailty. If they do swing with a go again, take that opportunity! At the very least you’ll get 4 points of value from the block and ping. Maybe some extra value if they were planning on a weapon attack that turn.
Because the ceiling is so much lower against Bravo, I feel comfortable playing this trap as a simple block 3– especially if I can use it to get around dominate. Cast Frailty Trap, load another d-react off of Riptide, block some more! This is a way to get extra value out of a card not by the trap trigger, but by Riptide’s load ability. I probably wouldn’t block 3 damage from a hammer swing when this could help me get around harder to block damage later.
Some traps will be REALLY good against a certain deck. Buzzsaw Trap can reset a Dawnblade Dori no matter how many counters or attack reactions they have. Collapsing Trap can turn a powerful ninja turn into an awkward attempt at efficiency. Spike Pit Trap has the potential to deal considerable damage to Uzuri in the late game.
If you’re not familiar with a deck, keep an eye on the cards your opponents are playing, pitching, and blocking with. What patterns are you seeing?
Valuing Attacks
The other thing to evaluate is your semi-defensive attacks (Brothers in Arms and Fyendal's Fighting Spirit mainly). Generally, we want to attack with our arrows, E-Strikes, and CnCs, but what about these flexible cards?
I find that what impacts my decision is less about matchup and more about game state. Let’s take Brothers in Arms into Bravo for example. If the Bravo is playing a defensive fatigue game plan, they can easily block 6 attack while swinging in with their weapon regularly for 4. Having a 4 block can be helpful to avoid leaking damage in the end game.
On the other hand, if Bravo is playing more aggressively, then throwing extra 6 attacks can keep their hands lean or apply pressure to their life total.
There are two ways to win: by bringing their cards to 0 or bringing their life to 0. Your path to victory might change in the middle of a game. Keep track of life, your opponent’s power turns, and cards in deck. If you need to threaten life, attack. If you need to fatigue, then sit back and block.
Matchups
Welcome to the part of the write up where I tell you to run 74 card decks every game!
Ok, it’s not quite that ridiculous, but I find myself running more cards fairly often. Here’s what I have so far...

Bravo, Assassins, Dorinthea, and Suspected Fatigue:
Deck - Throw everything in the deck. Whole deck, just run it. No substitutions.
Strategy - Against fatigue, you want to toss regular attacks when you can to start stripping cards while keeping recursion arrows in your deck. Bonus points if you use Trench/E-Strike/Sink to sneakily send recursion arrows to the bottom.
Always keep a few block 4’s for late game against Bravo as that full blocks his hammer.
Block well, send efficient attacks, save recursion arrows, attack above rate late game.
Dawnblade Dori is a much easier matchup as our D-reacts all block out dawnblade. It’s easy to spend one card on a block and strip 2 cards from their hand every turn.

Wizards:
Deck - I cut red traps here, Frailty and Inertia. Tough to trigger and want cards with more pitch value. Battering Bolt is huge, and I still keep in a couple Sinks to hit the deck limit, in case they’re throwing big attacks. And of course siding in any AB you have.
Strategy - Race! Throw attacks regularly and see what you can do. Make sure you hold cards against Kano in particular. 2 cards in hand telegraphs an Oasis Respite so hold onto that while you can.

Dromai:
Deck - The goal here is to A) run as many poppers as you can and B) strip your deck of as many irrelevant cards as you can to increase your chances of drawing poppers. I cut most traps (including CRU traps, but keeping Tarpit) and keep some of the 4 blocks (cutting Take Cover). The goal is to run 60 cards with all of your poppers and Remembrances to get those poppers back.
Strategy - Lose. Sorry! I wish this deck beat Dromai, but it doesn’t. I’ve gotten close and I thought I could do it with 14 poppers in some builds, but I was still losing regularly. I’ve since abandoned the matchup, like most Riptide players. Now my poppers are at about 10.
But the basic strategy is to use Endless/Salvage/Cadaverous to clear dragons. I bring in AB 2 so I have some arcane defense if they Tomeltai Trench. Intoxicating Shot is also a pretty great dragon clearer. I like to use it especially for Passing Mirage.

Runeblade - I’d actually cut Cadaverous here to trim down my red count, but they trigger all our traps so the matchup is pretty good. AB 1 is fine.

Aggro Heroes:
Eat them alive. Block everything out efficiently, survive, and fatigue.
Conclusion
All in all, I think this deck is a very solid addition to the Riptide lineup. I don’t know if it will be the best deck with Lexi gone and Bulls Eyes Bracers back, but it is an option that does much better into other fatigue decks then the more aggressive Riptide lists.
I think this will always be an option. I myself will likely bounce back and forth between this and aggro lists depending on the meta. Between the two, I think we can keep folks guessing even as Riptide finds his footing in the competitive scene.
This article was written with the help of Garrett Johnson, Jack McCreanor, and Nyx. I want to say thank you for their prolonged conversations about Fatigue Riptide. This group has been aggressively testing this deck since mid-September, and they've been putting their money where their mouths are by running it at PQ’s. Here’s to the future of fatigue Riptide!