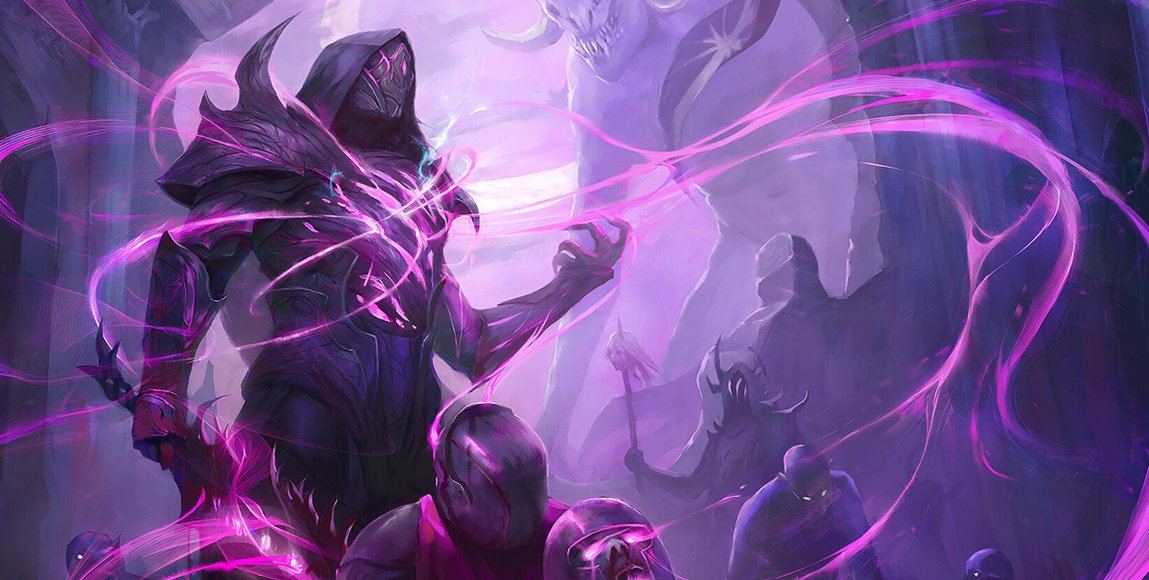
ProQuest season is off to an explosive start, and we’ve seen Bravo, Star of the Show secure his place as the deck to beat. But other heroes are quickly closing the gap...
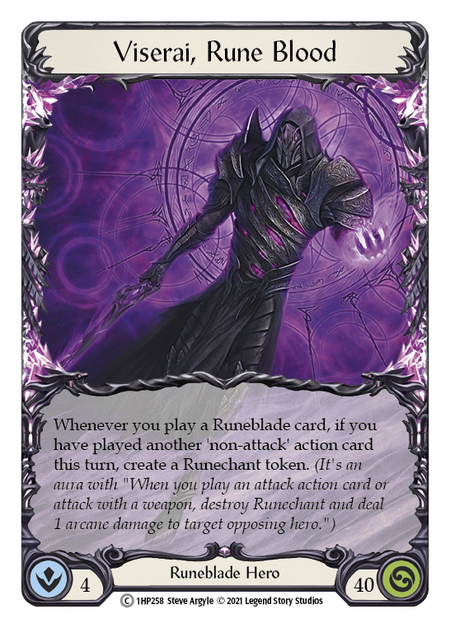
Viserai is better positioned than ever. With a refined list and a proactive midrange strategy, Viserai can generate some truly explosive turns, and is more consistent than ever in being able to attack across both the arcane and physical damage axis while putting immense pressure on opponents.
I’ve been developing a midrange Viserai deck in parallel with my Guardian decks during ProQuest testing. With a refined midrange strategy that prioritizes generating maximum value and attacking each and every turn, Viserai becomes an extremely compelling and well-rounded contender in the early Everfest meta.
Last week, I covered that meta in an article for Legend Story Studios. Viserai (and the Runeblade class as a whole) is well-positioned in this meta- especially Midrange Viserai, who has a roughly 50/50 matchup against Bravo, Star of the Show and a favorable matchup into most configurations of Prism.
I’m excited to add Viserai to my competitive repertoire and to share some of the insights I’ve learned developing this list.
The Deck
Weapons
- Rosetta Thorn (1)
Equipment
- Crown of Dichotomy (1)
- Arcanite Skullcap (1)
- Bloodsheath Skeleta (1)
- Grasp of the Arknight (1)
- Spellbound Creepers (1)
- Vexing Quillhand (1)
Loadout
- Become the Arknight (Blue) (3)
- Amplify the Arknight (Red) (3)
- Consuming Volition (Red) (3)
- Dread Triptych (Blue) (3)
- Meat and Greet (Red) (3)
- Gorganian Tome (1)
- Lead the Charge (Yellow) (2)
- Revel in Runeblood (Red) (3)
- Mauvrion Skies (Yellow) (3)
- Mauvrion Skies (Blue) (3)
- Mordred Tide (Red) (3)
- Sink Below (Red) (3)
- Ninth Blade of the Blood Oath (Yellow) (1)
- Spellblade Assault (Blue) (3)
- Runic Reclamation (Red) (3)
- Rattle Bones (Red) (2)
- Read the Runes (Red) (3)
- Reduce to Runechant (Red) (3)
- Rune Flash (Red) (3)
- Runeblood Incantation (Red) (3)
- Sonata Arcanix (Red) (3)
- Spellblade Assault (Red) (3)
- Swarming Gloomveil (Red) (3)
- Oath of the Arknight (Blue) (3)
- This Round's on Me (Blue) (3)
- Whisper of the Oracle (Blue) (3)
- Vexing Malice (Blue) (1)
The core strategy of Viserai in a midrange configuration is to play for maximum value and attack each and every turn. More often than not, we prefer to play out our cards rather than block with them, though we do need to protect our life and armor as able on turns where we lack the pieces to set up some explosive turns. The idea is that, with full hands, we have the ability to trigger Viserai’s hero ability multiple times per turn, give our attacks go again, and simply present more damage from the split-axis approach of arcane/physical than our opponent can comfortably defend or refute with their counterattacks.
There are countless synergies and potential lines of play that generate impressive value. It will take lots of practice to get the hang of identifying these yourself and learning to quickly parse through the cards in your hand to calculate out the best potential lines of play.
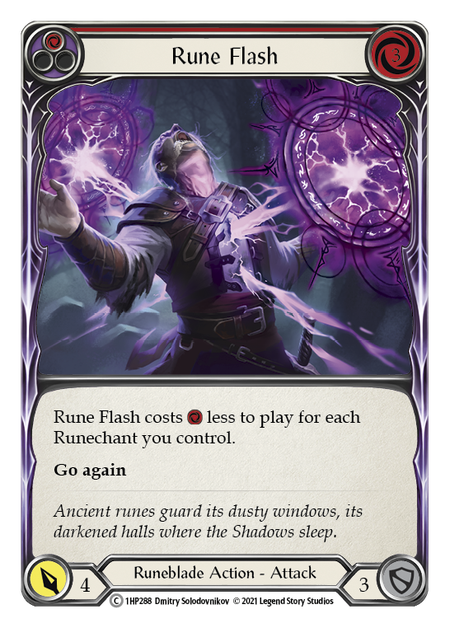
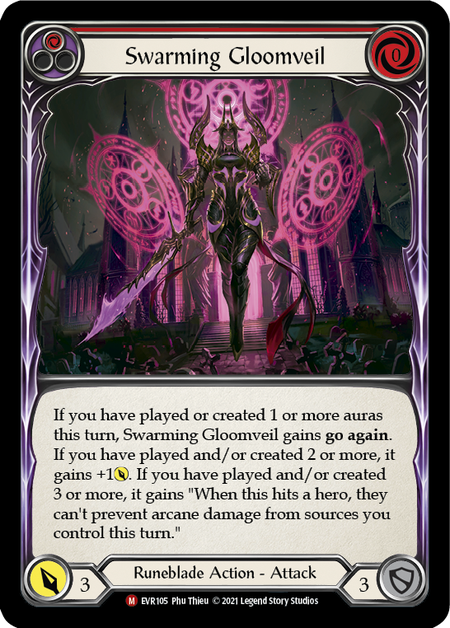
A great turn with this Viserai configuration equates to maximizing your generation of Runechants, playing a non-attack action and go again attack action card, then swinging in with Rosetta Thorn for 2&2. With cards like Rune Flash, Swarming Gloomveil, Meat and Greet, and Mauvrion Skies- and that's before mixing in all the playlines made possible through Spellbound Creepers- Viserai can reliably set up turns with more than one attack action card being played per turn followed by Rosetta Thorn.

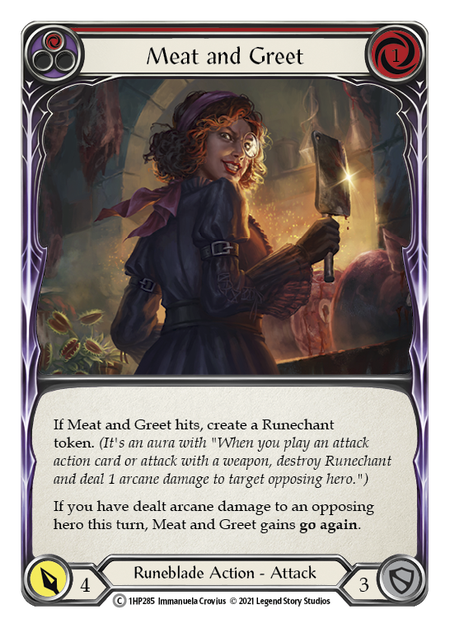
Playing Runeblade requires careful sequencing of play to maximize your mileage. How you sequence and structure your turn is more important than simply the cards you choose to play. This is evident even in Viserai’s hero ability, which generates Runechant tokens after each Runeblade card you play if you have played another non-attack action this turn. Practice sequencing your play to maximize Runechant generation and the ‘value’ you are able to capture from your cards.
Pro Tip: Each time you play a Runeblade card, check to make sure you are triggering Viserai as often as possible and not missing any Runechants. In this configuration, Viserai will generate a lot of Runechants from some of the frequent interactions you’ll create. Viserai’s ability CAN trigger much more than just once per turn, creating an extremely high value ceiling when maximizing the ability and complementary cards like Mordred Tide.
Viserai’s greatest weakness (and the weakness of all Runeblades) is that they can simply have off-turns in which they don’t have the right mix of non-attack and attack action cards (or maybe a source of go again) to do some powerful things. On off turns like this, Viserai can lose momentum and give the opponent a chance to swing the tempo back in their favor. Thankfully, the power ceiling of turns is incredibly high to help balance out the reality of having a low floor with a ‘bad’ hand. Try to use your ‘off’ hands as a chance to block and protect your life, ideally setting up a powerful card set in your arsenal to get the match back on track.
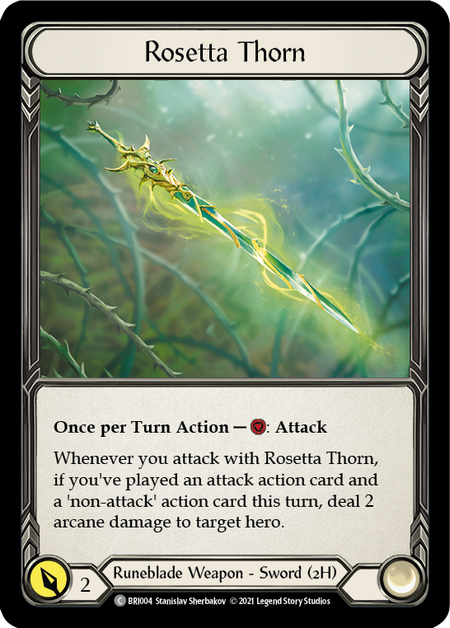
Rosetta Thorn remains the premium must-have Runeblade weapon in almost every matchup. For only 1 resource, we can present the infamous 2&2 (two arcane, two physical damage) to round out a powerful turn. Rosetta Thorn is excellent for delivering consistent pain to your opponent after they’ve already had to decide how to defend against your prior attacks. This is one of your most consistent sources of damage, and should be a line you prioritize on big turns with at least one non-attack action and a go again attack. I don’t think there’s a better, more efficient use for one resource point in all of Flesh & Blood. In the late game, nothing is scarier than having Thorn come in for 2&2 after another attack—this will almost always command three, even four card blocks from your opponent just so they can stay alive.
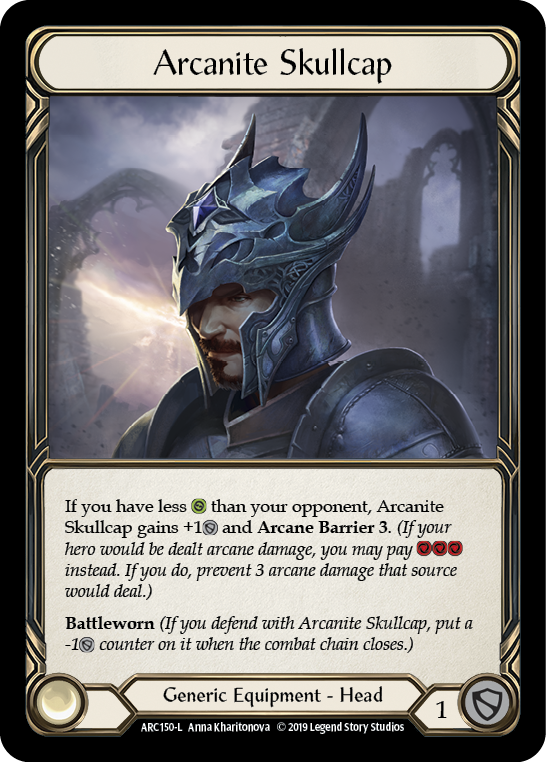

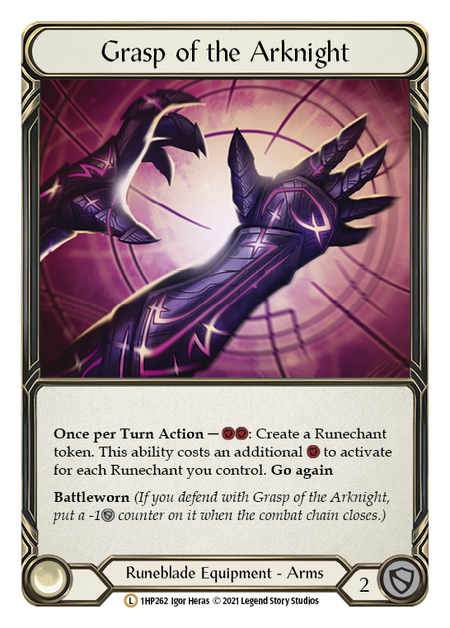
Arcanite Skullcap, Bloodsheath Skeleta, and Grasp of the Arknight all provide staggering armor density, and the latter two provide access to some of the best utility in the game. Grasp of the Arknight will give you a consistent outlet to spend your resources and generate value, and Bloodsheath Skeleta will allow you to set up a very powerful turn after using it to defend for two for the first block. In general, you want to try to preserve your armor blocks to get around on-hit effects or to protect and keep more cards in hand in the later game.
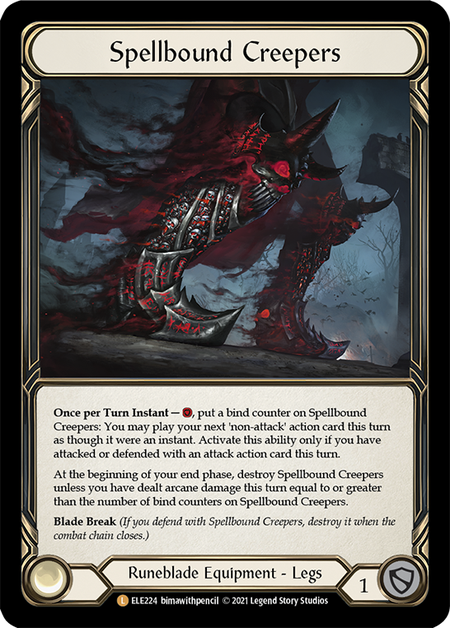
Spellbound Creepers introduce added complexity to piloting the list, but also give some of the best utility in the game. In addition, you have the potential to get more than one activation from them and snowball the value in your favor. Because they allow us to play non-attack actions as an instant, they can be used to give attacks go again in a pinch. For players not familiar with the interaction, if you play a card that has go again as an instant, you will get your action point back as the instant resolves (sometimes even gaining an action point).
Example: You open your turn with a Gorganian Tome, followed by Amplify the Arknight (creating a Runechant on the tail end of the attack). Then you can activate Spellbound Creepers to play Runeblood Incantation during the reaction phase (creating another Runechant via Viserai), and because it has go again, you get your action point back. Follow up with Rosetta Thorn, popping the additional 2 Runechant tokens created during the turn and coming in for 2&2.
One use of Spellbound Creepers is good. Two is great. Three is the dream. Try to use Spellbound Creepers at least once during your game- but once you've got them active, don’t be afraid to break it on a block if it looks like you are not going to be able to pressure your opponent with a lot of arcane damage on your next turn. You would rather get the damage prevention off the boots than lose them on the next turn having not dealt enough arcane damage or blocked to get extra value.
Runechanting for Fun and Profit
This list is well positioned to attack each and every turn, often after creating new Runechant tokens and having the ability to give the first attack go again. Because of this, we often don’t amass a ton of Runechant for a big Bloodsheath Skeleta turn in the way OTK Viserai decks do.
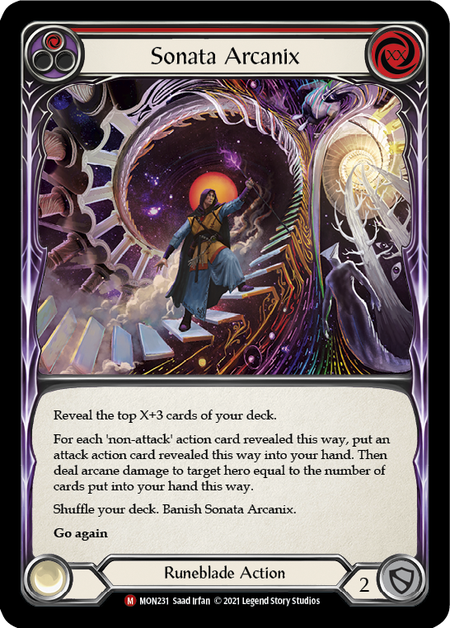
Sonata Arcanix can be a powerful card even when played for 0. If you are looking to set up a powerful Sonata combo turn, you can put Sonata in your arsenal, take a couple turns off from attacking, and amass a few runechant tokens to facilitate the OTK-taught combo (destroying Bloodsheath Skeleta to reduce the cost of your Sonata Arcanix and one subsequent attack). Notably, you can also leverage Bloodsheath Skeleta to reduce the cost of your Ninth Blade of the Blood Oath before playing it.


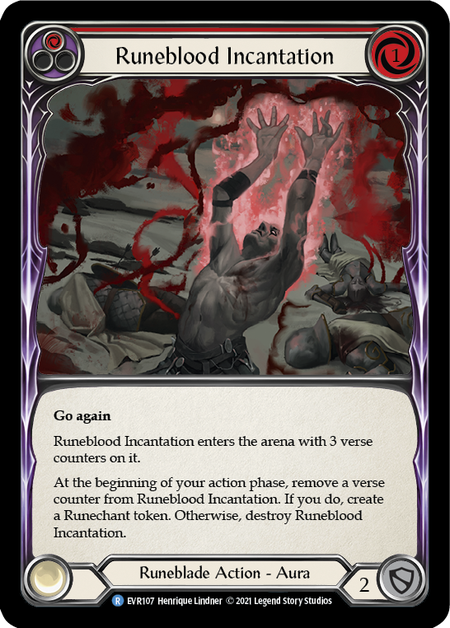
With cards like Revel in Runeblood, Runeblood Incantation, Read the Runes, and Mordred Tide, you may find yourself able to utilize Bloodsheath Skeleta after generating multiple Runechant in one turn. Always keep an eye out for great opportunities to use this powerful armor piece, and try to block with it once sooner rather than later, so you don't throw out its armor or delay a good opportunity to trigger its effect.
Evaluate your decision to bank your Runechants on a case-by-case basis. This deck can win simply by maximizing the core strategy and attacking each and every turn after generating as much Runechant as possible. But it can also lean into some Runechant-centric combos with Bloodsheath Skeleta when taking a slower approach to certain matchups.
The New Runeblade Tech
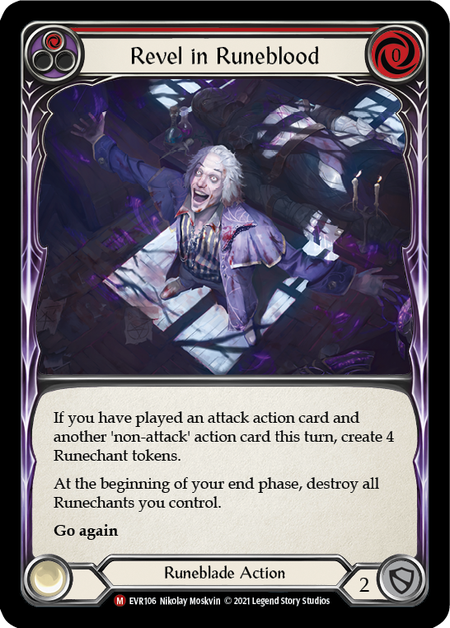

It’s no surprise to see the maximum number of copies of Revel in Runeblood and Swarming Gloomveil in almost every Runeblade deck putting up good results in ProQuest events. These two new cards push Runeblade to new heights, as well as enable some truly explosive turns in their own right. Pair them together, and you can devastate your opponent.
Mordred Tide into Swarming Gloomveil is a combo to watch for. When Viserai’s hero ability triggers off of playing Swarming Gloomveil, you’ll create two Runechants and give the attack +1 and go again. If you can find a way to generate an additional Runechant before playing out this two-card combo, you can turn on Swarming Gloomveil’s third line and potentially shut down your opponent’s ability to defend against any further arcane damage during the turn.
Rules Tip: Per the Everfest release notes, Swarming Gloomveil is always checking to see if auras have been created during the turn, so don’t worry if you create Runechants after playing the attack- it will still gain its added effects.
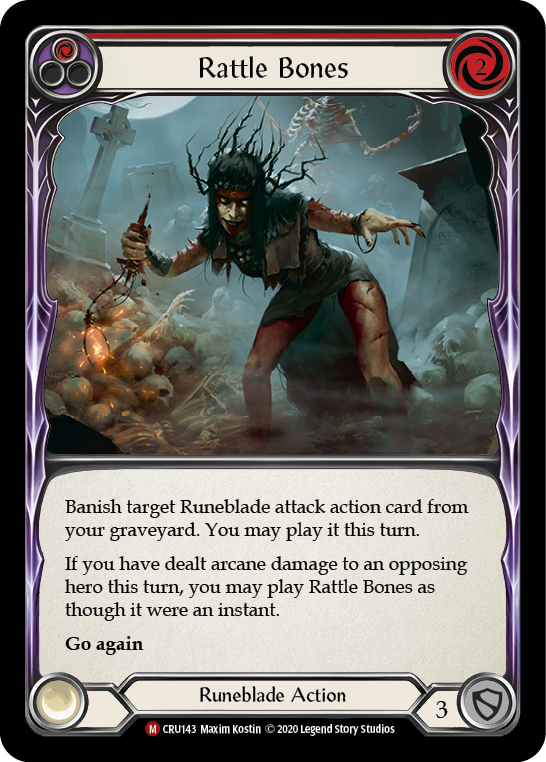
Swarming Gloomveil makes for a fantastic Rattle Bones target. It’s zero cost, so it can be used to add a lot of offensive pressure on big turns. 2 copies of Rattle Bones feels perfect in the list (three feels a little crowded). Make sure you take advantage of Rattle Bones’ ability to be played as an instant and gain an action point in certain situations. If you have dealt arcane damage during the turn already, Rattle Bones can be used to further expand the framework for an amazing turn.
Play out Revel in Runeblood as able once you meet its criteria. This card will often represent 5 Runechant tokens after Viserai’s hero ability resolves. If your follow-up to Revel in Runeblood is swinging Rosetta Thorn, that’s an extra 9 damage you are pushing across the table to end the turn, represented as 2 arcane damage, 5 Runechant triggers, and 2 physical damage.
Revel in Runeblood can be one of the best Spellbound Creepers. Using Revel in Runeblood to give an attack go again will allow some of the most explosive damage turns possible with this deck (as well as help you deal arcane damage to keep the boots around another turn).
Sideboarding & Matchups
The core 60 of the list is tight and streamlined- though we do shift some equipment and mainboard cards around in certain matchups. Because this deck is designed to be so proactive and linear within its many many lines of play, specific matchups will typically not impact your overall strategy. Sideboarding is minimal. You'll note below that I only have notes for the 2 top-of-the-meta matchups, and only sideboard for about half the heroes I might face. This simplicity and proactive approach to piloting Midrange Viserai is a huge benefit to the deck as it exists today.
With all that we can do with Runechants and setting up the foundation to our engine, you should always opt to play first if able, trying to set up Runechants and a powerful arsenal card (perhaps attacking if it looks compelling and you simply have an explosive hand).
Pro Tip: Reduce to Runechant can be an excellent card to clear Frostbite tokens. If you have enough Runechants, Reduce to Runechant will still be free to play after adding the additional resource cost from Frostbite. Against the Ice heroes- Bravo, Star of the Show, Oldhim, and Lexi- we opt to bring Reduce to Runechant in.
Bravo, Star of the Show decks- specifically in the ‘Captain Planet’ configuration that try to fuse each and every turn- cannot block well. Consuming Volition adds some disruption and will force Bravo to use either a card from hand or armor to block and prevent the on-hit effect if they are not pitching to stop your arcane damage from Runechants. Reduce to Runechant and Sink Below can make good arsenal targets to get around dominate and some on-hit effects. Try to preserve your armor blocks to stop on-hit effects.
==========
Midrange Viserai does have a favorable Prism matchup. It will still be close, but we have the tools to deal with Prism and pressure her. You should strive to keep auras in check, and pressure Prism’s life with your Runechant and attacks. Try to send as many attacks as you can at your opponent’s face before popping their auras with something like a swing of Rosetta Thorn. Runic Reclamation can generate a best-of-both worlds approach, and though costly, does give a path toward pressuring life total and Auras at the same time.
Against Prism specifically, make sure you understand the Runechant and Spectra interaction. In short, attack action cards will trigger your Runechant tokens, but swinging your weapon into a Spectra aura will not. It is possible to work on building up Runechant tokens with your go again non-attack actions and Grasp of the Arknight followed by swinging your weapon into Spectra auras without triggering your Runechant. This can be a powerful line in the Prism matchup when looking to set up a powerful Bloodsheath Skeleta interaction.
==========
Oldhim/Bravo, Showstopper
+3 Reduce to Runechant (red)
-1 Consuming Volition (red)
Lexi
+3 Reduce to Runechant
-3 Runeblood Incantation
Viserai/Chane/Briar
+1 Vexing Quillhand
-1 Grasp of the Arknight
Kano
+1 Vexing Quillhand
+1 Crown of Dichotomy
-1 Grasp of the Arknight
-1 Arcanite Skullcap
Conclusion
Viserai is a hero I am excited to continue to play in both Blitz and Classic Constructed. With all of the new additions from Everfest, Viserai is better than ever as an extremely flexible, all-rounder hero that enjoys very reasonable matchups against the entire field of competition. Viserai’s toolbox is extremely flexible, and with a proactive midrange strategy, requires very little customization or sideboarding in most matchups.
Stay tuned for more Viserai content as I continue to hone and tune this deck ahead of Pro Tour: New Jersey!
Love my content? Help support it directly- plus get always-up-to-date access to my competitive decks, access to my exclusive Discord community, and much more- on my Patreon!
Audio narration by Mark Chamberlain | Background music Acoustic Crossing; Inspiring Acoustic Guitar by LesFM | Music promoted by Chosic.com | Licensed under Creative Commons CC BY 3.0

