Welcome
...to Dash 101, your introductory course in to understanding the Inventor Extraordinaire! The lesson plan is as follows:
- We are going to spend some time talking about why you might want to play Dash, from her story to her mechanics;
- We will go over her general deck archetypes and how she fits in to the Game overall;
- We will discuss the card pool available to her for deckbuilding, starting with cards that bear the same class, and finishing with notable mentions from the generics;
- A perusal of equipment is certainly in order;
- We will carry on into a discussion regarding her various decklists;
- And we will finish with your mission-- should you wish to accept it.
This course is long, but comprehensive for the aspiring Mechanologist student. Feel free to bookmark it and take this lesson in chunks. Grab your favorite lunchables or dunkaroos, because we are going to school.
Why Play Dash?
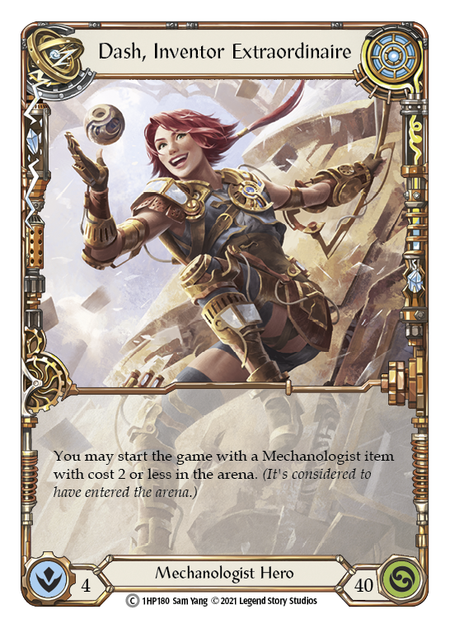
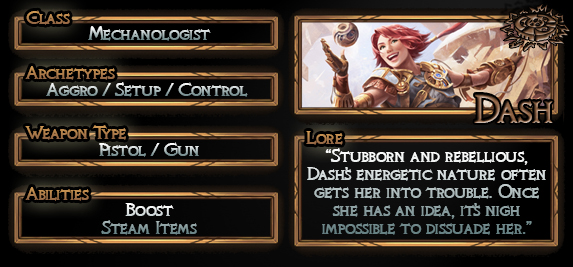
Dash is the first Mechanologist introduced to the game, coming in hot with the Boost mechanic and all of her wonderful items. Not only did Dash usher in new mechanics to the game, she also was the first- and so far, only- person to bring a gun to this fight. She is an inventive genius, modifying her armor and gun to better suit her needs on the fly; the toolbox available to Dash is unprecedented in other classes.
If you want to come to the battlefield ready to rock with a pistol, rocket boots, and a whole lotta gumption, Dash is your girl! The Mechanologist class is unique in many ways: it boasts the largest collection of items, a keyword (boost) that is wholly unique to mechanologists, and the flexibility to fill any role on the traditional card game triangle. She also has one of the most consistent abilities in the game: she comes with one of her signature items already on the battlefield, ready to rock right away.
On a more story/lore-oriented bias, you'll choose to play Dash because she is a spunky, inventive, and interesting woman. She gets in to hijinks, makes her own parts, and can more than handle her own in a fight.
Archetypes
Boost
Full Boost Dash is for you if you want to drop a cinder block on the accelerator and hope for the best! She can certainly be more nuanced than that, and we'll talk about that later, but nobody can do some of the things that Dash can do.
The Boost deck is very much focused around the mechanic inherent to the Mechanologist, introduced in Arcane Rising and found only in the Mechanologist class.
Boost: As an additional cost to play this card, you may banish the top card of your deck. If that card is a Mechanologist card, then this card gains go again.
As you can see, the mechanic itself cares about the Mechanologist class- we won't be seeing this strategy anywhere else, and it is unique in this way. Many of your cards have boost, and this deck seeks to play all of the cheapest, most efficient boost cards it can- as well as some of the tools that make Mechanologist truly unique, like the Teklo Core, Hyper Driver, and Maximum Velocity.

Nearly every single one of Dash's attacks can gain go again, and if you lean in to that strategy you unlock the capability to play out the most efficient attack in the game: Maximum Velocity. The requirements for playing it are high: having to boost thrice a turn before you're allowed to play it. But 2 resources for 10 damage is no joke. And let's not forget that, under the right circumstances, you may have already sapped their armor away with your deck of tricks and shenanigans, and it's already coming at the end of a long chain of attacks.
Boost Dash's natural prey are other damage-racing decks like Lightning Lexi and Levia; aggro builds for Bravo, Star of the Show; and anyone dependent upon the function of their armor. You also tend to perform well against setup decks in general, as most aggro decks like this one will be able to output more damage than a setup deck is capable of taking. If you think Aggro decks are doing hot in your locals, consider bringing the steam heat!
Your natural predators are going to be very patient control decks who will readily fatigue you. When you lean hardcore into aggression, it's true that you can score wins against setup decks- but there's an answer waiting for you in the likes of Oldhim, Ice Lexi, and other decks that seek to absorb and block out huge damage lines.
Tank (Setup/Control)
This deck archetype seeks to defend efficiently over the course of the game, taking time to carefully, slowly, meticulously build the pistol into an unstoppable force capable of sending four attacks of four damage every single turn until the deed is done. This deck takes advantage of the various defense reactions that are available to stay alive, as well as various tricks available to Dash herself that can help get her items in to play quickly and skip waiting on the whole deck to cycle.
The natural prey for this deck is Oldhim, the same old man that gives Aggro Dash so much trouble! This deck can be a real pain for any deck that is hardcore dedicated to control, or any deck that tends to swing big once per turn. Since there is so much capacity for damage control while getting the pistol assembled, this build of Dash tends to not struggle at all against traditional control decks. If control is prevalent in your meta, consider sleeving up Tank Dash!
Our natural predators are going to be aggressive decks like Lightning Lexi, Rhinar, and the various One-Turn-Kill builds found among the cadre of Runeblade heroes. OTK decks like Viserai want the game to go longer just like you do, and will be very pleased to generate runechants while you choke on defense reactions and potentially fail to get set up before they do.
Midrange
Midrange decks are very strong in FAB, but are very skill intensive. I don't recommend starting on a midrange/tempo build in card games, but if you are willing to put in the reps, it can be very rewarding. At a pro quest, I witnessed a Dash player ride two Induction Chambers all the way to victory against a very skilled Prism player.
If you just spend some time playing around in the card pool and play with the various deck archetypes discussed above, then you should be able to craft your own deck in no time, capable of taking on your local meta and beyond! Find the deck you like to play, and play it!
The Card Pool
One of the cool things in Flesh and Blood is that, for all of the complexity and depth it offer, there really aren't that many cards to think about for a given class. Cards are relatively easy to learn, and the vast majority of cards come in three different pitch strips. So while, on paper, there are some 37 Mechanologist cards in Arcane Rising, there are really only 20 effects to learn, and the remaining 17 cards are simply variants with different stats.
Arcane Rising introduced Dash and the whole Mechanologist class. She's been pistol-slingin' ever since, and cards from this set are the core of Dash's identity. Here we were first shown the power of the gun, as well as steam tech in general. You'll be hard-pressed to find a Mechanologist who doesn't include Teklo Plasma Pistol, Teklo Foundry Heart, and Achilles Accelerator in their lists.
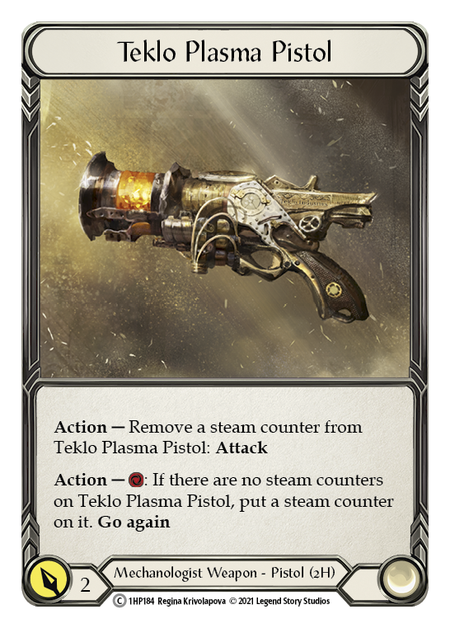
Mechanologist weapons are unique among other weapons in the game, as they can be paid for on one turn and attack another. The pistol is also among a rare assortment of weapons that is not restricted to only being able to be used once per turn. You can only load the pistol for one shot at a time, as you are not allowed to activate it and load a steam counter if it already has any steam built up; but if you can generate some extra action points, or even give the weapon itself go again, then you are fully in business to shoot that thing as much as you can afford to.
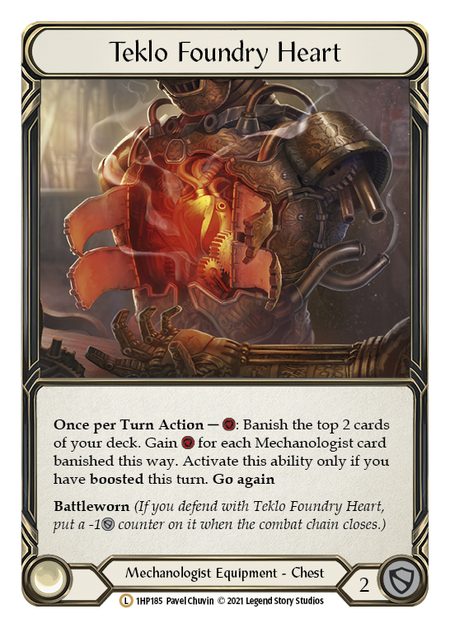
Teklo Foundry Heart not only provides armor density 3 (which is to say, it can block for 2, and then later block for 1, providing a total of 3 block over the course of the game), it even survives through the final block to continue to provide its benefit. The Foundry Heart is one of our first signposts in the card pool that Mechanologists function a touch differently than the other classes thus far. This card calls out other cards in the deck by class instead of type! If you banish a card that isn't from the Mechanologist card pool in pursuit of gaining resources with the Teklo Foundry Heart, you'll get burned: this thing runs on pure resources only. Not only does it cost a resource to boot up, it'll cost you two cards off the top of your own deck, banished forever; and if it hits any snares along the way, the math changes from +1 resource, to net neutral, to a 1 resource loss. Don't get me wrong, though, this card is awesome! It just requires you build the deck in a certain way if you plan to use its game effect.
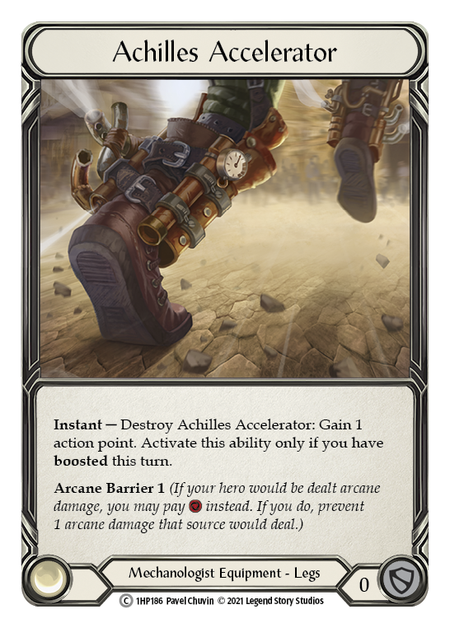
Achilles Accelerator is your insurance policy. Not only does it boast Arcane Barrier 1- something that is absolutely critical not only in Arcane Rising limited environments but also competitive environs as a whole- this card is designed to save your bacon in the event of catastrophe... or get just a little extra oomph to push you over the edge. Flesh and Blood cards are, as a rule, multi-functional; but as one might expect out of the tinkering engineer class, that gets pushed a little bit further over here.
Attacks
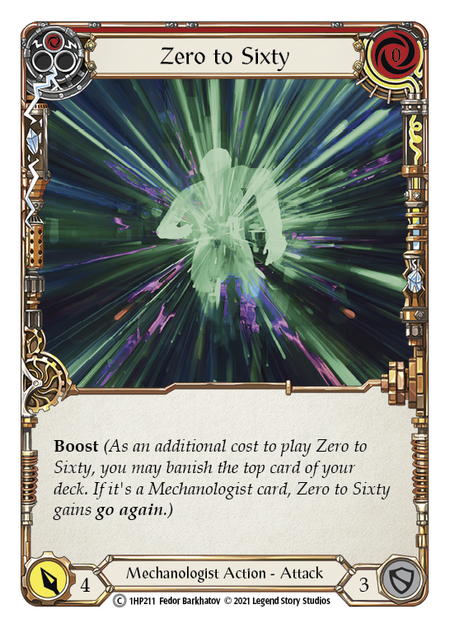
Zero to Sixty forms our basis of evaluation here: it costs 0, attacks for 2/3/4 with boost at the Blue/Yellow/Red pitch stripe, and blocks for 3. No on-hit effect or anything fancy, just a free attack that can gain go again if you so choose. Remember, Boost is an optional cost- not a mandatory one. It is very likely that you will start combat chains with cards like Zero to Sixty, boosted, as it represents the lowest investment on your part and opens the door for big threats that rely on you having boosted multiple times.
When Dash was first printed, this was the only zero-cost attack available to her that bore the distinction of belonging to the Mechanologist class, thereby keying into the Boost mechanic and the Legendary chestpiece.
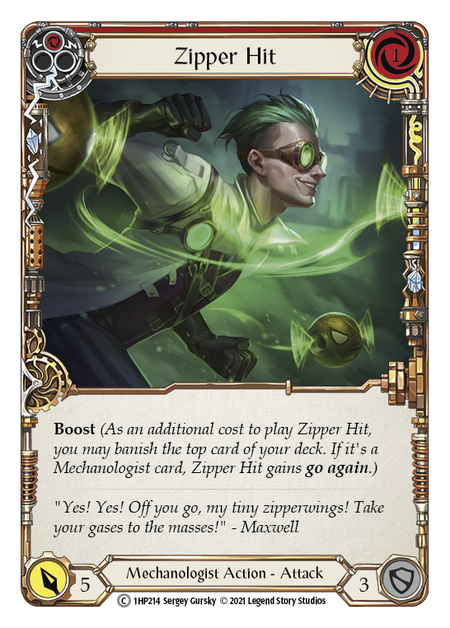
Ratcheting up one notch to the 1-cost attack slot, we've got Zipper Hit coming in for 3/4/5 damage with boost at the B/Y/R pitch stripe, and blocks for 3. As compared to the previously-established baseline of Zero to Sixty, we're paying one more resource to attack for one more damage. This attack typically earns its keep by being efficient and cheap: if you want extra-long combat chains that can overwhelm your opposition, then you are going to be looking at more attacks like this than those that follow.
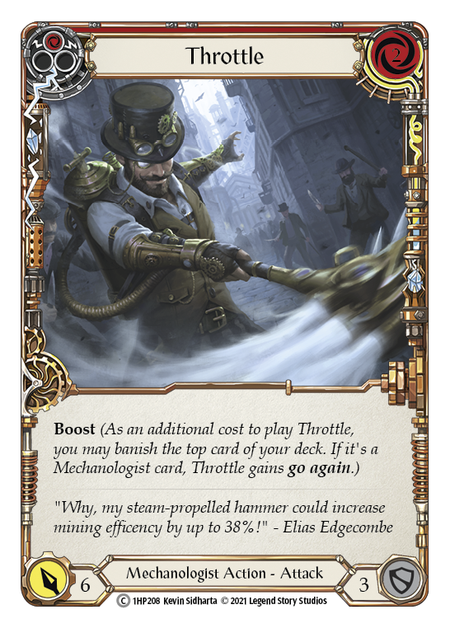
In the 2-cost attack slot, we find all of our other options: Throttle, Over Loop, and Pedal to the Metal.
Throttle is akin to Zipper Hit in the same way that Zipper Hit is akin to Zero to Sixty: we are paying one more resource for one more damage, with nothing else to be said about it. Red Throttle is one of the few cards that we have access to in-class that can threaten to contend with Illusionist phantasms, however, and should not be dismissed outright.
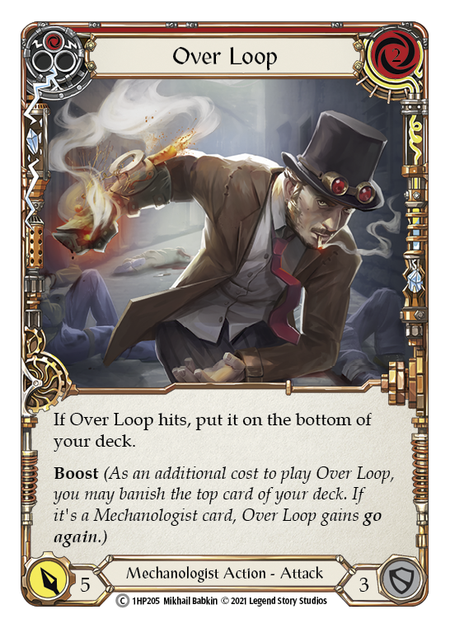
Over Loop, as compared to Throttle, offers one less damage but also threatens an on-hit effect. If we shift our comparison back to Zipper Hit, we are offering the same attack values at the same pitch stripes, but with one more cost to accompany the added on-hit effect. Over Loop says that if it hits, you put it on the bottom of your deck when the chain link resolves. This can be pretty important, actually, for our card economy! Since playing a card typically removes it from the deck, and Boost offers us another method of frequently removing cards from the deck, we are prone to running out of cards in the deck. Over Loop offers some salve to this burn in the form of conditional recursion. If nothing else, this can make your opponent really consider blocking when they normally wouldn't want to, merely because it can replenish one of your most scarce resources if they do not.

Pedal to the Metal, likewise, offers an important on-hit for your opponent to consider. If Pedal to the Metal hits, your next attack this turn gains dominate. This effect doesn't even care if the attack comes from your weapon or from a card, if the attack is Mechanologist or not. If the opponent blocks this 3/4/5 boost attack with one or two cards, does the next attack even need dominate? This card's job is to sap your opponents hand in fear of what is to come, and it can really put in the work on that front.
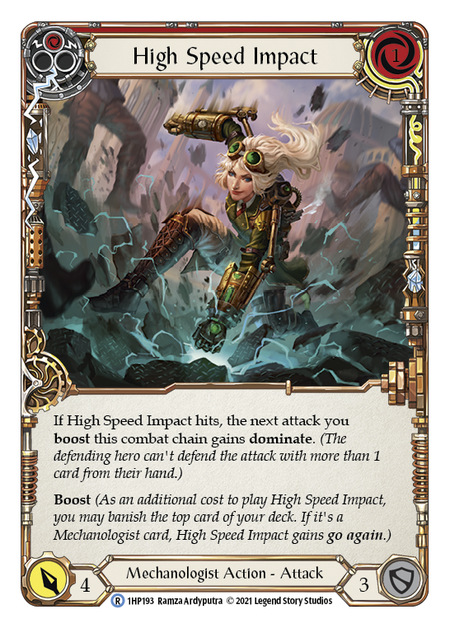
With Crucible of War, we began to see more on-hit effects in the class. High Speed Impact comes in at a single cost for 2/3/4 damage, as well as the on-hit effect of stapling dominate on to the next attack you boost this combat chain. The effect is a little situational, but it does feed in to this now well-established strategy of boosting in to very long combat chains. HSI does not offer dominate to any old card, unfortunately, and is best at the start or in the middle of a combat chain; even still, as a one-costed Mechanologist attack, it joins Zipper Hit as one of the few cards that can extend the combat chain inexpensively.
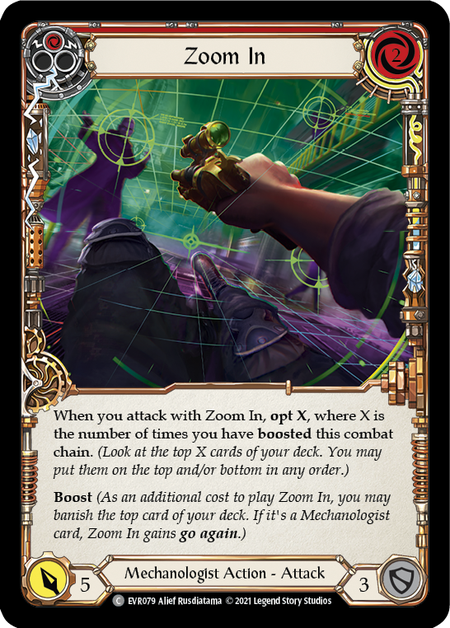
From Everfest, Zoom In is a 2-cost boost attack that offers 3/4/5 damage with an opt effect equal to the number of times you have boosted this combat chain. Not only can this help clear the way for future boosts, it can also help set up your topdeck for whatever purposes you may have in mind. This effect can not be understated: incidental opt on an attack can be absolutely massive in a Mechanologist deck that even remotely tries to take advantage of it.

Combustile Courier comes in for 2/3/4 damage at the Blue/Yellow/Red pitch values, so it seems a little weak at first glance-- but it boasts a killer on-hit effect that your opponent is not going to want to ignore. If this card connects with the opponent, the next attack you boost this combat chain gets +3 damage! It is somewhat limited in that it cannot effect cards that you do not boost, but the mere threat of this is enough for the opponent to block with one or two cards from hand, if not also throwing in some armor. In their mind, stopping this 4 damage, even inefficiently, is really stopping 3 more damage than that, and they are not fully wrong... they just don't know that you played it planning on them spending resources to fully block it, even if that's just a single piece of armor.
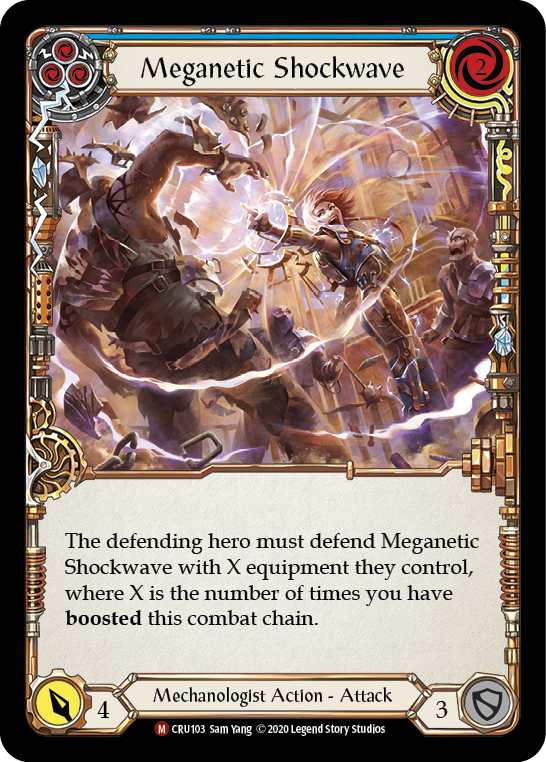
Making them block with armor is incredibly relevant, because Mechanologist also boasts Meganetic Shockwave and T-Bone. The former only comes in at the blue pitch stripe as a 2-costed attack for 4 damage, but with the added caveat that the opponent must block with pieces of armor for every time that you have boosted on the combat chain. If the opposition deemed it necessary to block with equipment already, you could snipe something really important from them that they would normally prefer to not block with, like a Bladebreak or Temper-ridden equipment.
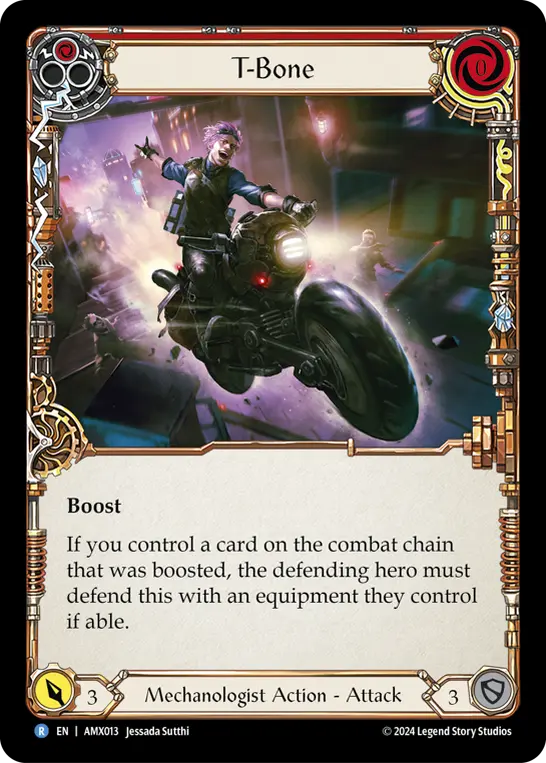
T-Bone adds another zero-cost attack with boost, but it's only representing 1/2/3 damage. The cool part, though, is that the damage is pretty irrelevant: it may as well attack for 0. The real trick to this card is in the textbox: not only does it have boost itself, it also reads “if you control a card on the combat chain that was boosted, the defending hero must defend this card with an equipment they control if able.” Sneaking this little attack in the middle of a chain of boosts can really spell havoc for the opponent, especially if you follow this play up with a Meganetic Shockwave.
Maximum Velocity is one of our big payoff cards in Mechanologist. Coming in at the cost of 2, this attack hits for TEN damage- with one tiny caveat, that you have to have boosted thrice already in the turn in order to play it. Max Velo does not come with boost itself, as it is the definition of a haymaker attack: this thing is coming in to lay down the law and knock the opponent out of the arena.
10 damage is absolutely massive, especially when it comes at the tail end of an already 3-attack-plus wide chain of attacks. It is not uncommon for this attack to land unblocked. Patience can be key here, but don't get stuck with it clogging your arsenal if you choose to block and can no longer boost thrice in one turn; better to arsenal a cheap card for the chain, such as Zero to Sixty, and play Maximum Velocity out of hand.
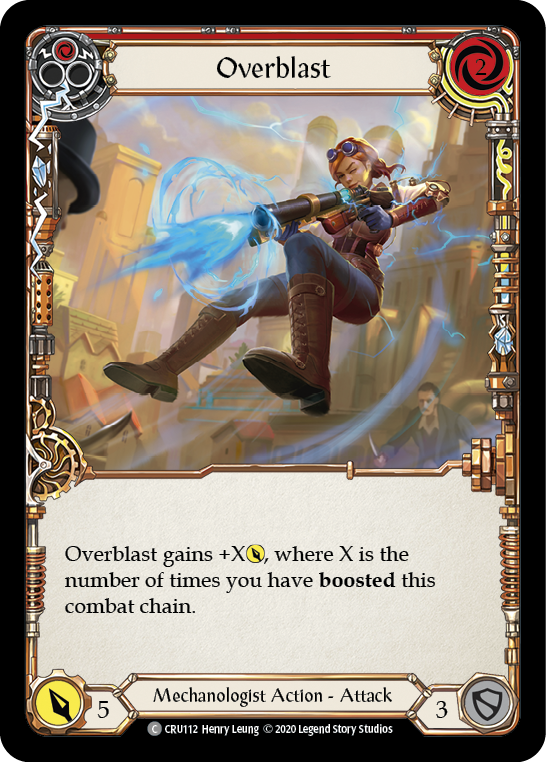
In the same vein, Overblast also wants to see you boosting on long combat chains. This attack comes in for 3/4/5 damage at the B/Y/R pitch stripe, and gets a +1 to attack for each boost on the chain thusfar. This card does not offer go again either, so it may be best to think of this card as an end to a combat chain, rather than the start or midpoint. Unfortunately it compares unfavorably to our other finishers, like Maximum Velocity, as even the red Overblast can only proffer 8 damage for the same investment.
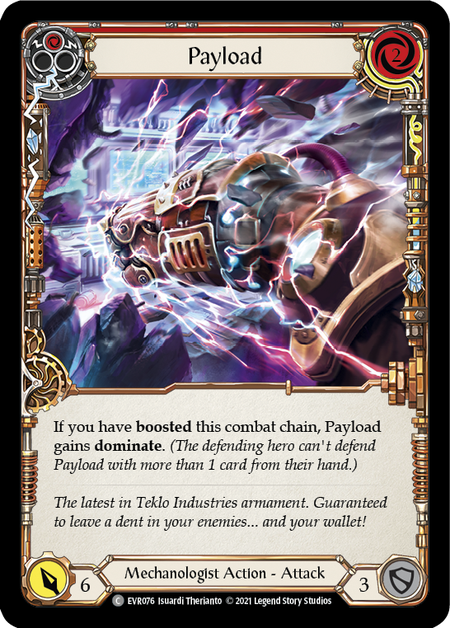
Payload does not offer boost, so again we're looking at a closer. What it does offer is dominate. If you've been able to sap their armor to brittle ash, then this is practically a guranteed way to end the game without needing to boost more than just once to get that payoff. Max Velo offers 10 damage, sure, but it gets harder and harder to play as the games goes on; in contrast, the later in the game it is, Zero to Sixty into Payload gets harder and harder for them to deal with.
Non-Attacks
Mechanologists are known for their Items, which we'll get to in a moment; but they do have a few non-attack actions to consider as well.
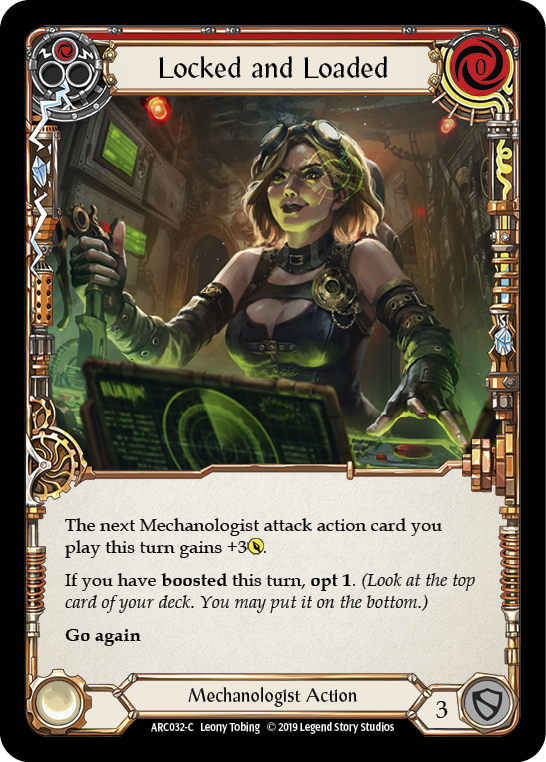
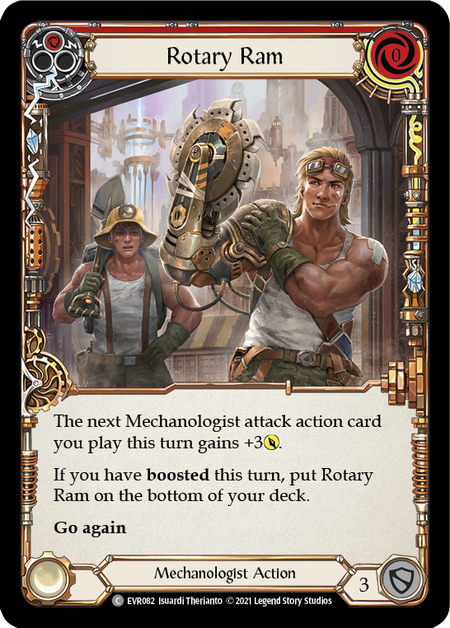
Locked and Loaded and Rotary Ram comprise our buffs. Both of these cards are free, and both offer a +1/2/3 improvement to your next Mechanologist attack action card; but L&L gives you control of the topdeck if you've boosted before playing it, while Rotary Ram cycles itself. Note that playing a non-attack after a boost breaks the chain- and for some Mechanologist cards, keeping an unbroken chain is super important!
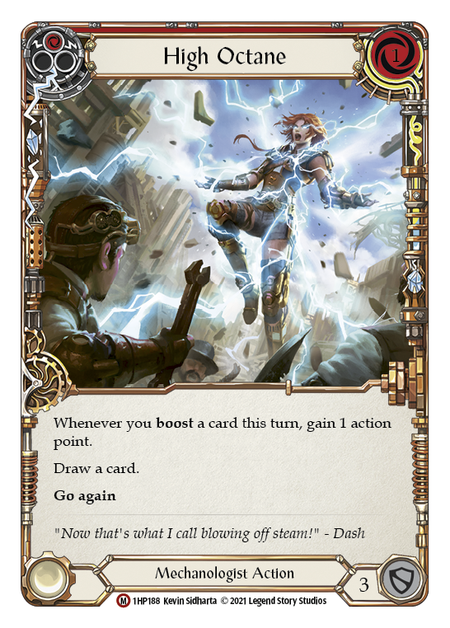
It can be hard to immediately grasp the full potential of High Octane. You pay one resource to play this card, and immediately draw a card. For the rest of the turn, whenever you boost a card, you gain an action point- that is to say, even if you boost and banish a non-Mechanologist card, you still get an action point. If you boost and hit on your banish, you'll get an action point and go again on your attack, effectively netting you +1 action point.
At the end of a long turn of boosting, say three or four times, you'll have a handful of action points at your disposal- and I can't help but recommend that you fan the hammer at your foe! Since the pistol can be shot any number of times (so long as you have the resources and the action points to do so- typically granted by way of Induction Chamber, but this can circumvent or compliment that), you are fully free to load, aim, and fire.
Action points are some of the rarest resources in the game: each player is only granted one per turn after all, so cards that manipulate that are always worth looking at.
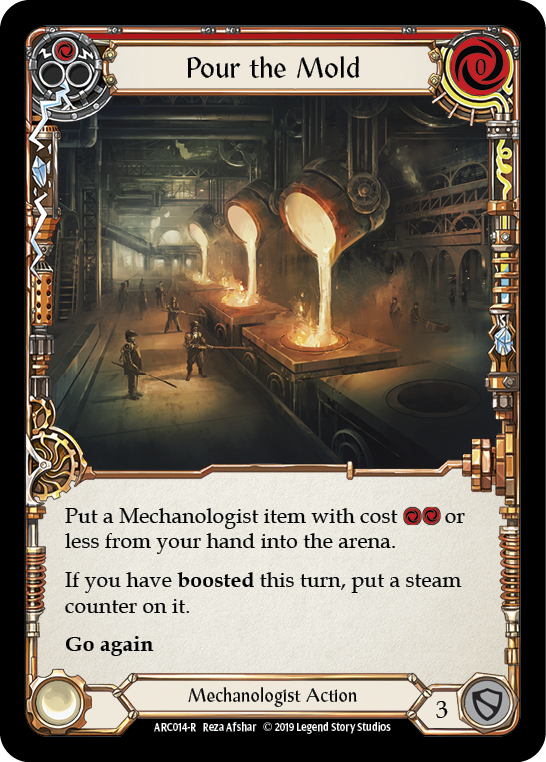
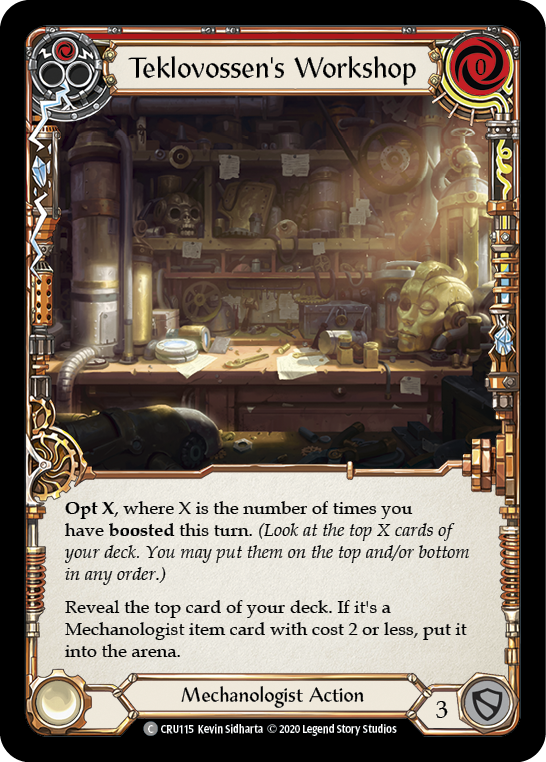
Item strategies also see support among the non-attack actions of the class. Pour the Mold gets an Item into play from hand with an extra steam counter. It's a fickle card that hasn't seen much play yet, but it exists to support Item builds in the future. Teklovossen's Workshop can end a long combat chain with tricking an item in from the top of your deck; and like Pour the Mold, this is a card that's seen little utilization at present.
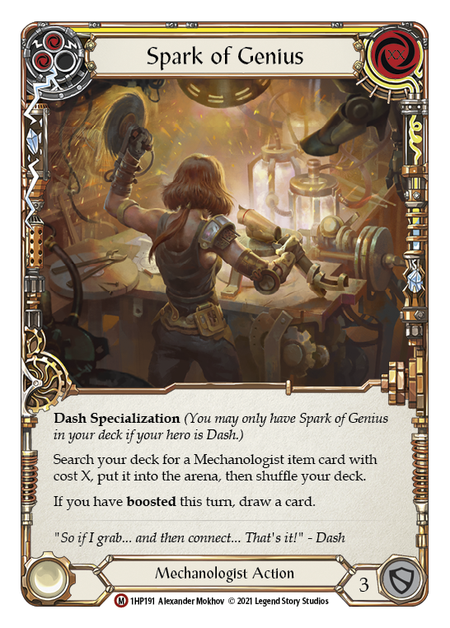
Spark of Genius, in contrast, searches your entire deck for an Item. This card is a turn-ender, as it has no easy access to go-again, but can be so very powerful. One not-so-obvious benefit to this card is that it takes cards with no block value out of your deck.
Items
This is where a lot of the complexity for Dash comes in, as these items are all one-of-a-kind unique. You can certainly have 3 of a given item in play at any time, and indeed some strategies revolve around exactly that, but these are unique in the fact that they do not come in three different pitch values as many FaB cards do. Cognition Nodes, for example, only ever comes as a blue-pitch item: there is no yellow nor red.
All of the doodads that Dash has at her disposal are disproportionately unique: they all do something different, but some of them are still decidedly similar. Dithering over these is one of the keys to making ease of victory in Dash, do yourself a service and dance with the goddess of the machine!
What's more, item cards do not block! This is, perhaps, one of the biggest reasons as to why decks that feature item cards heavily also tend to feature defense reactions heavily: you have to balance out the lack of blocking somehow!
Ditch the decisions and embrace dichotomy: do you pitch, or do you play? Although these items do no blocking of their own, they can certainly power up defense reactions... and what's more, is that their powers are absolutely game-changing, ranging from modifications to your weaponry, to defense loadouts and varied disruptive options in-between.
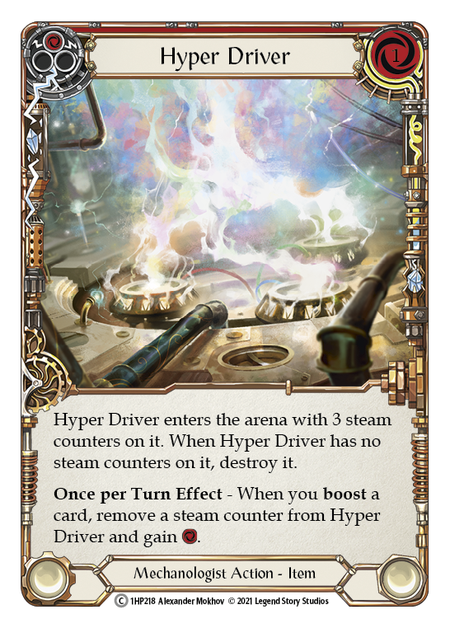
For many Mechanologists, items are the butter of the gameplan: making use of boost attacks and defense reactions to leave the opposition fried to a toasty crisp and depleted of power while you spread out items and settle in for a crunchy, tasty late-game of inevitability. For others, the items are a lot more like rocket fuel: powering them in to space and hopefully keeping them aloft without risk of crashing back down to Rathe. Although there isn't a rocket in FaB just yet, being hit for T-Bone into T-Bone into T-Bone into Maximum Velocity (all thanks to the Teklo Core or a few Hyper Drivers) sure does feel like being sent to the moon for most opponents! Or, when it is late in the game and your gun has three Induction Chambers and Plasma Purifiers strapped on to it, the opponent has little to do but cry in the face of a consistently plausible TWENTY damage pouring out of the gun.
Let's talk about these little guys in some greater depth.
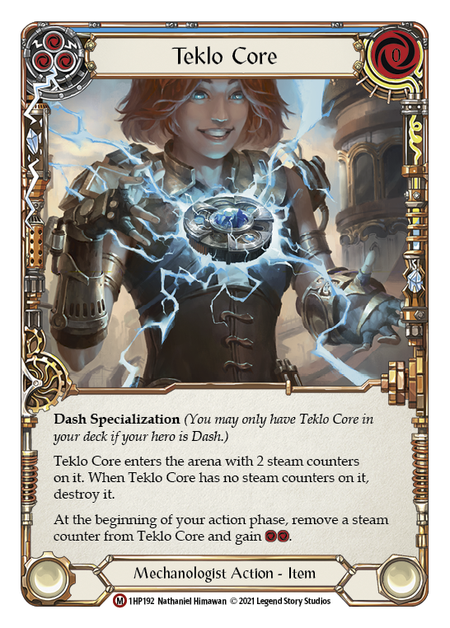
Teklo Core is typically the first item that people see or think of when introduced to Dash. This is one of her specialization cards, and it's pretty good to say the least. Teklo Core basically puts the pedal to the metal for the first two turns of your game, allowing you to go wider than any opponent is capable of doing. I can't overstate the value of a free two resources: this thing, along with it's cousin the Hyper Driver, is at the very (Teklo) core of the most explosive Dash turns.
The first time you boost each turn, Hyper Driver spits out a resource. Although one resource doesn't go nearly as far as two do in this game, one resource is far from none and, again, is at the core of the most explosive Dash turns. By pairing the two together, you have a much-increased likelihood of getting to play your whole hand of cards, rather than needing to pitch some of them. This is very much a high risk, high reward strategy, with risks like running out of deck literally twice as fast as other classes, and rewards like 20+ damage turns and a propensity towards some amount of broken equipment.
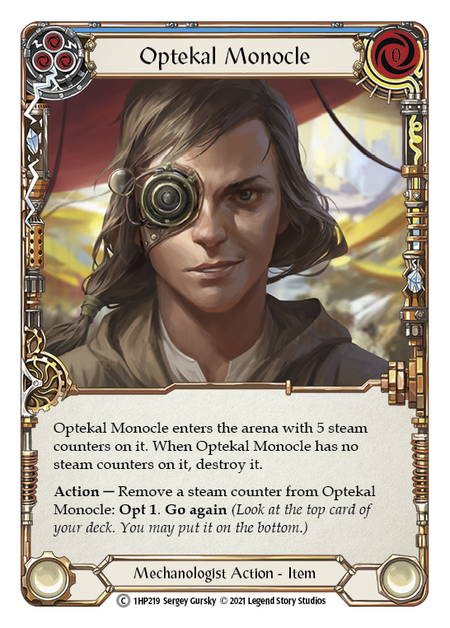
Optekal Monocle is similar, but different. This eyepiece item comes with the ability to fix the top of your deck up to five times as an action with go again. Since the boost deck is reliant on banishing the top card of the deck to achieve Extremely Wide Turns™ , fixing the top card of the deck can be a very powerful ability. (More powerful than that, it seems, is just building the deck to practically always succeed at boosting naturally, but your mileage may vary.)
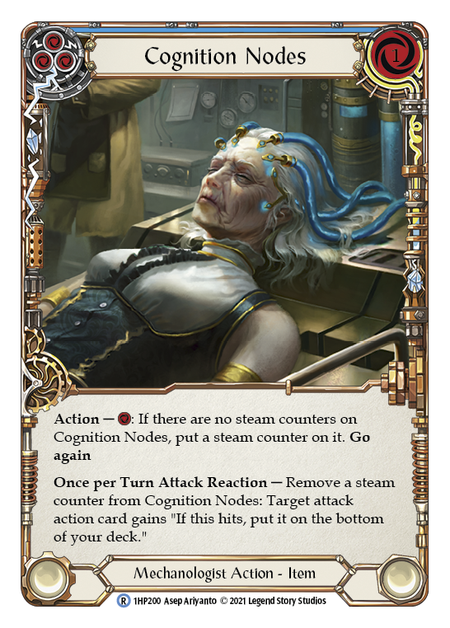
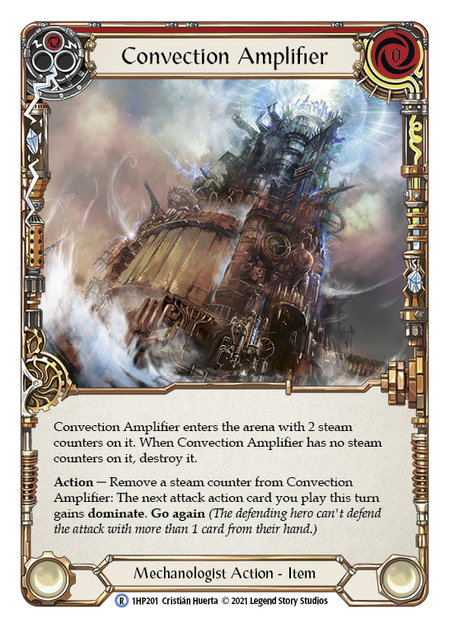
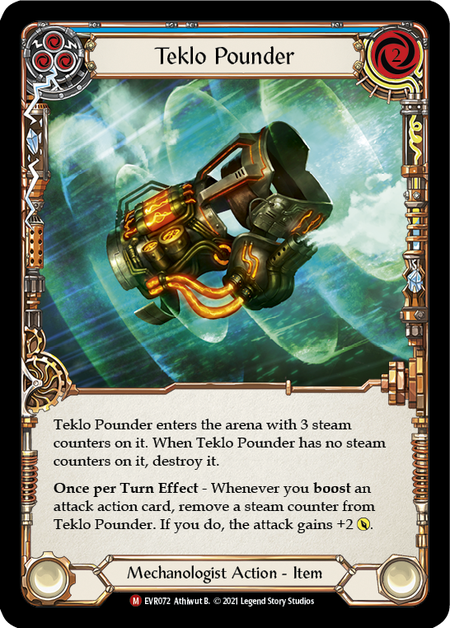
Teklo Pounder, Convection Amplifier, and Cognition Nodes frequently come up at this point of the discussion, so we're just going to place this right here. See, if we are already talking about having wide turns, then Teklo Pounder feels like a natural fit: the first time that you boost an attack each turn, it gets +2. This +2 can really be a difference maker in terms of breakpoints: 4 and 5 are just better numbers than 2 and 3 when it comes to actually doing damage and landing on-hit effects. See, the +2 attack power here doesn't really mean +2 damage, as the opponent is likely going to block; what it means is they either need to put down another card or take at least one damage (as most cards block for 2 or 3), which is all you need for an on-hit effect. Teklo Pounder can really enable cards like Combustible Courier and the like, if you find yourself building situations where they need to hit or sap more cards out of their hand. Pounder can get Over Loops over the top of typical defenses, landing hits to delay fatigue as well.
On that note, Cognition Nodes confers that text on to any attack action card as an attack reaction, and so can be a fun way to hit your opponent with greater than your average number of Maximum Velocities- or Command and Conquers! The Convection Amplifier can preemptively add dominate on to your forthcoming attack action card, which can really drive damage home in the late game and can be one of the ways that the Mechanologist closes a game out in their favor.
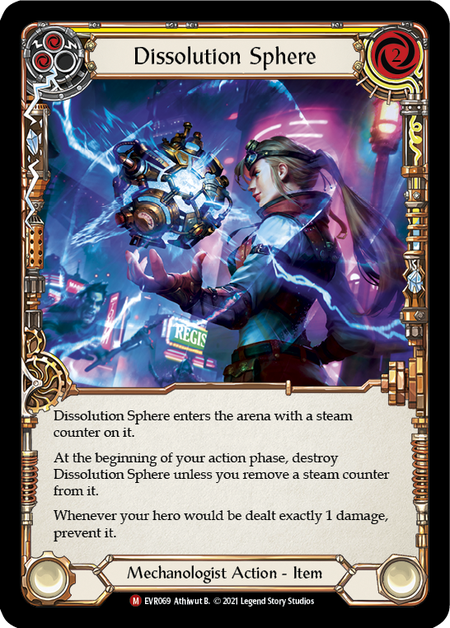
And since we are talking about break points, let's talk about our latest tool in the fight against Other People's On-Hit Effects. Dissolution Sphere, like many of the disruptive or defensive Mechanologist items, is more of a limited-time offering, but brings a very powerful effect on to the table. If you were to take a single damage from a source, instead prevent that damage. This is an absolutely huge meta call that not only can make blocking easier when faced with breakpoint-abusing heroes like Runeblade, Guardian, or Warrior, but also it just flat out denies the one-at-a-time damage presented by Spectral Shields, Kodachis, and Runechants. This, like all items, does not go in to every matchup... but it can make a real big difference in some of them.
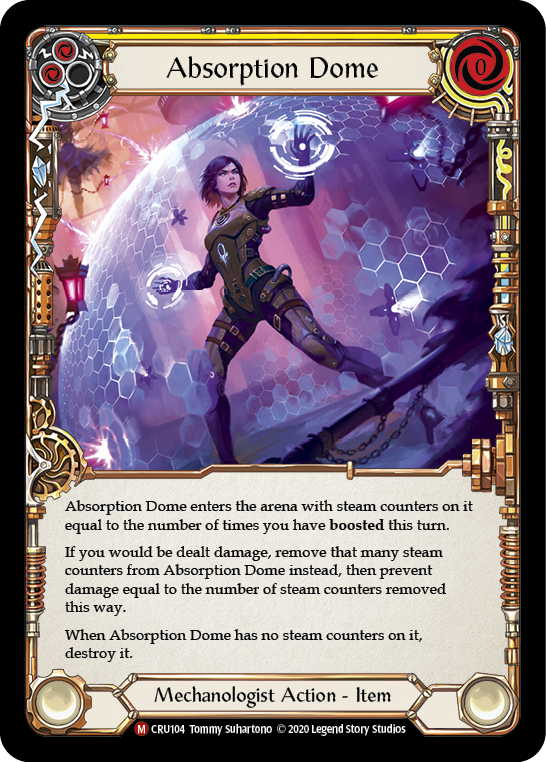
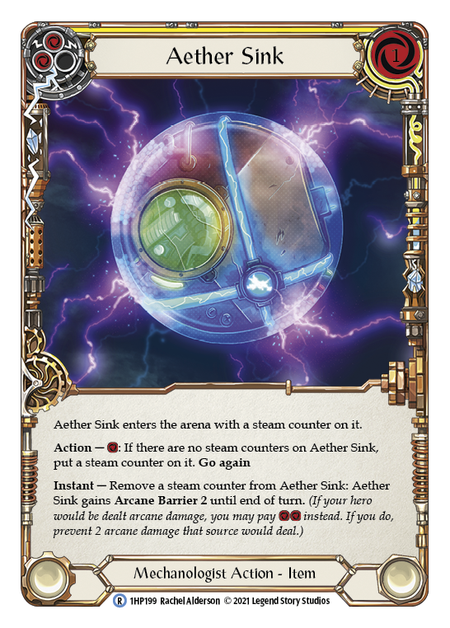
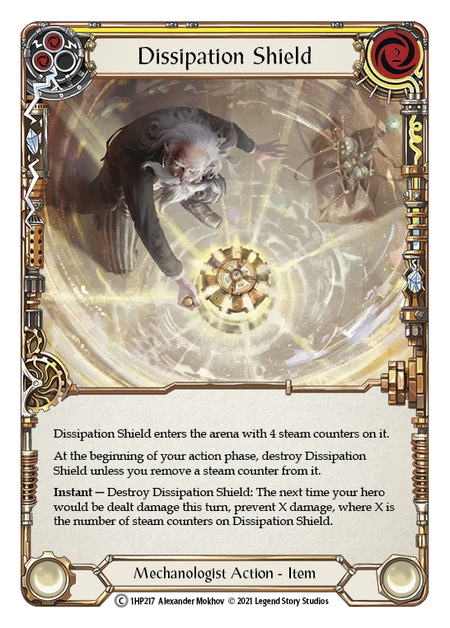
Dissipation Shield, Absorption Dome, and Aether Sink all make up the remaining clear defensive options in Mech Items. To cut to the chase, Aether Sink, much like ol Trusty Rusty (Rusted Relic), simply isn't worth including in most decks at this point in the game. If you are going to be running Arcane Barrier, then you don't want to be at the mercy of the draw to get it. If you think that Wizards or Runeblades (or even Illusionists sometimes) are going to be at the game table, then it is usually best to have your Arcane Barrier on your armor and not hidden in your deck.
The other two cards, however, do sometimes find their place in the sun: Dissipation Shield and Absorption Dome both can prevent huge amounts of damage and effectively buy you turns that the opponent was perhaps counting on you to not have. Playing these cards for maximum effect is very timing-dependent, but their power here is far from overstated. If you can trick your opponent into taking damage in hopes of blocking a bigger attack down the line, only to play Absorption Dome and stuff up their own follow-up turn, it can make for a big turnabout indeed! (Admittedly these make their best showing in Data Doll and not as much in Dash, but as other decks shift, our cards rise to meet them in their various corners and pockets of play.)
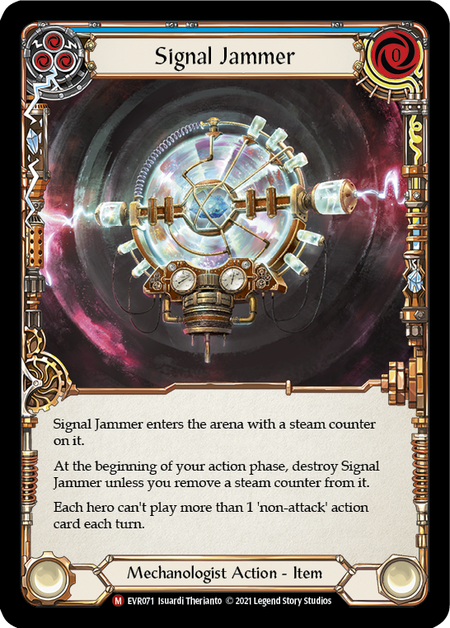
Signal Jammer stops heroes from playing multiple non-attack actions in a turn for two turns straight. This can be a massive roadblock for certain classes, and is largely something that you will want to pay attention for opportunities to utilize. If you find that a lot of your local opponents are playing multiple non-attack actions in a turn (and indeed most all classes are capable, in not outright culpable, of doing this), then Signal Jammer was made for your meta. Be very careful to no goozle yourself or your team, of course, as it does affect ALL heroes in play.
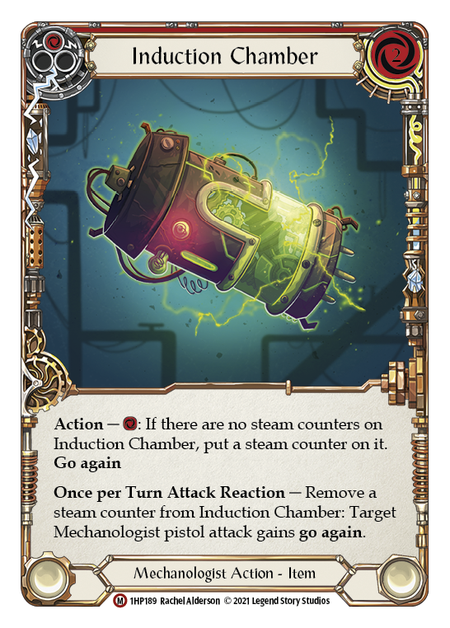
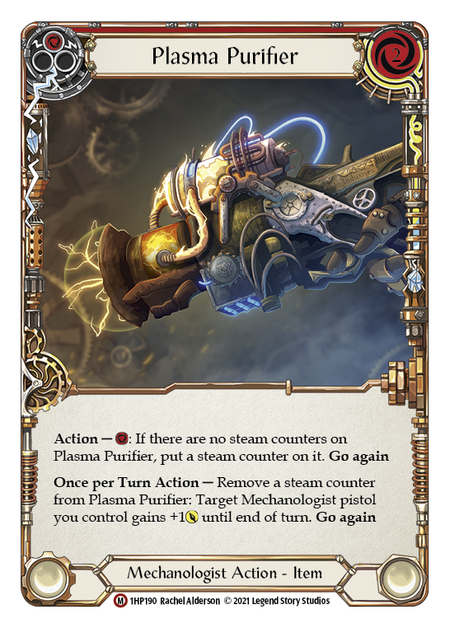
Saving the best for last, Plasma Purifier and Induction Chamber are the classic. Plasma Purifier and Induction Chamber can be the only two items you run in a Dash deck, and you'd be alright if you played your cards right. Since the pistol notably does not restrict itself to being shot once per turn, a suite of Induction Chambers can help provide the action points desired to fan the hammer and fire that pistol up to four times. When combined with other action point shenanigans, like High Octane, the pistol can go full volcanic and unload until you are fully out of resources.
The Plasma Purifier only sweetens the deal further by increasing the amount of damage that each pistol shot produces for the turn. When these two are paired together, the gun goes from offering merely two damage per turn, all the way up to potentially twenty! It was already a bit unfair, bringing a gun to a hammer fight, but this makes the fight plain untenable for most opponents. What's more is that this makes for an excellent late-game strategy: when fully set up, this weapon is basically all you need on your own turns, and is powered entirely by pitch. It'll be a difficult time for any opponent seeking to fatigue you, while you will be the one turning the screws of fatigue back at them!
Getting Set Up with Dash
Dash's hero ability is one of the most variable in the game, coming with 14 options at the time of printing. Some options currently are a little less than viable, like the Absorption Dome coming in with 0 counters on it, but all of them are worth considering in different circumstances. There are three very popular starts, however, so let's discuss those.
Many players choose to start with her signature item, the Teklo Core, in play. This, in my view, is a bit like rocket fuel: the Teklo Core is going to provide for extremely explosive opening turns that can send the Dash player in to orbit, getting in to a late game position over the opponent early. I like to follow up this opener with the Hyper Driver item, so that I can stay in orbit and keep ahead of the other player. These items in tandem can really help with staying on the beatdown and doling out damage to try for an early knockout.
In a similar vein, some players are opting to start with Teklo Pounder in play. This card packs the extra +2 punch along for the ride, and can make a big difference in the opening turns of a match to try and put the other player off their game with awkward break points. Taking cards away from the opponent is massive in a game like this one, so it's no surprise that the Pounder is seeing some opening deployments.
Opposite to these choices, however, lies the Induction Chamber. Getting this item out early is a great way to get on the road to being fully setup. And, although the pistol maxes out at 3 Chambers and 3 Purifiers, I feel pretty good-to-go by the time I have just 2 chambers and one or two Purifiers on the board: so instead of feeling like I need to go and get 6 items to really be “online,” I know from experience that I really only need 3-4 of them, and Dash lets me start with 1 already. With a good opening hand and a well-timed Spark of Genius, I can be stealing turns from the opponent in no time! Usually this game plan is durable and highly capable of going in to the late game, but if you can force your opponent in to making late-game decisions early, then you are creating a different sort of disruption entirely.
You might find yourselves running a mixture of these items, or going all-in on one of the apparent packages that these make up - experimenting with your particular mix of items is pretty thematic, too! Embrace the tinkerer!