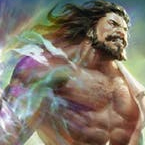
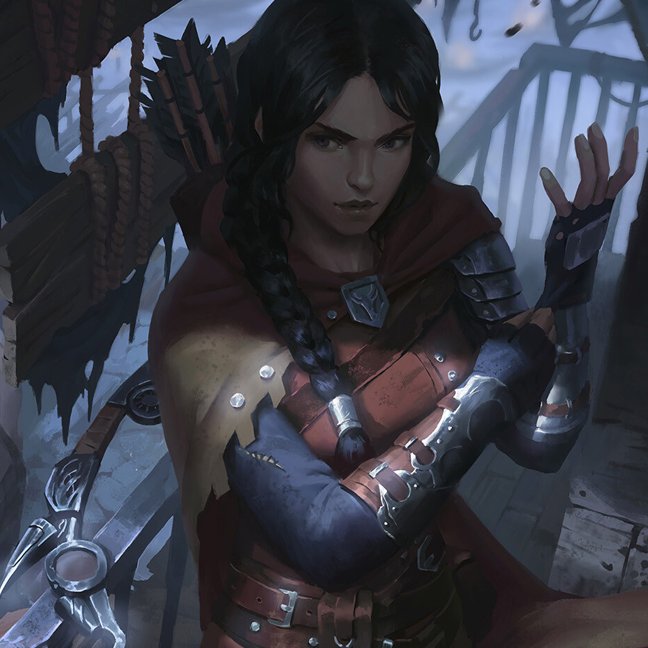
Saturday the 19th of February, 2022 kicked off the new season of Pro Quest events across the world, and it was no surprise when Starvo and Viserai decks popped up in almost every top 8. However, interest sparked across social media when an Azalea appeared in a top 8 in Brisbane, Australia. Not only is it rare to see Azalea doing so well, but this Azalea was the only one in the 36-player tournament. To make things more intriguing, this Brisbane event had a line-up of high-ranking players including Kuan Li, Hayden Dale, Nick Butcher, Vincent Lim, and Lachlan Buchan.
That Azalea players was me; and although I missed my aim to score Azalea her first ever Living Legend points, I still managed to place Top 4.
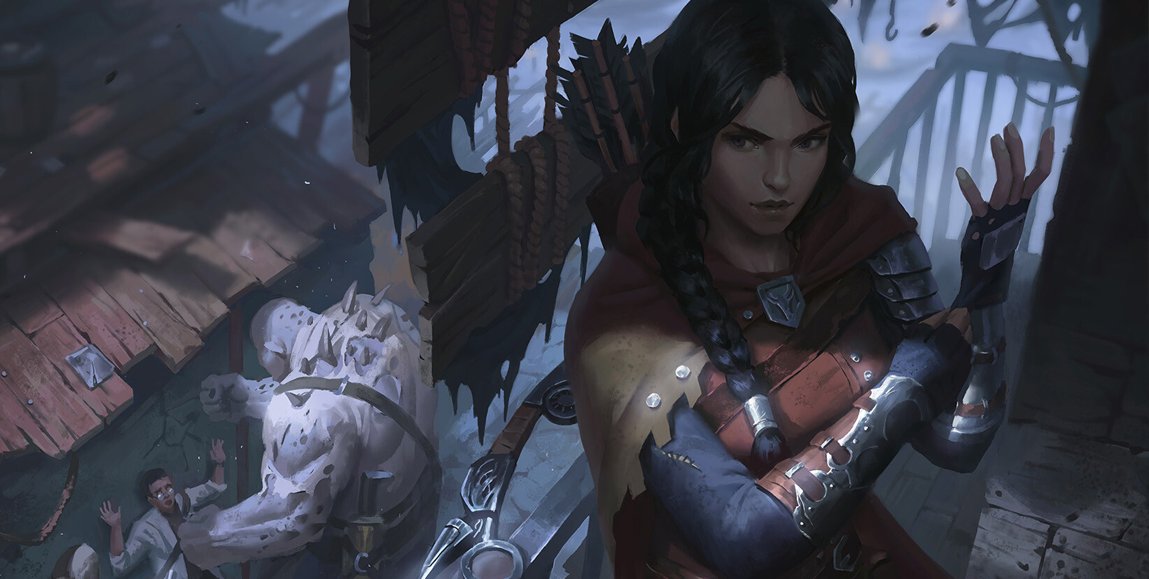
If you haven’t seen me around the community, my name is Wesley. I have been playing Azalea since the release of Arcane Rising, and have managed to achieve the highest tournament placements with Azalea of any FaB player to date. If not for the pandemic canceling my trip, you would have watched me battle to the top of the Australian Nationals.
It's my goal to claim the first Living Legend points for Azalea- but that won’t stop me from sharing what I have learned with other players keen on mastering the bow and arrow. All ships rise with the tide.
While this article can stand on its own as advice for honing your Azalea deck and piloting it into the Everfest meta, you will gain deeper insights if you go back to read my previous article, where the basis of this deck is laid out. This is the core from which I've updated, and you'll find a complete matchup guide there as well. (It is a Pro Series piece, so you'll need to be a subscriber to the Rathe Times to check it out.)
On Sunday Sept. 5th, Wesley placed 2nd in the RC Crew Road to Nationals, making him the highest achieving Azalea player in the world. Here's how he did it- and how you can improve your Azalea game too.
Are you new to Azalea? Stop by our FAB101 article to learn the basics of the Ranger playstyle!
The Deck
Weapons
- Death Dealer (1)
Equipment
- Bull's Eye Bracers (1)
- Fyendal's Spring Tunic (1)
- Snapdragon Scalers (1)
- Skullbone Crosswrap (1)
Loadout
- Battering Bolt (Red) (3)
- Captain's Call (Yellow) (3)
- Enlightened Strike (Red) (3)
- Endless Arrow (Red) (3)
- Rain Razors (Yellow) (3)
- Razor Reflex (Red) (3)
- Hamstring Shot (Red) (1)
- Head Shot (Red) (1)
- Command and Conquer (Red) (2)
- Searing Shot (Red) (3)
- Sink Below (Red) (2)
- Fatigue Shot (Red) (3)
- Nimblism (Red) (3)
- Take Aim (Red) (3)
- Nock the Deathwhistle (Blue) (3)
- Remorseless (Red) (3)
- Razor Reflex (Yellow) (3)
- Read the Glide Path (Red) (3)
- Red in the Ledger (Red) (3)
- Scar for a Scar (Red) (3)
- Seek and Destroy (Red) (3)
- Snatch (Red) (3)
- Sleep Dart (Red) (3)
- Take Cover (Red) (3)
- Ravenous Rabble (Red) (3)
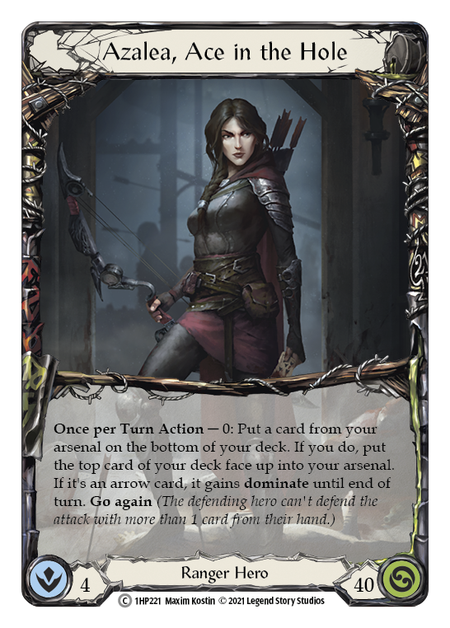
The concept behind the deck is this: making use of a high damage-to-cost ratio, with a fluid strategy capable of going tall, wide, or midrange from turn to turn. It can attack four times for 4 each, and it can dominate for 15. This acts as a meta disruptor, because people largely sideboard for decks doing only one of those things; when you can do both, you can get around their counterplays by swapping to the other style of attacking.
Let's talk about some of the key cards.
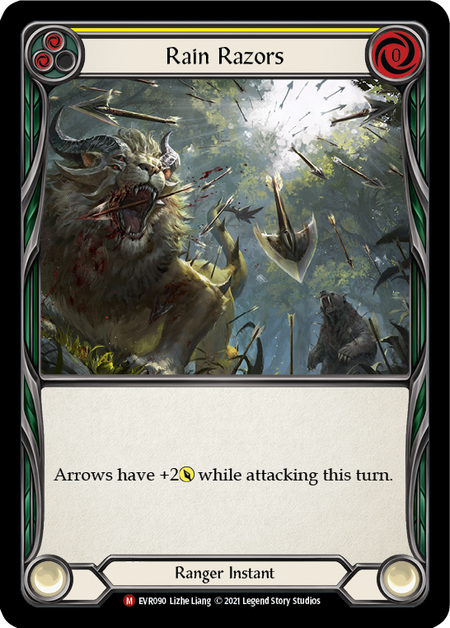
Rain Razors is by far one of the strongest cards Azalea now has access to. Not only does it act as another way of making it difficult for your opponent to determine whether to overblock your attacks, but it can also consistently add four or six damage to attacks in one turn- for zero cost. Arrows like Bolt’n' Shot and Endless Arrow benefit the most from this new Instant, as they allow you to easily benefit from the buff multiple times in one turn.
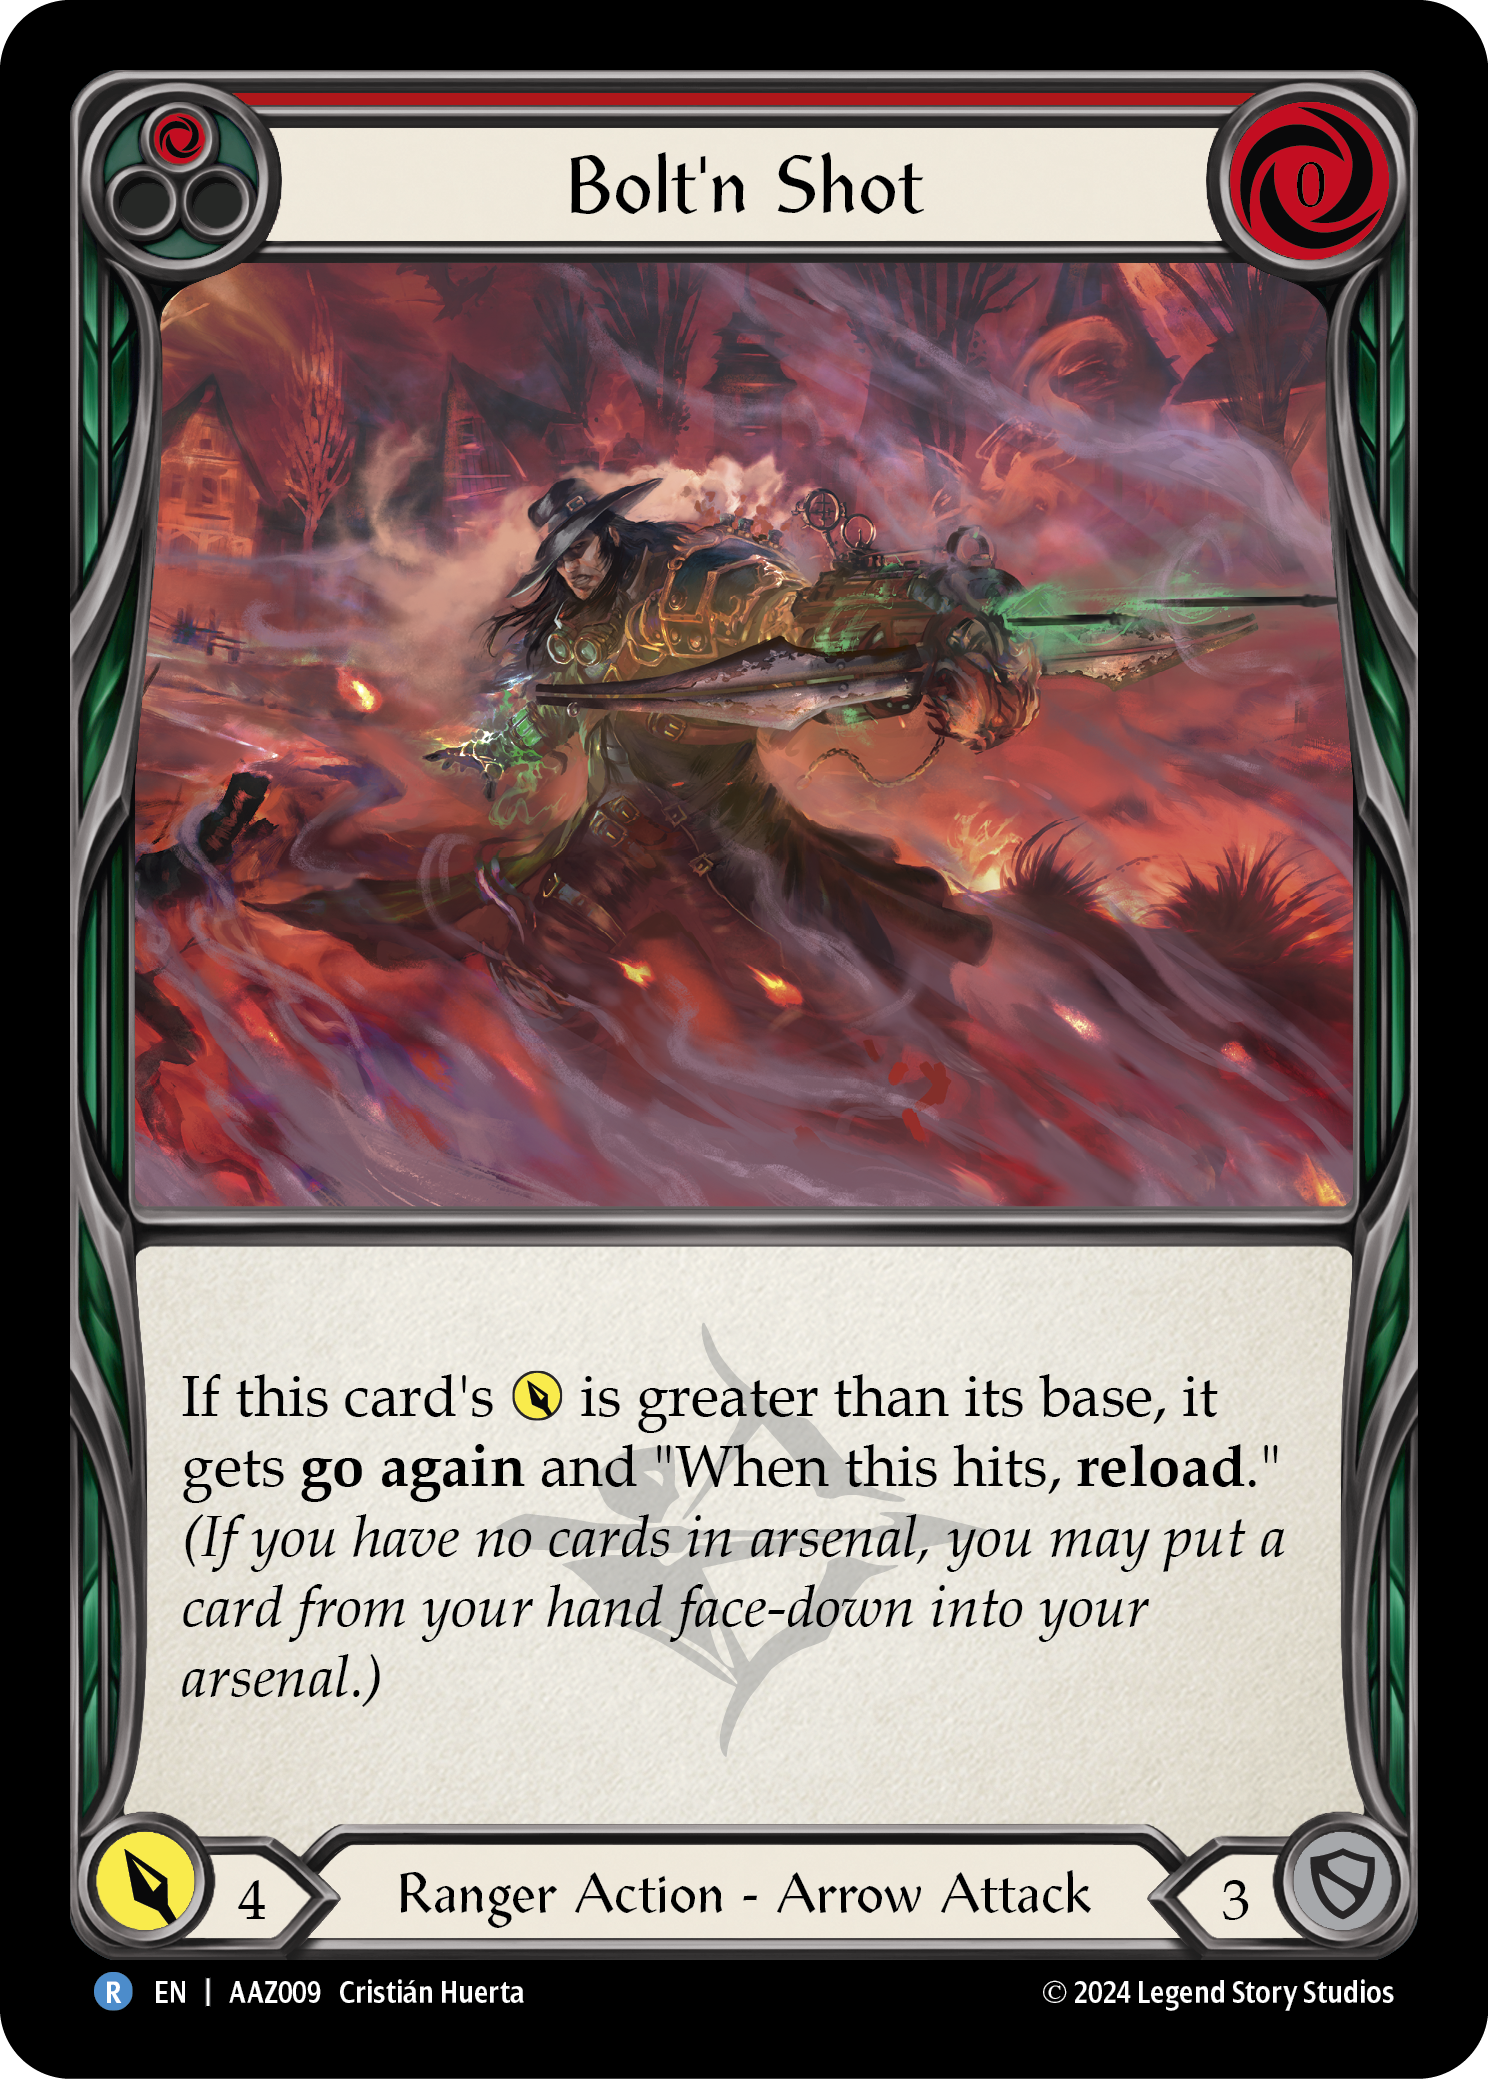
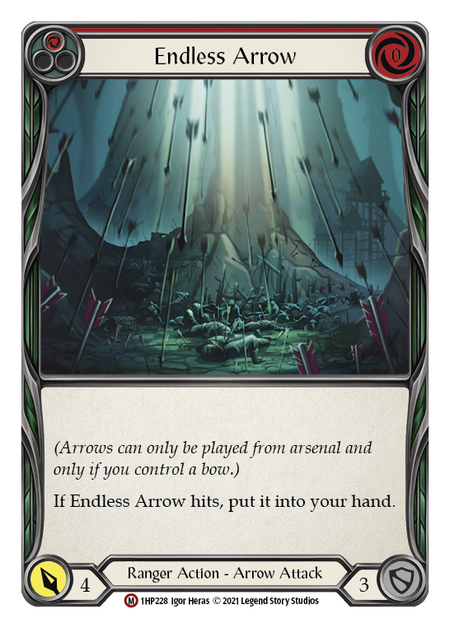
For example, you can start with Bolt’n' Shot in your arsenal, with Endless Arrow, Razor Reflex, Rain Razors, and one other card in your hand. After you attack with the Bolt’n' Shot, you can buff it in the reaction step using Rain Razors to activate Bolt’n' Shot’s card effects. If you hit, you can reload Endless Arrow into your arsenal; otherwise you can activate Death Dealer to load Endless Arrow and draw a card to replace the card you pitched. Attack with Endless Arrow (buffed by Rain Razors), and use Razor Reflex to buff it further, adding on-hit go again. Assuming you hit, you can then put Endless Arrow back into your arsenal with a card like Bull’s Eye Bracers and make another attack using the buff from Rain Razors.
I want to reaffirm the potency of Bolt'n' Shot. I am so thrilled that LSS gave Ranger such a strong arrow to play with. Bolt'n' is so useful that it makes Sic ‘Em Shot completely irrelevant. With the numerous buff cards that Azalea has access to, it is so easy to guarantee that Bolt’n' Shot will have go again and on-hit reload. This opens up so many useful combinations with other arrows or generic attacks, can set up Skullbone Crosswrap or Azalea’s activated effect, and adds a reason for your opponent to have to waste cards blocking. Even if you draw Bolt’n' Shot without a buff, you can at least break your Bull’s Eye Bracers to buff it, gaining go again so that you can play multiple attacks. This card is a must include in all Azalea decks.
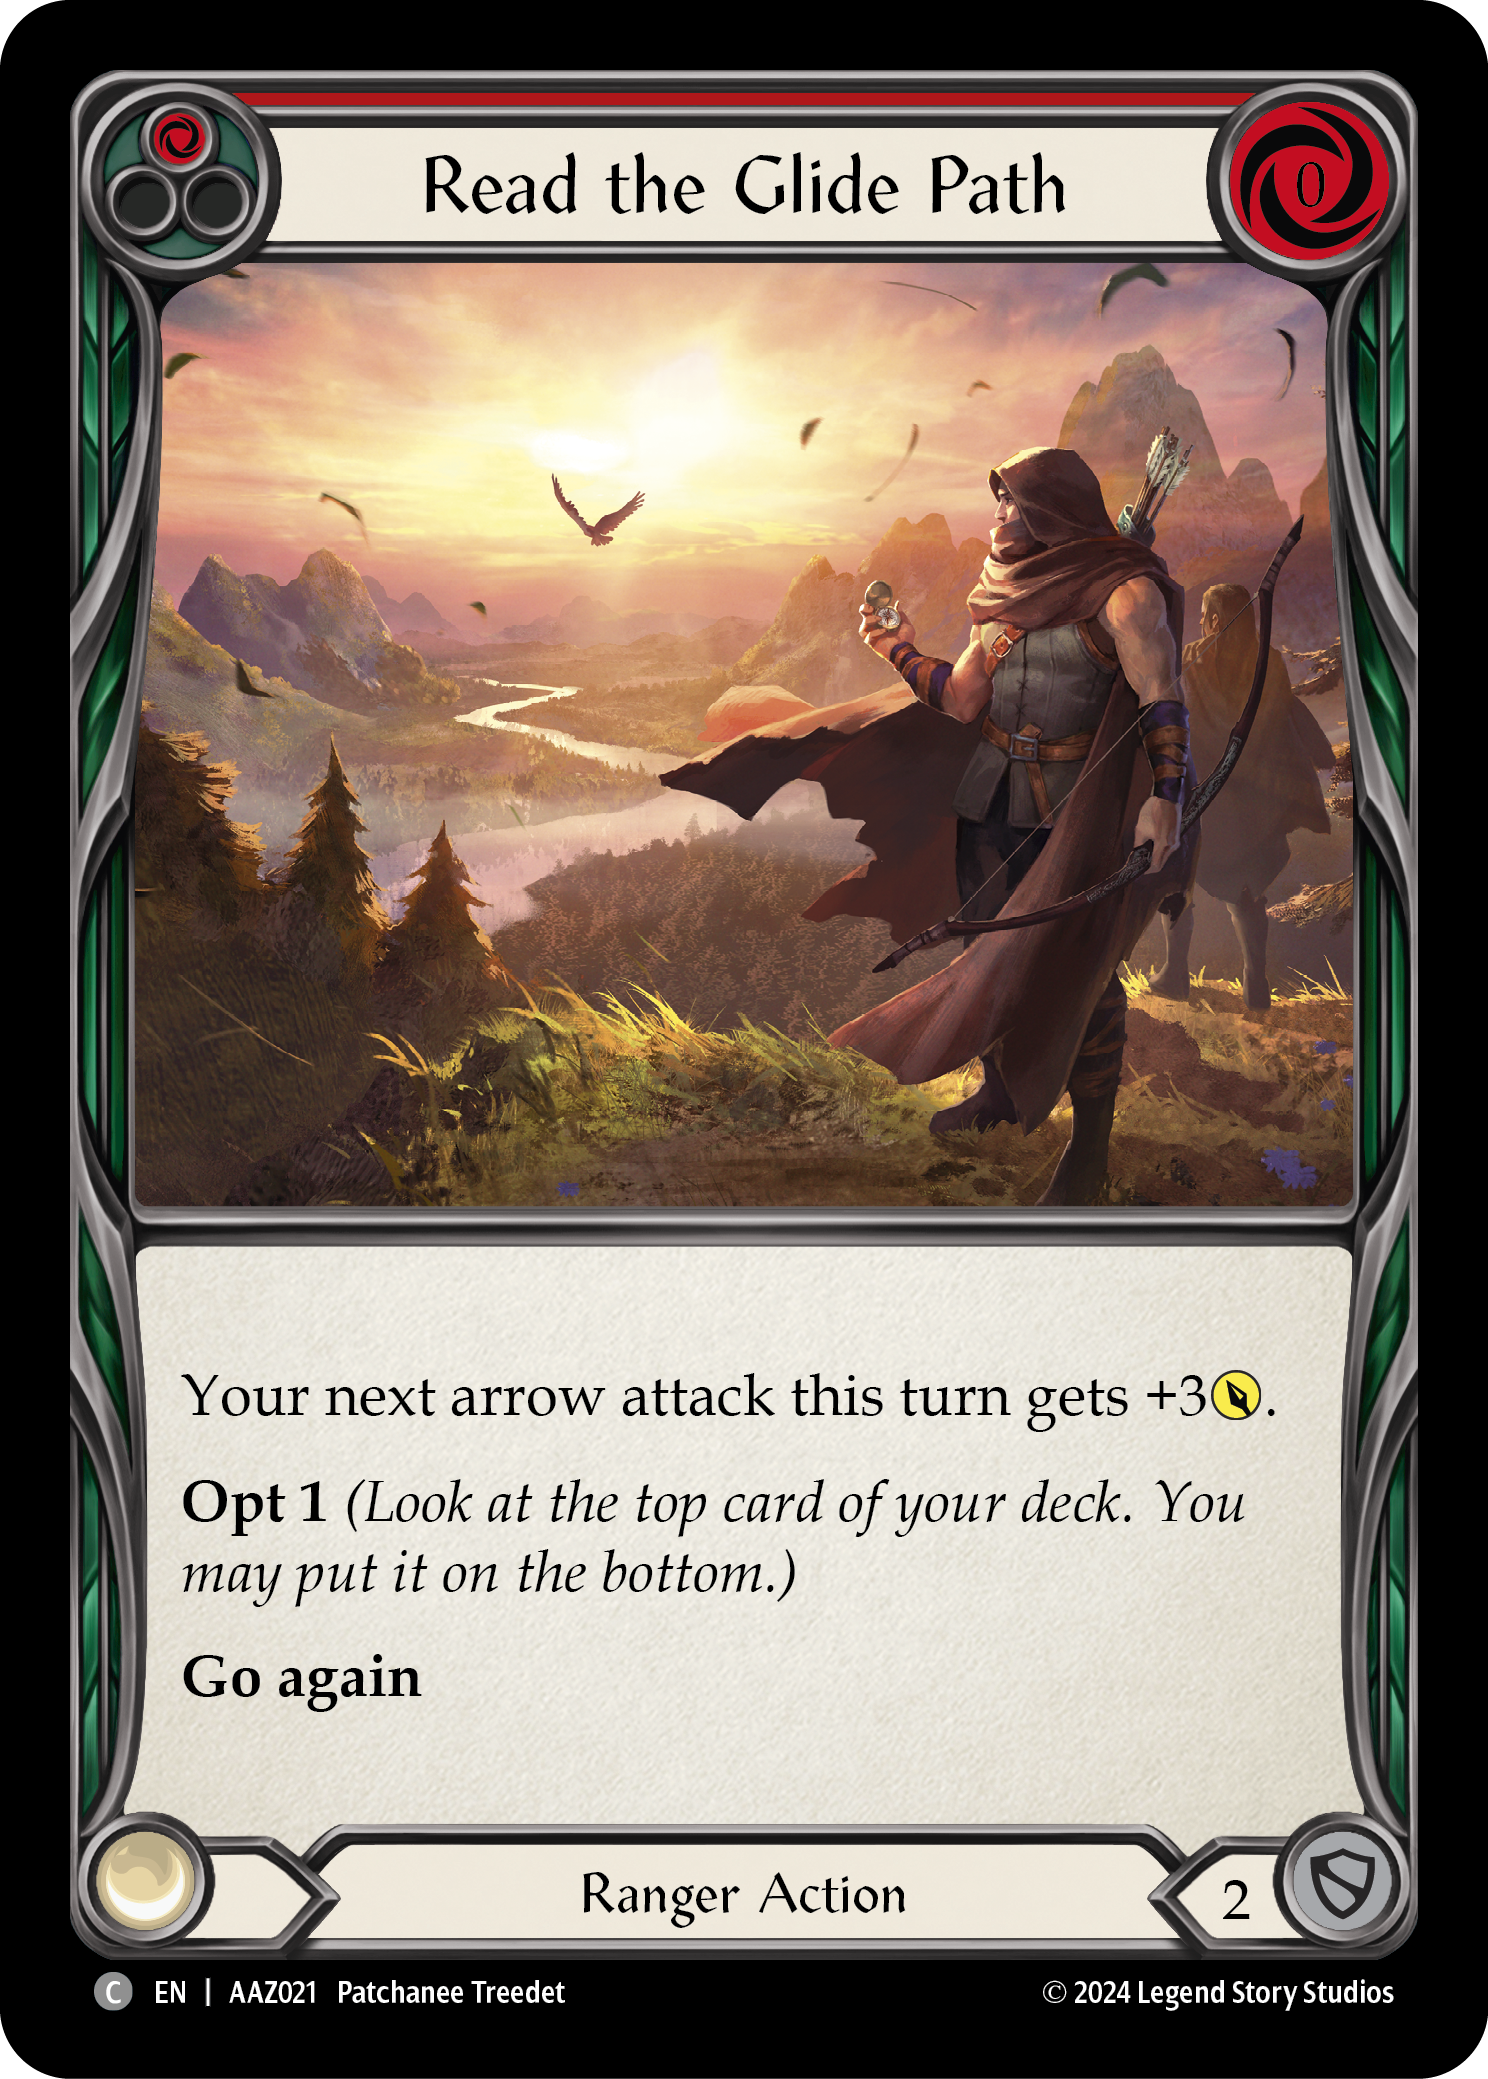
Although Read the Glide Path can only buff arrow attacks, it has so much potential. This deck has so many ways of interacting with the top card of the deck, either through drawing off Death Dealer or activating Azalea’s effect. It's essentially a better Nimblism, with the only drawback being that you can only buff arrows. This doesn’t turn out to be much of a drawback; between the opt from Skullbone Crosswrap and Read the Glide Path, you can almost always ensure that you will get to play an arrow and receive the buff. With the banning of Plunder Run, there was a big need for another powerful attack buff, and this card fits the bill.
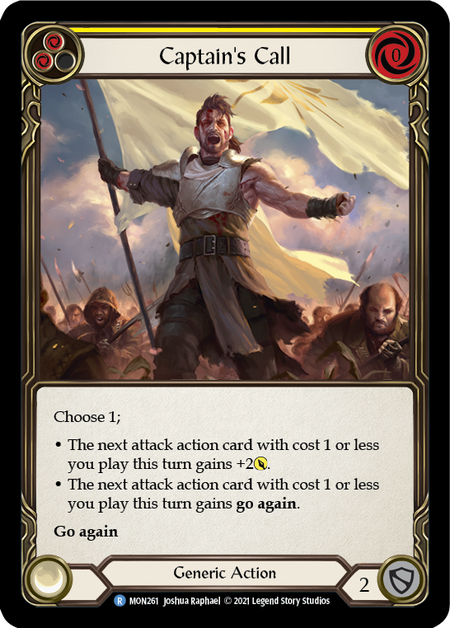
Captain’s Call is a great card in this list because it gives you the flexibility of deciding between buffing your attack or giving go again. Ultimately, I find Razor Reflex better than Captain’s Call because it does both; however, being zero cost gives you more utility on certain turns, especially when you want to guarantee go again on your attack. This card synergizes well with cards like Nock the Deathwhistle, where you can make it more likely for a dominated arrow of your choice to hit your opponent. It is also very beneficial as it can buff your generic attacks- unlike some of the other buff cards in the deck that only buff arrows.
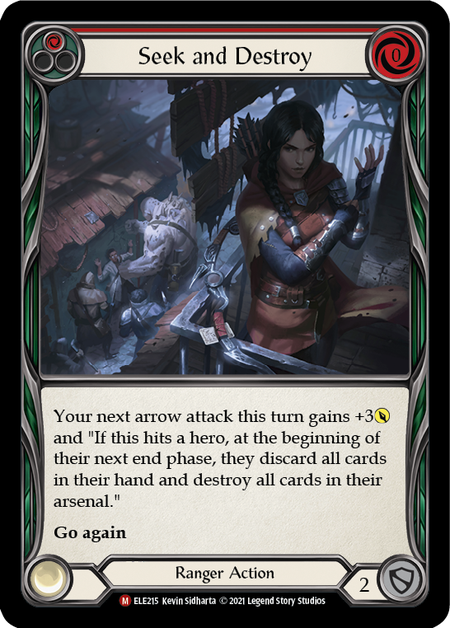
I was originally hesitant to play Seek and Destroy, as you can see in my previous article, but I will happily admit that this card is actually good. Being able to buff your arrows while preventing your opponent from setting up big turns or putting defense reactions in arsenal is very beneficial for Azalea. Every now and again you can force your opponent to lose their arsenal, but even just forcing their hand at an inopportune moment is great. Attacks with meaningful on-hit effects are the future of a good Flesh and Blood deck, and Seek and Destroy helps increase the potency of arrows while also buffing them (unlike Poison the Tips).

A lot of people think it is weird to see Snag in my sideboard, but there is good reason for it. Aggressive Katsu has always been one of the hardest counters to this style of Azalea. Being a deck that does very little blocking leaves you open to taking around 20 damage every turn, and a good Katsu can find those attacks very consistently. However, after I started testing Snag in the Katsu matchup, I found that it was a lot easier to get the upper hand. Most of Katsu’s cards have self-buffing effects, and if you know you aren’t going to block, then by playing Snag you can generally prevent upwards of 5 damage for zero cost. This proved to be the difference between winning and losing in the Katsu matchup, and I highly recommend running the card against Katsu.
Dearly Departed
If you've come here after reading my prior piece, you may wonder what pushed certain cards out. Or perhaps you've got an Azalea deck going already, and are looking at my list saying, "why isn't he using X?" Let's take a moment to run down the notable omissions.
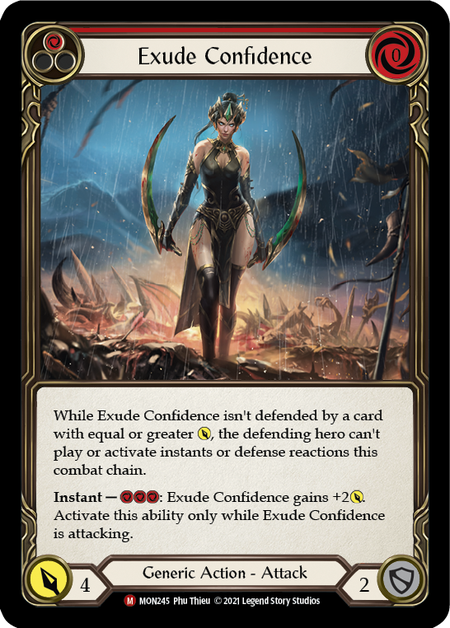
Exude Confidence was useful against Kano, and against decks running lots of defense reactions but not many high-power cards. However, it has never been outstanding for Azalea, and was just filling a gap temporarily while I waited for new cards. Those new cards have now arrived.
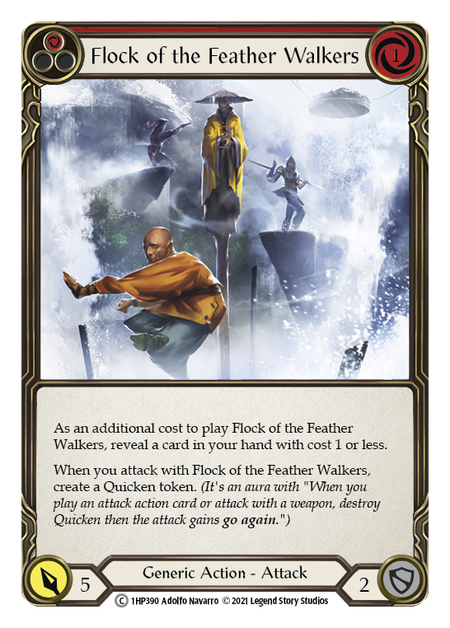
Flock of the Feather Walkers is a great card to run in this kind of Azalea build, and will be one of the first cards that I put back in if I see a need for it. Unfortunately, there wasn’t space to run it in this list, and I tend to prefer zero cost attacks for their ability to be played without needing other cards in hand.
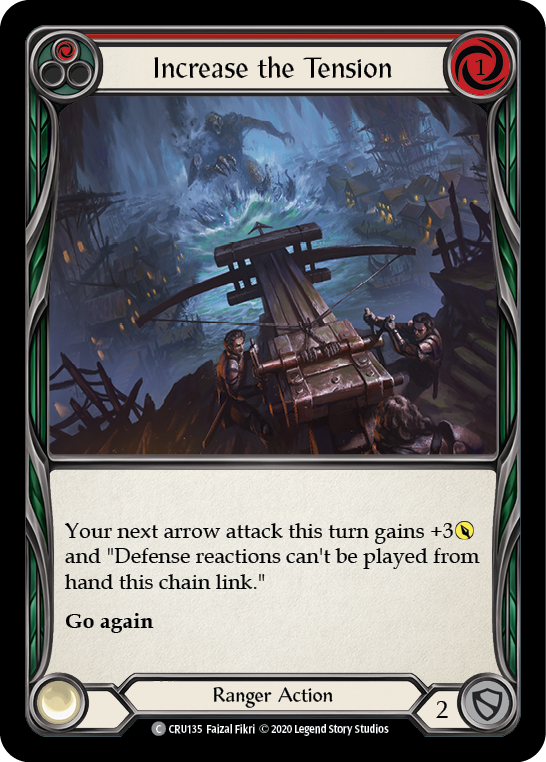
With the introduction of Dreadbore and Release the Tension, more decks are boarding out their defense reactions in the matchup against Azalea. This means that there is less use for Increase the Tension and other zero-cost arrow buffs can take its place.
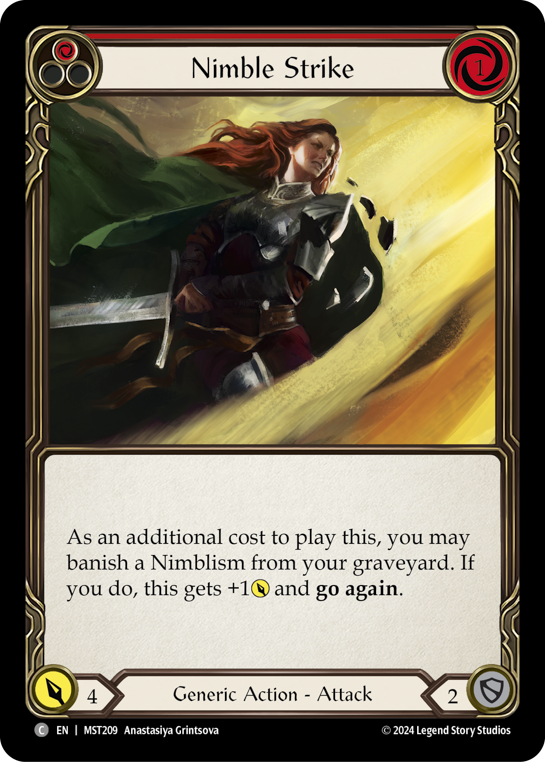
Nimble Strike was one of the lower power-to-cost-ratio cards in the deck, and without any meaningful on-hit effects there just wasn’t room to keep it in. The latest iteration of my deck reduced the total pitch being run in most matchups, and therefore I needed to cut one of my higher cost cards.
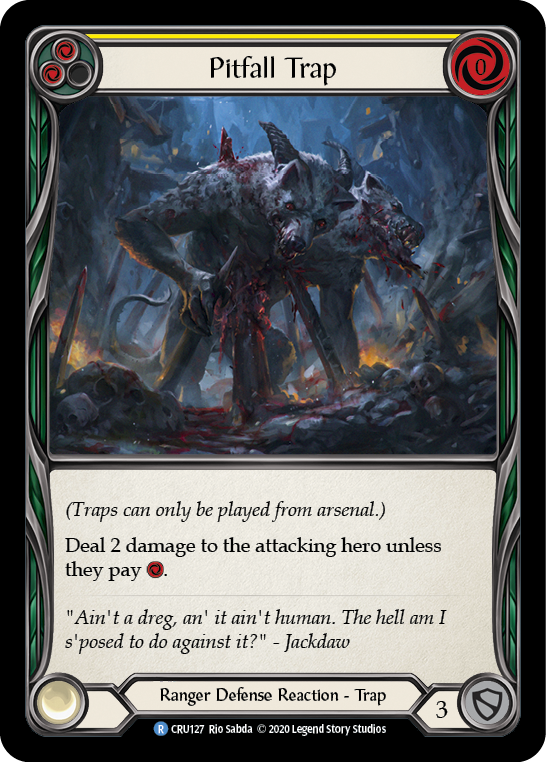
Pitfall Trap was an interesting card, as it gave Azalea a way of guaranteeing a win against most decks when they went down to two health. However, it leaves the deck vulnerable to drawing bad hands; and with the increase in aggressive cards like Rain Razors, the deck doesn’t need any extra support in finishing the kill.
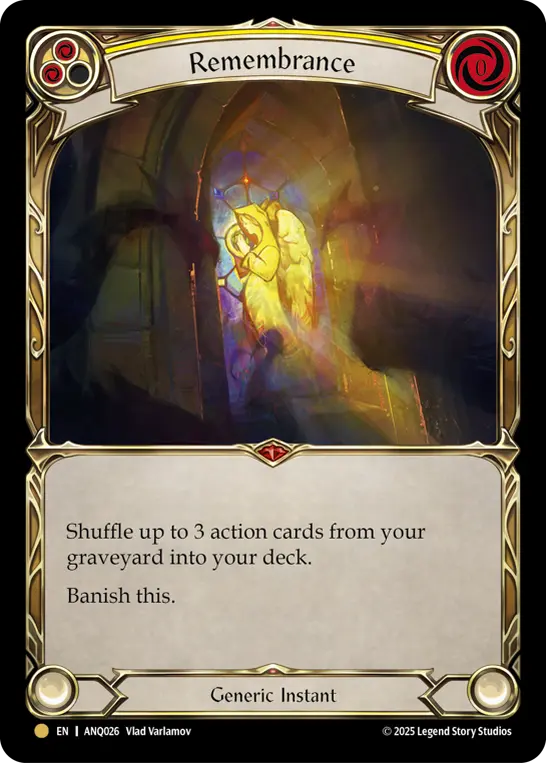
Remembrance was essential in surviving highly defensive matchups, as you could often run out of attacks before winning the game. Fortunately, the deck has become more aggressive since the release of Everfest, to the point where I rarely deck out before finishing.
Sideboarding

Given that Bravo, Star of the Show is such a new hero, it should be no surprise when I say that I have had the least practice against Starvo decks. Going into the Pro Quest, I felt fairly confident with the matchup; but after being knocked out by Starvo in the Top 4, I have gone back to the drawing board. For those struggling into the Starvo matchup, it will be worth practicing with red Fatigue Shot in your sideboard. I am still figuring out what cards to remove in order to make room for Fatigue Shot, but it will likely be 1x Snag, 1x Erina’s Prayer, and 1x Sink Below; my sideboarding advice doesn't include those as I have yet to make the adjustment.
Against Boltyn, Bravo (either), Briar, Dash, Lexi, Oldhim, Rhinar, and Dorinthea
- Take Cover (red) +3
- Sink Below (red) +2
Against Chane, Levia, & Viserai
- Take Cover (red) +2
- Sleep Dart (red) +3
Against Prism
- Battering Bolt +3
- Raging Onslaught (red) +2
Against Katsu
- Take Cover (red) +2
- Snag +3
Against Kano
- Eirina's Prayer (red) +3
- Snag +2
Audio narration by Mark Chamberlain | Background music by Wavecont | Music promoted by Chosic.com | Licensed under creative commons Attribution-ShareAlike 4.0 International