Flesh and Blood is fundamentally a game of math. Cards are built on mathematical foundations; and because of the game's design, a card's value can be assessed along three axes at any given time: its play value, its pitch value, and its block value. Because of this, you can calculate the value of any given play in a relatively meaningful way.
Many have laid out systems for determining the value of a card or a line of play. (You can find a few of those articles from authors Abbas Dedanwalla, Roger Bodee, Frank Hung, Drew Cordell, and Michael Hamilton here.) I'd like to add to that body of work with a simple 'cards in hand' approach that you can put to use in realtime.
Following the unexpected rise of Wounded Bull in the hands of World Champion Michael Hamilton, Clay DeAngelis examined the principles beneath its success, and outlined how to maximize the value of your cards when deckbuilding. In contrast, I hope to supply you with a framework for maximizing the value of each hand.
1- It's Just Math
Value, for the terms of this discussion, is simply calculated by adding together the damage threatened and damage prevented. A hand that blocks 6 damage and threatens 7 is a 13-value play. If you could have blocked for 3 and swung for 11 instead, you would have eked out one more value - and most of the time that would be the right play. In this game, the baseline value we should expect from a card is 3- the value of a typical block. So you use this simple principle to calculate which cards to block with, which cards to pitch, and which cards to play.
Now obviously, what keeps FaB fun is that a lot of complexity is built on top of that - but before we get to that, we must familiarize ourselves with the core principles. And the most core principle of all is that you win if you present more value than your opponent throughout the game.
Let's take the Fai hand below as an example.
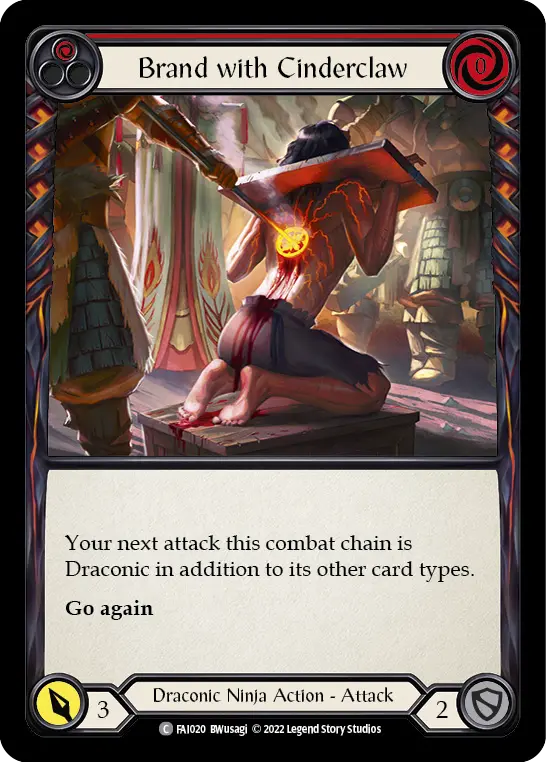
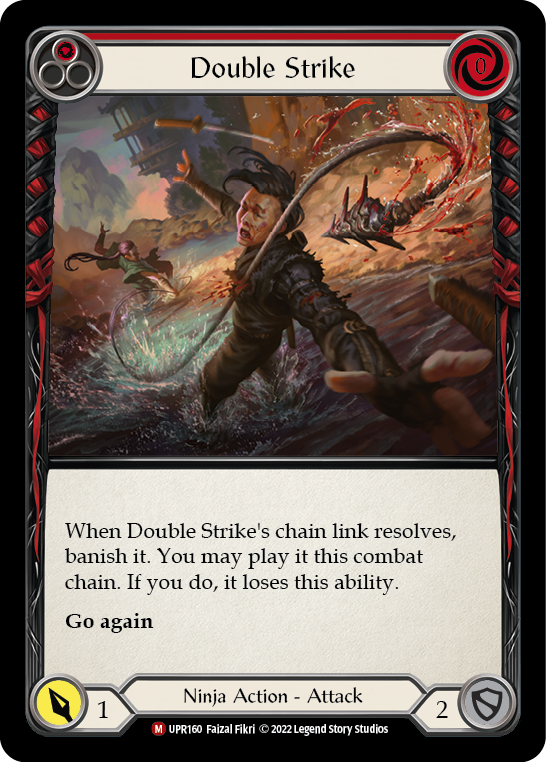
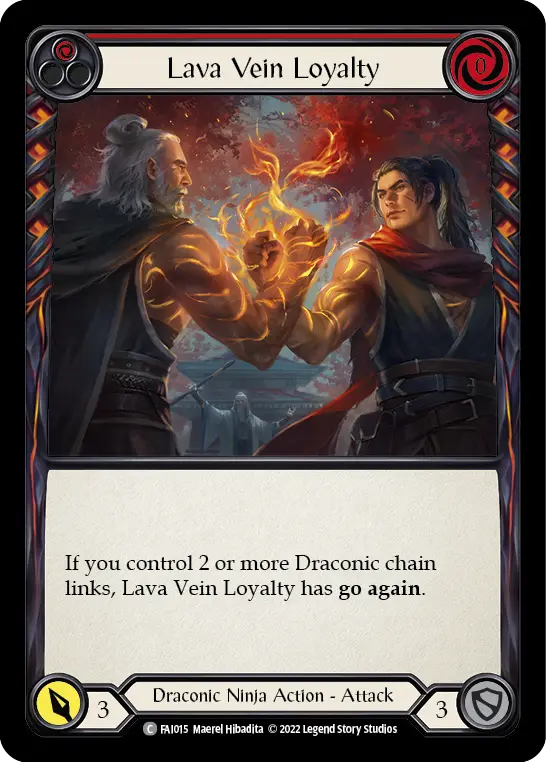

If you're an experienced Fai player, a line of play probably stands out to you already, but let's walk a few paths with value in mind.
One possibility is blocking 7 with Brand with Cinderclaw, Lava Vein Loyalty, and Double Strike, then swinging Snatch for 4 value and a strong on-hit (which might translate to an arsenal worth a further 3 or so value). Your value here is roughly 11 (and an on-hit). Using the base value of 3 per card (and because we should expect better than that, we'll add 1 for your action point), we're aiming to get 13 value out of our hand to be “on rate”. If you hit with Snatch, you would surpass that rate - but we have other options where the value we gain is within our control.
First of all, blocking with Brand seems obviously wrong, as it deals 3 damage and only blocks for 2. Thus, you immediately gain 1 point of value if you attack with it instead of blocking with it. Your value is now 12.
Lava Vein Loyalty is worth the same on defense and offense, so blocking or attacking might initially seem purely like a matter of preference. But due to Fai’s hero power, we can claim an extra point of free value if we get three chain links and pull a Phoenix Flame back from the graveyard. And that is indeed possible if you play out the Brand with Cinderclaw, followed by the Double Strike - which now becomes Draconic - and then the Lava Vein Loyalty.

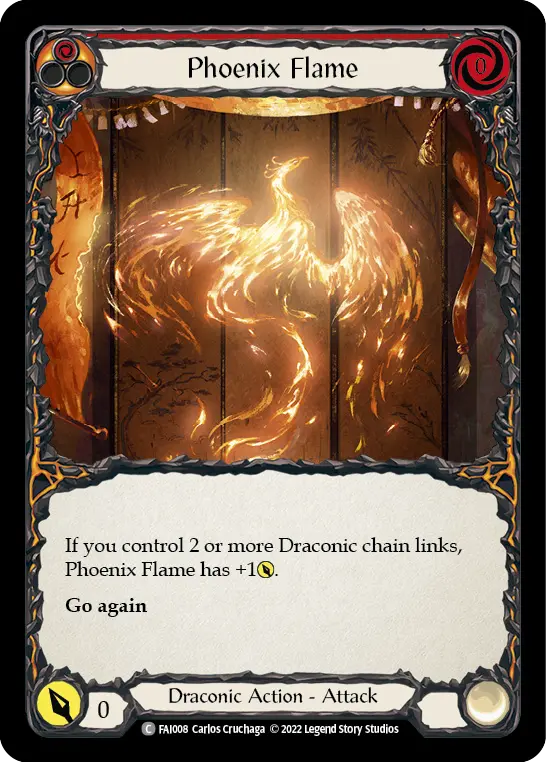
The 3 links allow you to fetch a Phoenix Flame and up your value to 13. And if you have Tiger Stripe Shuko, your second swing of Double Strike gets buffed. Playing your whole hand aggressively, therefore, nets you 14 value. You have successfully gone “above rate” and presented a valuable on-hit.
Now let's swing to the heavy side of the game with a Bravo hand.


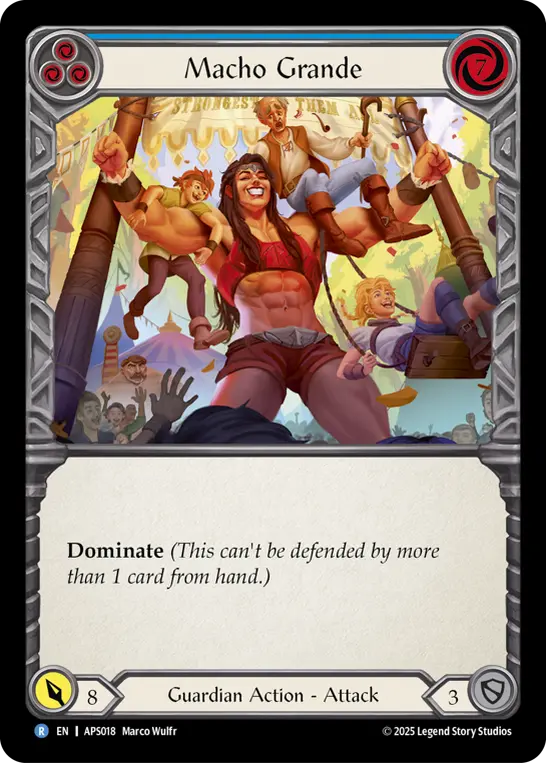
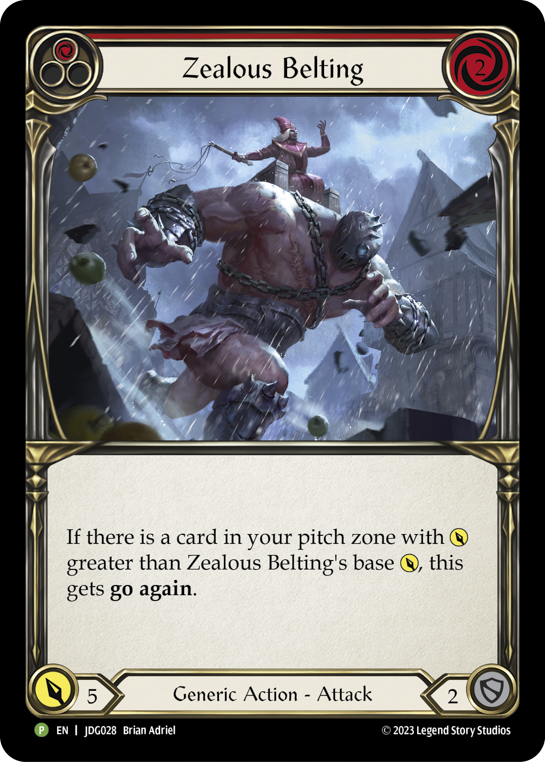
One possibility is pitching all the other cards to play Macho Grande for 8 and dominate. This is obviously an atrocious rate of 2 value per card, but if your opponent has such a low life total that it can close out the game, it might still be the correct play.
Ignoring such an edge case, lets look at other possibilities. Assuming you are playing Anothos, another option is blocking with Zealous Belting and Disable, creating a Seismic Surge token and swinging for 6. This adds up to 11 + the value of a Seismic Surge, which might be worth 1 next turn. Still below rate, but a lot better than the Macho Grande line.
The best line, however, is unsurprisingly the one that attacks - rather than defends - with the red 2-block, and manages to use the extra action point afforded from the go again. The best line would thus look like blocking with one of the blues, creating a Seismic Surge token with another blue, attacking with Zealous Belting, and pitching the last blue for an Anothos Swing of 6. This presents 3 + 5 + 6 = 14 value and a seismic surge token. Another nice turn!

The above examples were intentionally rather simple. The first example included no pitching and only a single on-hit at the end, the outcome of which did not change the most efficient line. The second example was also relatively straightforward, right down to the blues being interchangeable for the optimal line.
In play, you will encounter much more complicated lines, but the same principles apply. Math out whether a card is better used for blocking, attacking, or pitching. And remember that many cards have synergies together: 2 attacks below 3 power trigger Tiger Stripe Shuko, 3 Draconic chain links allow for a free Phoenix Flame, and two cards with cost 3 or greater in the pitch zone buff Anothos, for instance.
If you simply calculate the value generated by each (sensible) line of play and pick the one that gives the highest number, it will go a long way towards making optimal plays.
II- But Your Opponent Matters Too
Of course, reality is never quite as simple as theory. What your opponent does matters a lot when calculating the highest value lines of play.
Consider an early game hand as a Fai player playing against an aggressive Oldhim deck. The Oldhim swings a Spinal Crush at you with 1 resource floating, 3 counters on Tunic, and 1 card left in hand. This is your hand, and your arsenal is loaded.
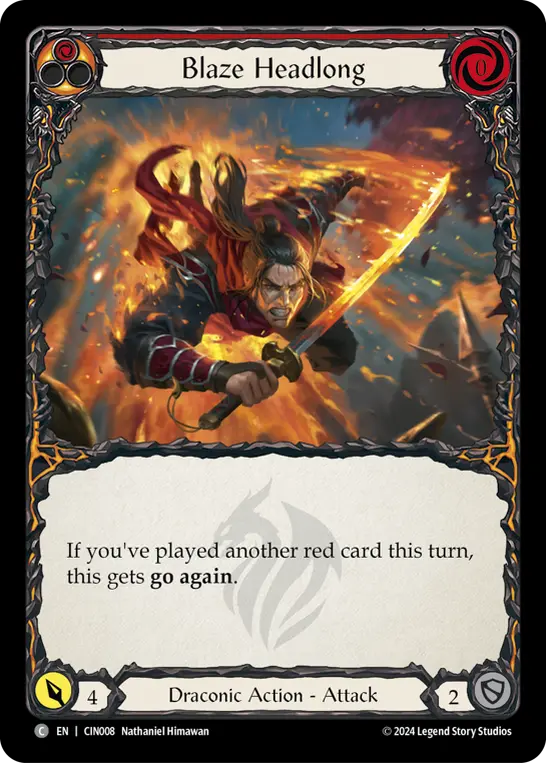


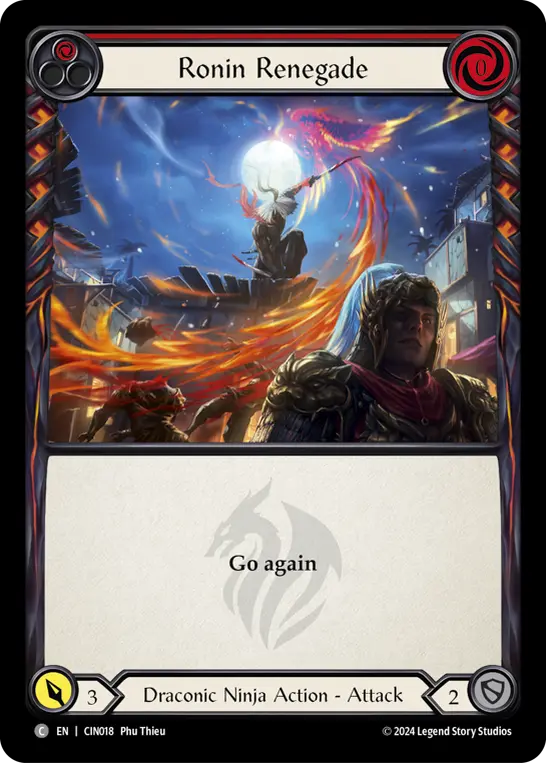
The Spinal Crush is either going to deal 4+ damage and strip your next turn of go again, or you will be left with only one card in hand. Either way, you must prepare yourself to make the most of a single attack. This means that you must block to maximize value, even though you block using cards that do so poorly. But what is the highest value combination of blocking and attacking?
Either you can block with Enlightened Strike, Ronin Renegade, and Brand with Cinderclaw, swinging back for 4 with Blaze Headlong. That is 4 + 7 = 11 value. Or you can block with Ronin and Brand, and swing back with E-Strike for 7. That's also 7 + 4 = 11 value.
In either case, you are looking at a poor hand which equals only 2.75 value per card. But it would seem up to personal preference - for keeping both players' life totals either high or low - whether you picked line 1 or 2.
Now take into consideration what the opponent might be planning. As Oldhim has 2 resources available to them (including Tunic), and has a card in hand, they are threatening the prospect of a Pummel coming down on the attack. Playing around Pummel is typically a value sink unless you have a defense reaction, but in this case one line becomes better value when considering the possibility of Pummel.
If you block seven and save the Blaze Headlong, a Pummel will leave you with no attack - and 7 value all in all. If you block 4 and save both the Enlightened Strike and the Blaze Headlong, a Pummel will still hurt - as it will make you discard the Enlightened Strike and leave you with an attack for 4, rather than 7 - but you will have created 4 value on the offense and 4 on the defense - 8 in all.

As the above example illustrates, both on-hits and potential on-hits from your opponent matter when calculating value. By choosing one line over another in the example above, we give up no value if our opponent does not Pummel, but end up 1 better off if they do.
III- And Not Everything is Easy to Calculate
If your opponent's final attack is a Snatch with an empty arsenal, you must assign some numerical value to their drawing and arsenal-ing a card in order to calculate the value of your potential plays. If the attack was a Blaze Headlong, blocking it out would save you 4 life by foregoing whatever damage you could produce with the cards you used to block; but as it has an on-hit, you must place some value on that.
Now of course, the opponent has some cards they would rather arsenal than others. If you are very advanced, and the game has progressed for quite a while, you can check your opponent’s graveyard and banished zone to make an educated guess as to what the value of the card drawn will be - but mostly I'm content valuing a card draw at 3 value. If you value a card draw at 3, blocking with two 2-blocks that would have swung for 6 the other way suddenly becomes worth it, as they block the 4 damage and the 3 value of the on-hit. This exchange puts you at a +1.
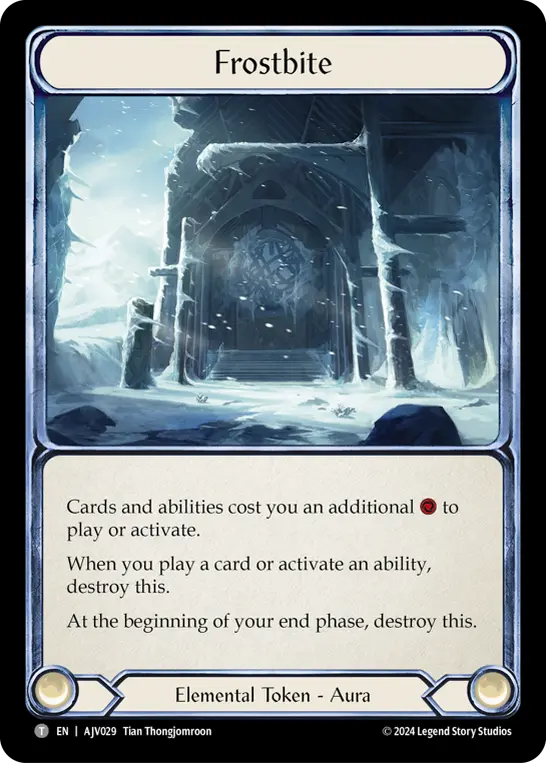
It is customary to count Frostbites as 1 point of value, since from the design end of things, 1 additional resource cost on a card usually ups the damage value of the card by 1. But applied right, Frostbites can be worth much more than 1 value. For instance, a correctly timed Stalagmite, Bastion of Isenloft when the enemy Runeblade has 1 resource floating and Rosetta at the ready, can prevent 4 damage.
The effect of disruption such as this is highly dependent on the game state. What if the opponent has 1 card left in hand and Rosetta ready? You might take away his arsenal by giving him a Frostbite, but maybe the card was a poor arsenal target anyway.
The game has many such interesting decisions, where the value of a play is unclear. Here the player must make decisions based on qualified guesses and quantification of effects that are not based on their face number. Just remember that, in the end, it all boils down to how much damage you are presenting and preventing! All other effects are simply a means to an end.
Putting It Into Practice
So what do we do with this? First of all, you should practice playing with this line of thinking in mind. The math is often easy, but there are many possible plays and they might depend on factors that are inherently variance-based. You must get a feel for these things by practicing. The more you practice, the better educated your guesses will be.
An initial way of practicing that I have found useful is goldfishing. Simply imagine that your opponent attacks for 12 vanilla damage each turn and plan out what the best line of play is for a random hand. This is a fast and easy way to get into the habit of playing with math-based value in mind. In the end, nothing beats playing against real players and seeing when you are punished or rewarded for a given play; but reps matter too.
In part 2 - which will be a Pro Series article for our subscribers later this month - I will be discussing gameplans which have to think of value in a different way: namely combo, fatigue, and board permanent plans. Common for all three of these strategies is that they demand a different perspective on value from both players.
Background Music by Wavecont, Acoustic Crossing by LesFM | Licensed under creative commons Attribution-ShareAlike 4.0 International | Music promoted by Chosic

