

One of the signature mechanics of Flesh and Blood is that each card can be utilized in 3 different ways. It can be played for its printed purpose, used as a defense, or pitched for resources. This element of multiple roles is the basis for the method of card evaluation I'm sharing today.
Card evaluation is a topic that many have talked about. There are a few notable methods of evaluation that others have put forward to attempt to quantify the value of any given card. Abbas Dedanwala, Roger Bodee, Frank Hung, and Drew Cordell have explored the mathematical modeling behind the economy of Flesh and Blood combat. Many point to a 'rule of 8' that seems to be a constant governing the numbers in the 4 corners of an attack card.
For my contribution to the field, I want to set aside big-picture mathematics and focus on calculating a value specifically for each role it can serve. With card effects being so temporary, most card valuation comes down to a simple math equation. This method is fast enough that you can reasonably run the numbers as you're considering your options in-game.
Once we’ve established the value of using each card in a specific way, you can start to see the ceiling of each card and the floor. When looking at cards, try to focus on how you want to be using them. It's also useful to note weaknesses in other areas- but only playtesting them in different decks and matchups will inform you how often those weaknesses actually come to light.
Playing the Card
A card game is built around playing cards. Most cards put in your deck will be played at some point, even if that is not their primary purpose (while that may sound counter-intuitive at first blush, in most decks there are cards that are included primarily for blocking and/or pitching).
For most attack action cards, evaluation is fairly simple. Here is the formula I use for cards that just deal damage.
Card value = damage dealt - cost of playing the card
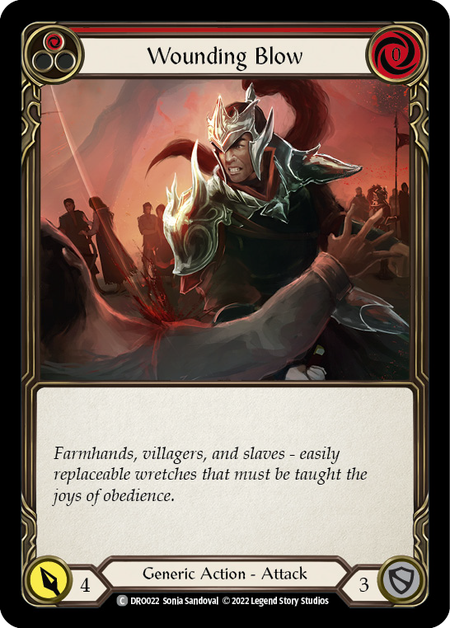
Wounding Blow’s value is simple to calculate with that formula. It deals 4 damage and it costs 0 resources to play. So using the formula above, you might expect the value of this card to be 4.
But there is a small twist that I haven't introduced yet, and it will apply to most cards. The true cost of this card is 0 resources + 1 action point. The true expression should be:
Value of Wounding Blow = 4 damage - (0 resources + 1 action point) cost of play
For these calculations, we will make a couple of assumptions. We’ll assign the value of 1 resource to be worth 1 damage. This is based on the assumption that an average card is worth 3 points. This is not meant to be 100% true, but it is a great starting point. We’ll assign the value of an action point to also be worth 1 damage.
Wounding Blow is therefore worth 3 damage when played as an attack.
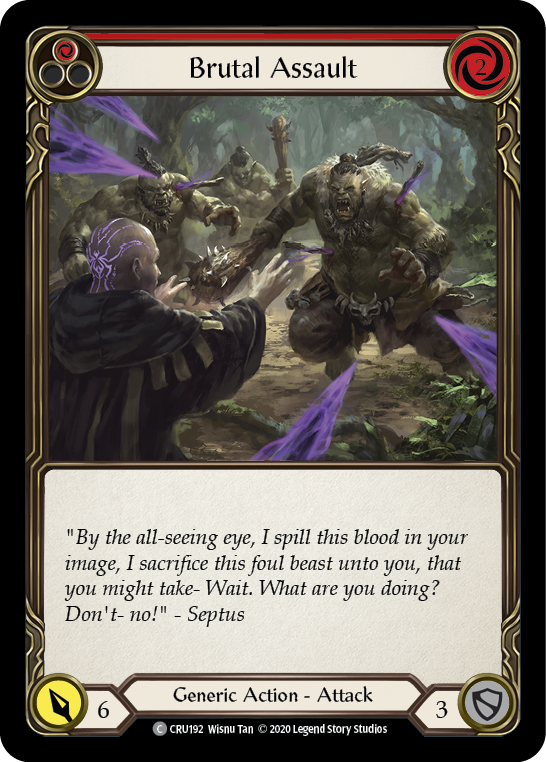
As is the convention, we'll repeat the exercise on Raging Onslaught before we get into conditional effects and on-hit triggers.
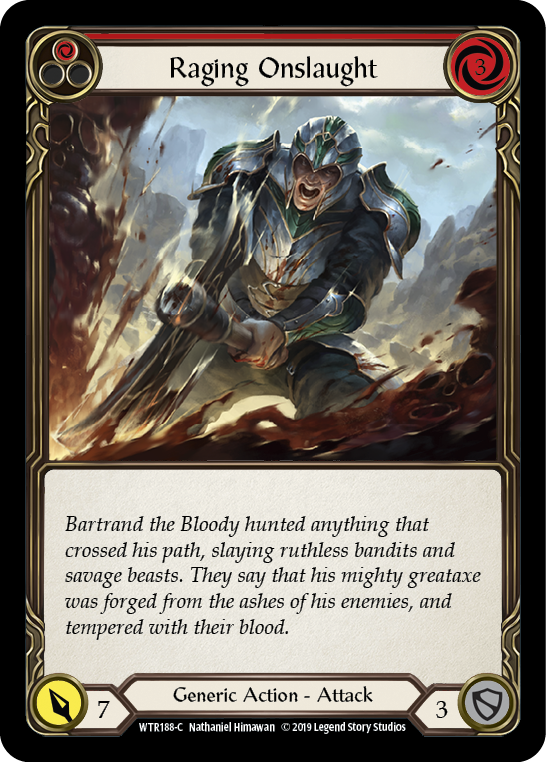
Value of Raging Onslaught = 7 (power) - 3 (resources) - 1 (action point) = 3
Although Raging Onslaught and Wounding Blow are both worth approximately 3 damage when played, most decks will have a preference for one versus another. A deck that is short on blues or has several ways to generate extra action points might prefer Wounding Blow, while a deck that plays plenty of blue resource cards might appreciate that Raging Onslaught efficiently converts their blue resource cards into damage.
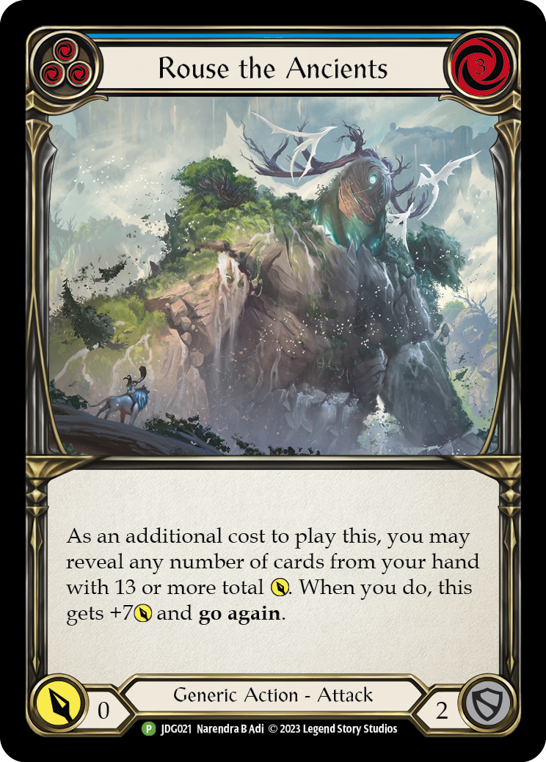
Next let’s bump it up a notch with cards that require you to meet a condition They aren’t hard to calculate how strong they are when you are doing what the card asks you to do.
Rouse = 7 (power) - 3 (resources) - 0 (has go again so no action point) = 4
Revel in Runeblood = 4 (runechants are worth ~1 damage) - 0 (go again) = 4
As you can see, this system does not hold to a mathematical constant that all cards share- and that's because we're examining only a single use for the card at any given time. You can see here that Rouse and Revel are better attacks than Raging and Wounding- but you can expect that they're worse in some other role!
Rouse the Ancients asks you to reveal 13 or more power worth of cards in your hand when you play it.
Revel in Runeblood asks even more; it requires you to play an attack and a non-attack action before you can get any benefit out of it. On top of that, it requires you to make another attack after playing it, because those Runechants will go away if you don’t cash them in.
To find out how often these cards will do what you would like them to, you have to play games and get practice in with them. It is important to look at what the ceiling on the card is, to see if it is even worth trying to make it happen.


Finally, we have conditional cards that your opponent has some influence over. This is where a lot of matchup dependency comes in.
Scar for a Scar looks a lot like Wounding Blow when you evaluate it, but if you are lower life than your opponent, it doesn’t cost your action point. So that becomes a question you need to answer before you can properly evaluate the card: how often is your health lower than your opponent's?
Snatch is a great card when it hits. Getting an extra card is a great reward for your card going unblocked. But then you have to ask how often it will go unblocked, and how much it hurts your opponent to be forced to block this card. These evaluations are never easy and come with playtesting and experience.
Defending with the Card
Blocking value is also an easy calculation.
Card Value = damage blocked - cost of blocking
For most cards, defending isn’t Plan A. These cards block for 3, 2, or 0 and have no cost to defend with them. In general, you only want to be defending with cards if they provide more value to you on defense than they would on offense. Because of that, I will only look to defend with my cards when my opponent is threatening an impactful hit trigger, or the value gained by blocking is more than I can gain by using them in a different way on the following turn.
In contrast, defense reactions are frequently cards you can put in your deck for the sole purpose of defending. You give up a lot of other uses to have a card that is specifically good at defending. These red defense reactions cannot even be played unless your opponent is attacking you. And at red, they are horrible resource cards.
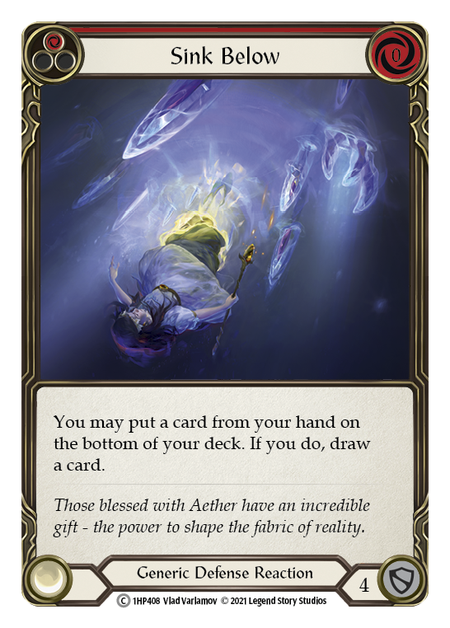
Value of Sink Below = 4 block - 0 resources - 0 action points = 4
Like I said at the start of the article, our intention is to evaluate cards based on their ceiling and best case. But it is also important to note that you won’t always have the option to defend with the full value of a card. If your opponent attacks you for 3, your Sink Below may not be able to get 4 points of value on defense.
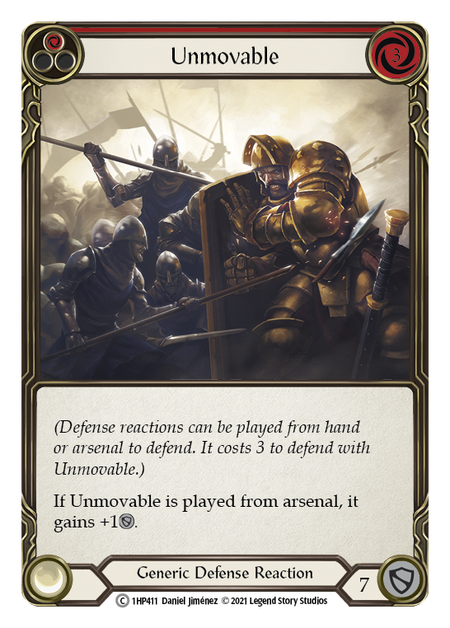
This is much more relevant with larger defense reactions. Unmovable has a solid rate, but frequently your opponent isn’t attacking you with a single source of 7+ damage that you want to block. It was particularly good against Starvo because he was attacking with a large attack almost every turn. These big defense reactions are incredibly potent in the right matchup, but they can be a pretty big liability outside of them, which leaves them as a metagame call, even in decks that can happily support playing them.
Pitching for Resources
As I stated in the attacking section, you can roughly assume you are getting 1 point of value for each resource spent. So, assuming you can spend all the resources, you get 1 for pitching a red, 2 for a yellow, and 3 for a blue.
Blue cards you put in your deck will primarily be used for resources, but you want to consider the other factors when choosing which blues to put in your deck. Always ask yourself what else you can do with a card if you can’t use the resources or don’t need them.
The most obvious thing is blocking. I try to make sure at least some of my blues block for 3. If I have more resources than I can use, it’s great to be able to spend some cards on defense.
Blues can also be pretty solid cards to play as well. Usually, these blues that are good to play are high rarity cards that only exist at blue, or they are blue cards that you don’t gain as much by going to the next color version of them.

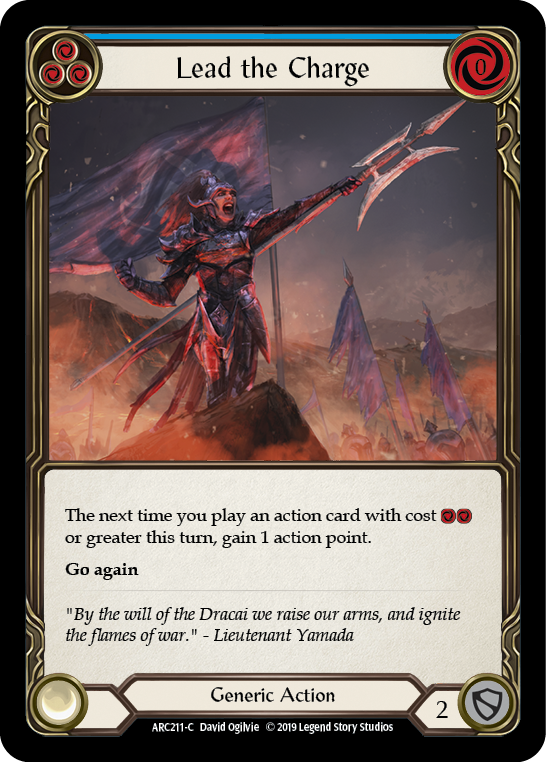

These cards are all great because, in the right hands, you are happy to play them. In the case of Lead the Charge and Captain's Call, when you play them with the correct cards, they are just as effective as their red versions. Mauvrion Skies red is better than its blue counterpart only when your next Runeblade card hits; you're happy to play blue as a resource card that can give an attack go again and add a threatening on-hit trigger.

Become the Arknight is an example of an extremely strong blue that isn’t available in other colors. It blocks for 3, can significantly improve any hand, and is a blue. You are frequently happy with all 3 options this card provides.
One final thing to consider is not all blue cards in your pitch zone are created equal.

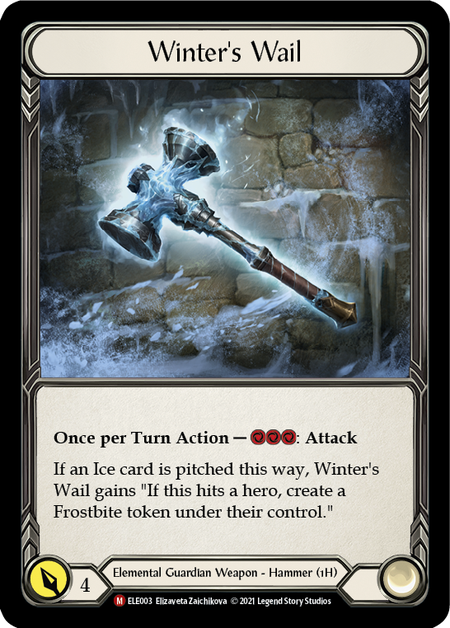
There are quite a few cards in the game that ask specific things about the cards you pitch. Winter’s Wail, for example, gives you a nice bonus when you pitch an Ice card. Kodachi asks you to pitch cards that cost 0. To meet these cards conditions, you’ll frequently have to make sacrifices in other areas of the cards.
Putting It All Together
Now that you know all 3 components of evaluation, we can use this to help determine how to build our decks. This changes if you are playing limited, commoner, blitz, or classic constructed. It also depends on what your hero or deck’s game plan is, and even the matchups you are playing.
This is the deck I won a Pro Quest with near the start of the season. Starvo was enemy number 1. In that matchup, I was playing as many defense reactions as I could, with the intent of grinding him out until his deck was mostly just mediocre 2-block Lightning and Ice cards. To facilitate this game plan, I played a lot of blue Ice cards to enable Winter's Wail and Oldhim’s defensive react ability, as well as a lot of 3 block blue cards to enable the expensive defense reactions while also blocking well when I needed them for that.
The defense reactions are what the deck is built around. This build takes on a defensive role in every matchup possible. As such, we have to be very selective with what attacks we include.

Enlightened Strike looks like a weird include in a controlling Guardian deck; the go again mode requires a lot of cards to make use of, and is also below rate because our deck's average pitch value is so high.
Value of E-Strike (go again) = 5 damage - 1 card (roughly valued at 3) = 2 value
The main mode you actually choose is the draw a card mode.
Value of E-Strike (draw) = 5 damage + 1 card - 1 card - 1 action point = 4 value
If you have an empty arsenal with an Enlightened Strike and any other card left in your hand, you can choose the draw a card mode to get an attack that threatens 5 damage at the cost of just the attack and your action point. With access to Crown of Seeds, the risk of putting an unplayable card into your arsenal is completely gone. This makes E-Strike a great inclusion in a Crown of Seeds deck.
Although the go again mode is below rate, having that flexibility for when you have a turn with a full hand is a nice bonus on a card that you are happy to play for a different reason.

Oaken Old’s unfused valuation looks exactly like Raging Onslaught from before.
Value of Oaken Old (unfused) = 7 damage - 3 resources - 1 action point = 3 value
However, when you fuse it, the rate you get is insane.
Value of Oaken Old (fused) = 9 damage + (on hit they lose 2 cards) - 3 resources - 1 action point = 5 value + potential on hits
A key additional note here is all 3 of these cards block for 3. They can’t be used as resource cards, but they do play defense well when you draw a hand that isn’t looking to attack with them. That makes them all great attacks for inclusion in a defensive Guardian deck.
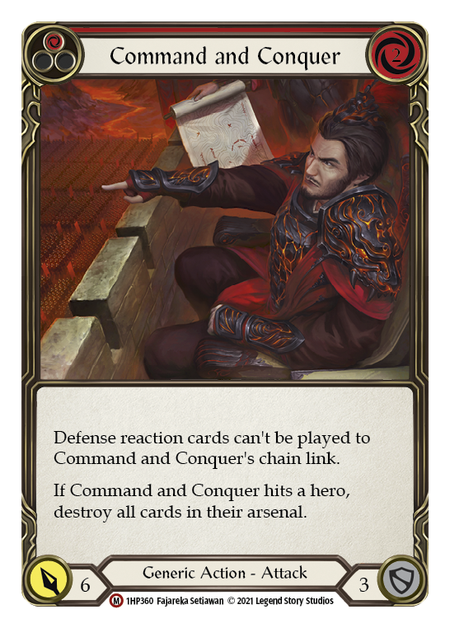
Command and Conquer is worse than the cards above by a reasonable amount. It can be very awkward for this Oldhim deck because it can be very difficult to spend the 1 extra resource you will have left over if you pitch a blue for it. However, in matchups where they do not have a lot of cards they do not want to block with or are unable to block with, it has an extremely threatening on-hit effect.
Value of Command and Conquer = 6 damage (+ potential on-hit) - 2 resources - 1 action point = 3 (+ potential on-hit)
This card is fine on rate, but if you can’t spend the last resource you gain from pitching a blue to play this, you should treat this as costing 3 resources.
Value of Command and Conquer (no use for the change) = 6 damage (+ potential on-hit) - 3 resources - 1 action point = 2 (+ potential on-hit)
As such, this card is really matchup dependent. I found myself boarding out this attack more than most other options in the deck; and if it wasn't for a nice interaction with Pummel, it's a card that likely would be cut from the deck.


When you pitch a blue and play Command and Conquer, you’ll have 1 resource left over. The best way to spend that resource is with a Tunic counter. You can use the Tunic to generate a second resource and toss Pummel on your C&C. On top of being extremely resource-efficient, Pummel being an attack reaction plays super well with everything Command and Conquer does. It prevents defense reactions, so they can’t respond with a reaction of their own after you Pummel; and it also has a powerful on-hit effect.
The power of your sideboard cannot be overstated in Flesh and Blood. Pummel is a card that is bad on defense. It isn’t a resource card. And to play it offensively requires you to be playing another attack. This card is something that you only want when you plan to get to your turn with at least 3 cards and want to be attacking.
There are some matchups where we need to shift the gears. Playing our defensive and controlling strategy won’t always work, and playtesting and learning your matchups will teach you when that isn’t the case. For those matchups, cards that do not work on offensive become a huge liability. You’ll notice the deck above had 71 cards and 11 red defense reactions. That isn’t a coincidence. In matchups where you need to be the aggressor, you have the flexibility to cut every single defense reaction and shift into a more proactive gameplan.
You can mitigate cards' weaknesses if you know what you will need to be doing in specific matchups. Pummel and defense reactions are both very good at one specific thing, so if you can correctly identify when you need to be doing the thing they are good at, you can benefit massively from it.
Closing Thoughts
These are the foundations I use to evaluate every card they print and every card I put into a deck. When building decks, I always need to ask what role or roles each card fills. If you are playing a format with sideboards, look at how you can avoid each card’s weaknesses through sideboard decisions. Every card has a cost and a weakness. It is important to see the whole picture of each card you are putting into your deck.
Background music is Vopna by Alexander Nakarada | Music promoted by Chosic | Attribution 4.0 International (CC BY 4.0)