September 4th was a monumental day for Flesh and Blood. A much-anticipated article by James White addressed the state of the game and how LSS planned on addressing issues plaguing the competitive scene. Alongside expected targets Bonds of Ancestry and Art of War were two cards that shook Kano players to the core: Tome of Aetherwind and Tome of Fyendal. Two pillars of the Kano deck are gone with no replacements in sight - the darkest day in Kano’s existence.
With Rosetta’s release moments away and no apparent viable Kano deck swimming to the surface, Kano players panicked en masse, and many (including myself) planned on jumping ship. Kano was finally dead and gone, burnt to ash with his beloved books.
Yet from the ashes, Kano has come roaring back.
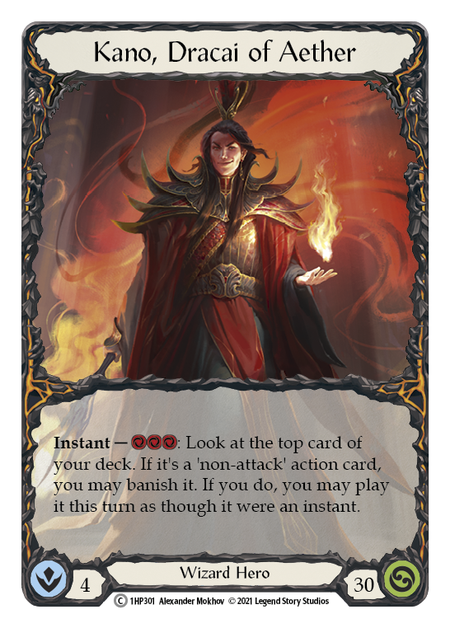
My name is Ronán Sovitzky, better known as my discord name Blazing for Lethal. I have over 12,000 games on the Lord of Aether, and I am here to explain the ins and outs of Kano in a post-tome world.
The Core
If you joined us for our prior examination of the 'Unga Bunga' Kano build, you've read this part before. But if this is your first stop, we still need to cover the core elements of Kano which have not changed, and likely never will.
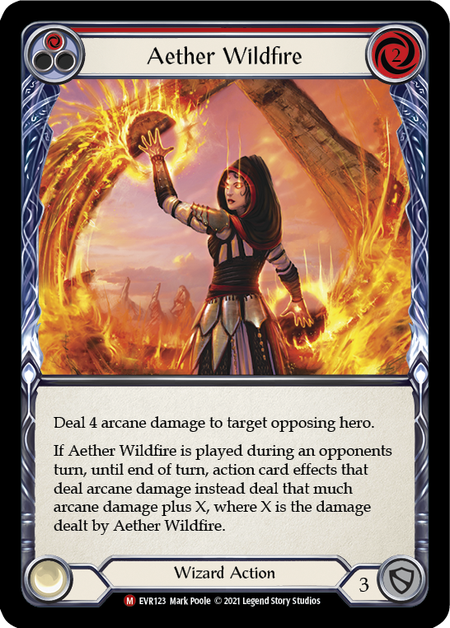
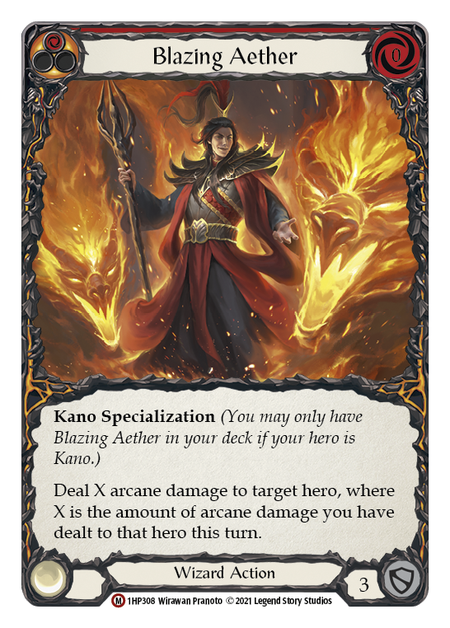
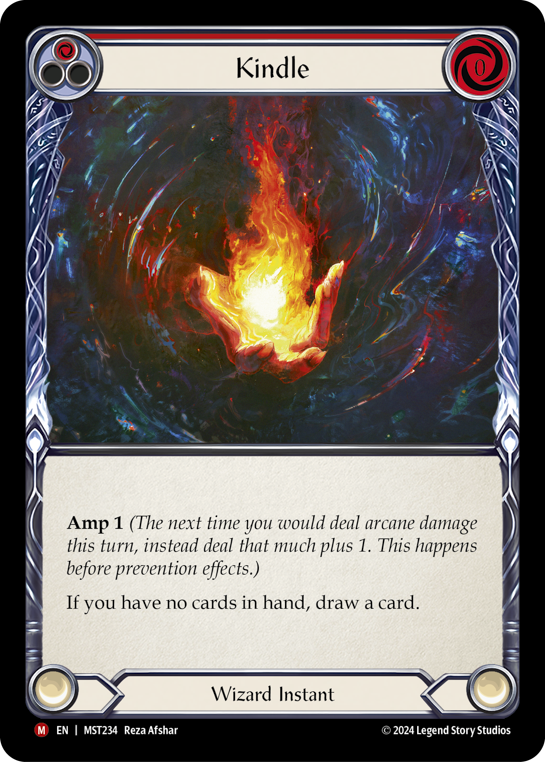
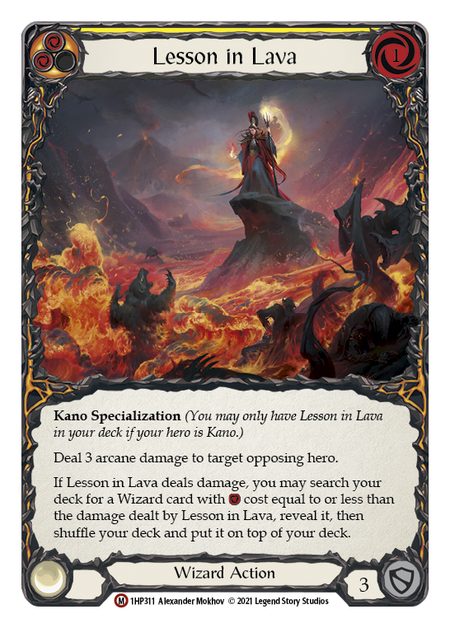
Each deck contains the minimum requirement of Aether Wildfire, Blazing Aether, Kindle, and Lesson in Lava. No Kano deck in this age can leave home without a playset of each card.
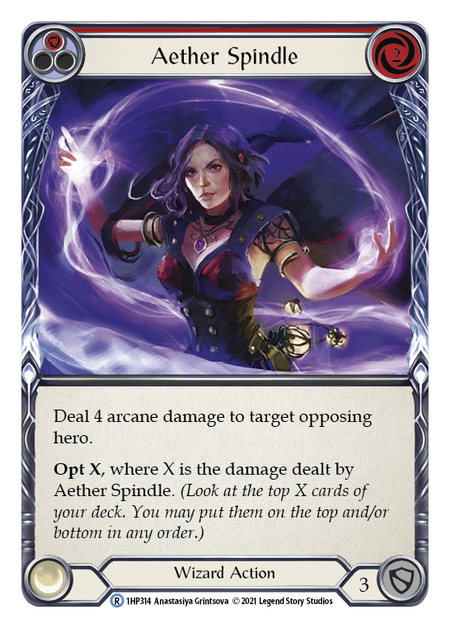
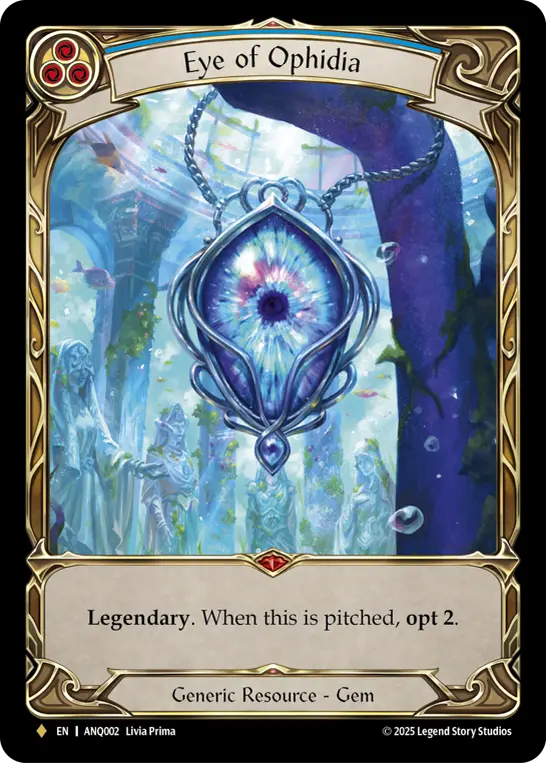
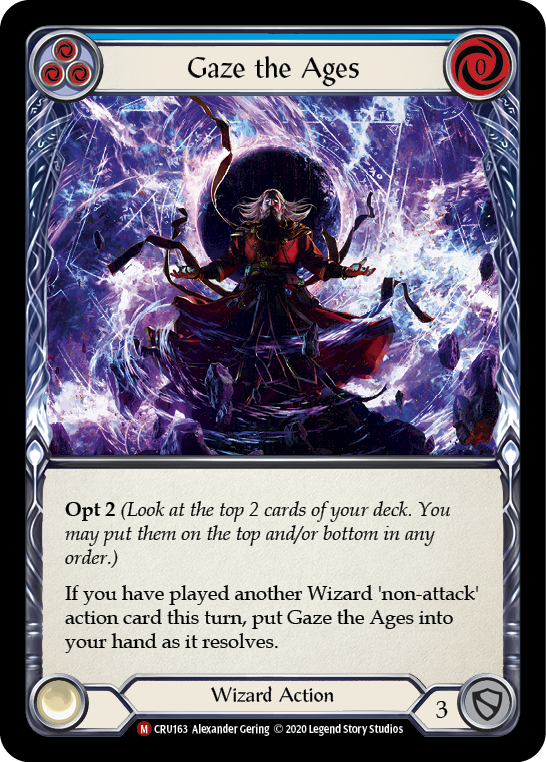
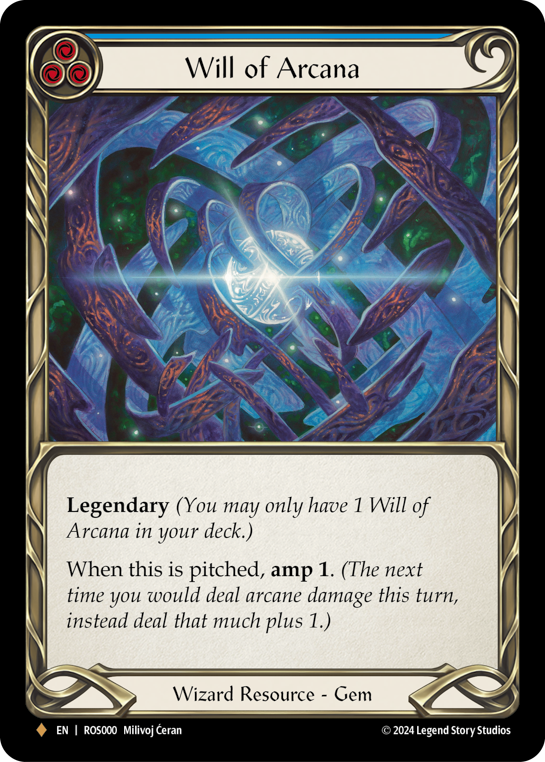
Joining their ranks as staples are Aether Spindle and Sonic Boom. Three Energy Potions and one to three Potions of Déjà Vu maintain their treasured slots as combo extenders, enablers, and emergency resource generators. Gaze the Ages, Will of Arcana, and Eye of Ophidia round out our haymaker slots as extremely flexible blues, allowing for many devious tricks combined when with Potion of Déjà Vu - these are never an unpleasant draw.
Finally, Kano relies on a robust 33-36 blue count to fuel his Arcane manipulations, and it is here that we begin to see distinct variations between Unga Bunga and Tempo.
Now Let's Get Into The Tempo List
Weapons
- Waning Moon (1)
- Crucible of Aetherweave (1)
Equipment
- Alluvion Constellas (1)
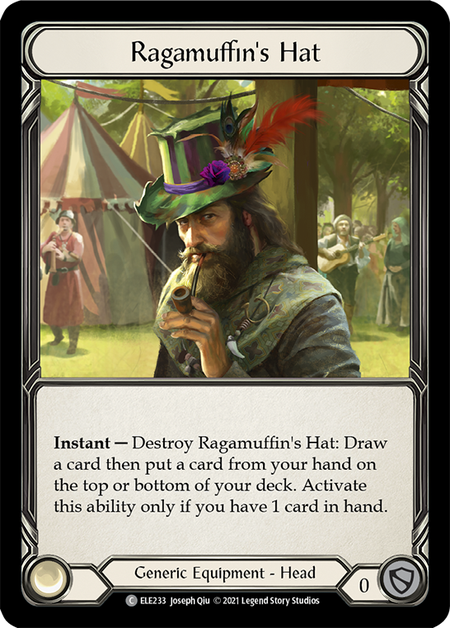
- Ragamuffin's Hat (1)
- Fyendal's Spring Tunic (1)
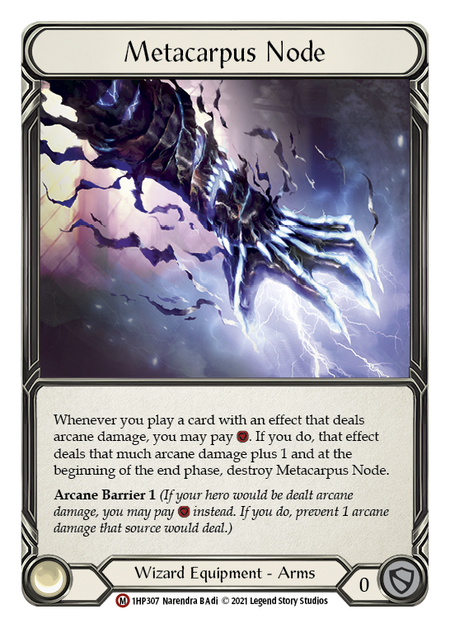
- Metacarpus Node (1)
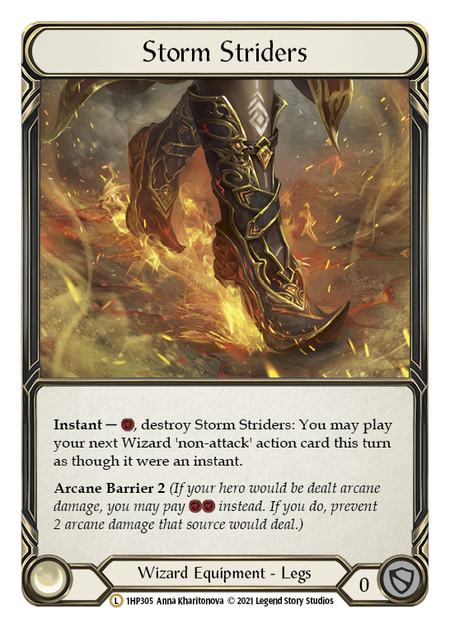
- Storm Striders (1)
- Threadbare Tunic (1)
Loadout
- Aether Flare (Blue) (3)
- Aether Flare (Red) (3)
- Aether Spindle (Red) (3)
- Aether Wildfire (Red) (3)
- Blazing Aether (Red) (3)
- Aether Arc (Blue) (2)
- Energy Potion (Blue) (3)
- Chain Lightning (Yellow) (1)
- Chorus of the Amphitheater (Blue) (3)
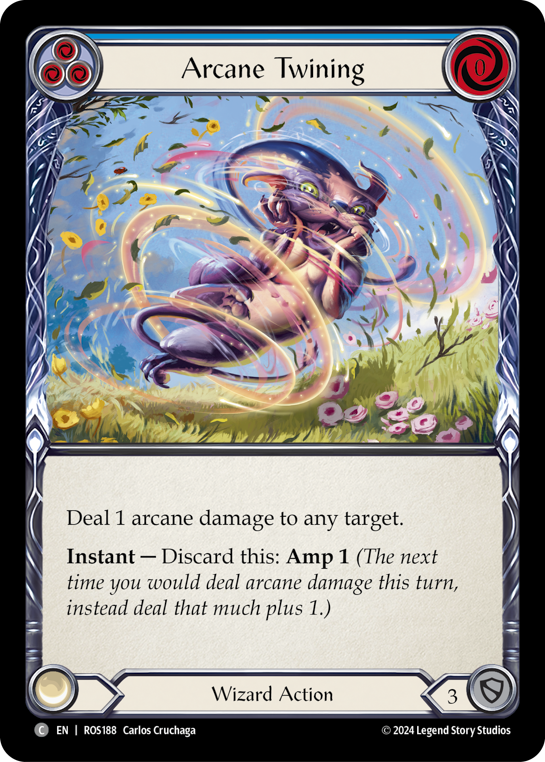
- Arcane Twining (Blue) (3)
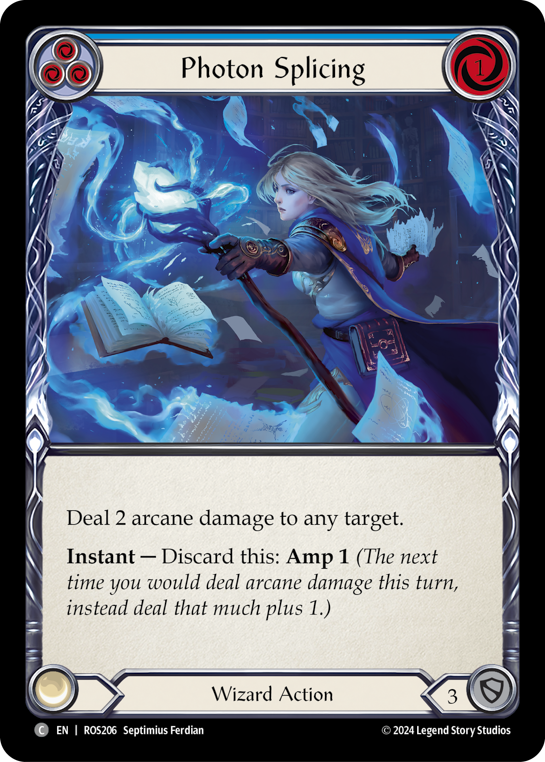
- Photon Splicing (Red) (3)
- Potion of Déjà Vu (Blue) (3)
- Overflow the Aetherwell (Blue) (3)
- Gaze the Ages (Blue) (3)
- Overflow the Aetherwell (Red) (2)
- Destructive Aethertide (Blue) (3)
- Open the Flood Gates (Blue) (3)
- Eye of Ophidia (Blue) (1)
- Snapback (Red) (2)
- Photon Splicing (Blue) (3)
- Kindle (Red) (3)
- Lesson in Lava (Yellow) (3)
- Scour (Blue) (3)
- Swell Tidings (Red) (3)
- Sonic Boom (Yellow) (3)
- Will of Arcana (Blue) (1)
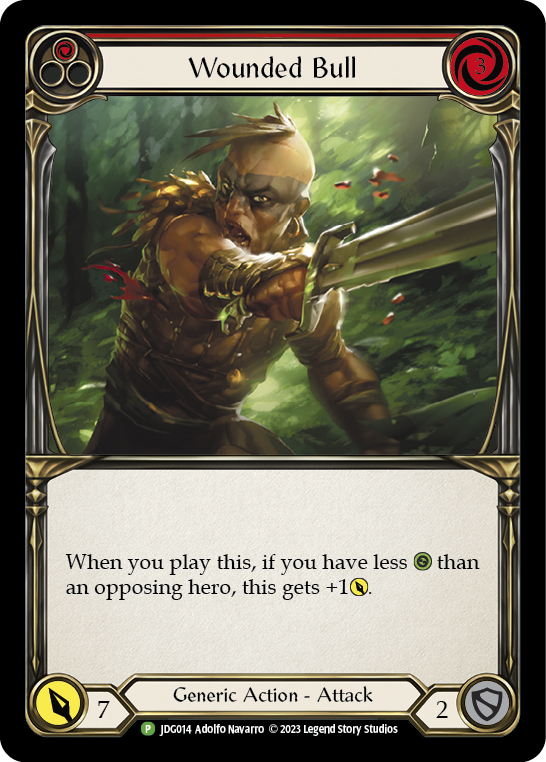
- Wounded Bull (Red) (3)
Tempo Kano seeks to push the largest amounts of damage each turn possible, then finish the game with a classic three-spell combo. This gameplan is accomplished with copious amounts of Amp and scaling damage cards. Each turn, we present a massive threat and force the opponent to respond to us, dictating the tempo of the game.
"Threats? In Kano?"
Despite popular opinion, Kano does in fact have powerful threats left in his arsenal. Chief among these is Aether Flare. This card is everything tempo wants to do wrapped in one: scaling damage and forcing cards from the opponent's hand. With Aether Flare comes the previously mentioned staples of Aether Spindle, Sonic Boom, and Lesson in Lava.
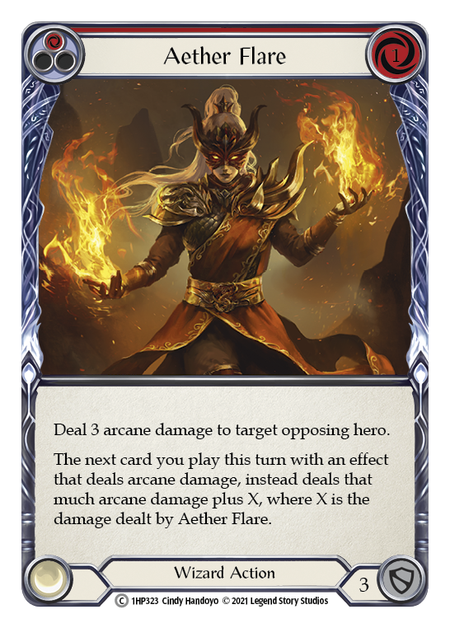

Each of these cards represents a devastating turn given the right setup - and here we see what sets Tempo apart: amp, and lots of it. In this deck, we run 13 sources of amp: Chorus of the Amphitheater, Photon Splicing, Arcane Twining, Kindle, AND Will of Arcana. Chorus, Splicing, and Twinning all provide a “free” Amp outlet, boosting our cards by a point of damage. This might seem underwhelming at first glance, but we will soon dive into how impactful that one point of damage is.
Let's examine a classic Tempo line: Aether Flare, a blue, and Snapback. In older Kano builds, this threatened 4 into 7 for a solid 11 damage. Now add an Amp outlet, and it turns into 5 then 8 for 13. Now let us imagine you discarded Chorus of the Amphitheater. You threaten 5 into 9 for a blistering 14 damage! Classic Kano combos like Wildfire > Lesson in Lava > Blazing Aether deal a baseline of 26 damage, which means a single Chorus > Flare > Snapback brings them to that 26 damage threshold.
Now of course, opponents are going to block, significantly reducing damage by turn, but such cards as Flare, Sonic Boom, Lesson in Lava, and Aether Spindle universally require the opponents to lose at least one card, if not more; if they do not respect our amped up threats, they will find themselves at 20 life alarmingly fast.
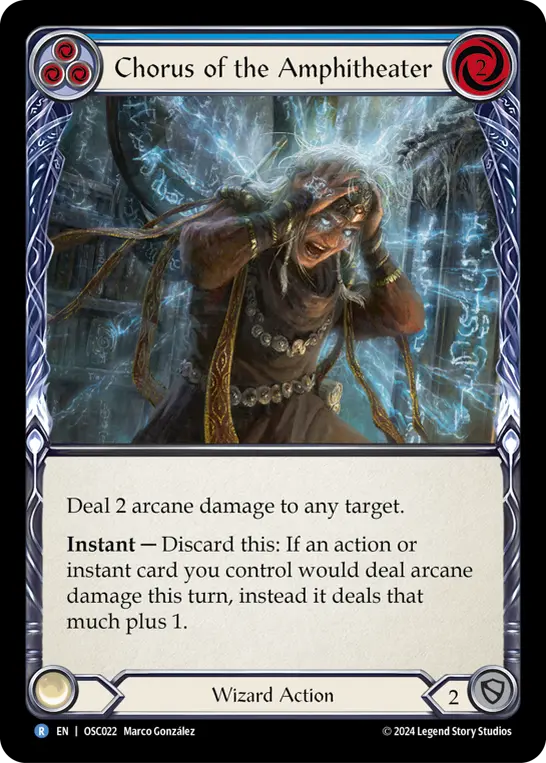
Reigning king among our new amp sources is Chorus of the Amphitheater. Yes, this card is dreadful. A two block, two cost, two damage spell? It is terrible. However, the discard ability is enough to carry its inclusion, and provides us unparalleled power turns in Kano. During our best turns, Chorus is worth a clean three damage if we can play three spells, and in such situations it becomes a fully on-rate card. 0 for 3 “go again” in blue is decent on its own, but in Kano it is absolutely bonkers.
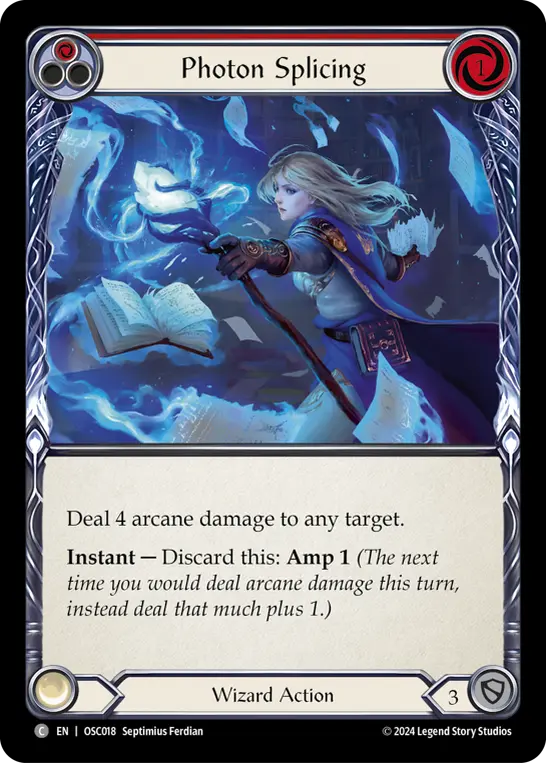
Photon Splicing and Arcane Twining round out our blue amp sources, much more inoffensively. Both cards are normal Wizard chaff: a Zap and a Scalding Rain variant. Rarely back breaking if we flip them on combo turn, and easily thrown as blocks or pitch.
The last two major amp sources are Kindle and Will of Arcana. These are in their own section, as ideally we save them for the combo turn. Unlike our other amp cards, they have no downside to their use. If we discard a blue to Amp on a combo turn, we’ve lost three whole resources - which generally kills our combo. It is almost NEVER correct to discard these cards on combo turns. The damage ends up being less than if you utilize the blue as a pitch source. But there are times when burning Will or Kindle during your turn is worth it, usually in conjunction with Flare or Spindle. We will discuss those lines later, but as a rule we save these two cards for the combo turn if able, since they are worth an extra +5 damage with Wildfire.
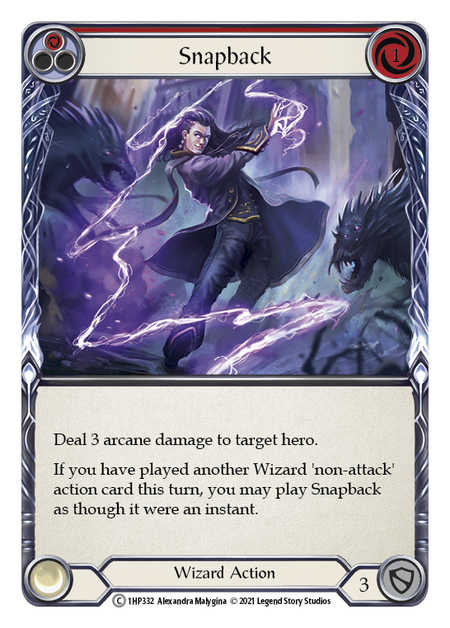
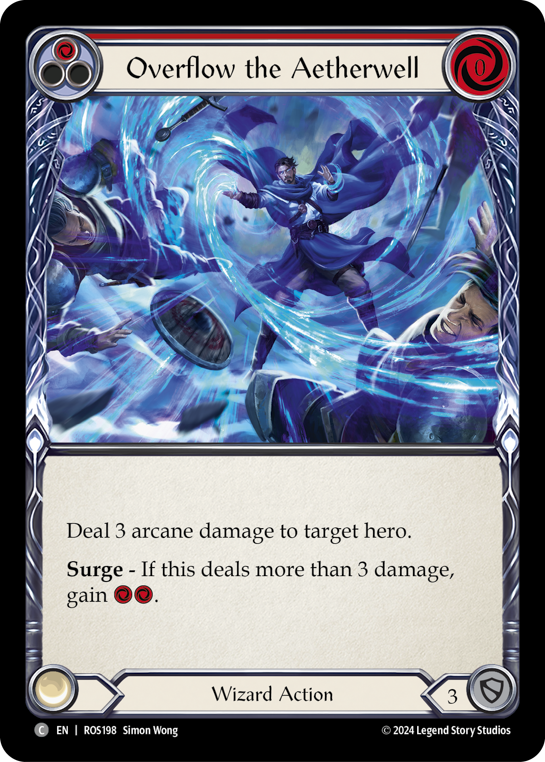

Rounding out the deck are a few cheap turn extenders in Snapback, Overflow the Aetherwell, and Chain Lightning. These cards excel at pushing out an extra three or more damage during one of our turns, with some strong utility combined with Lesson in Lava and Aether Spindle.
Snapback was once a staple in Kano, only falling from favor with the rise of Kindle and Unga Bunga Kano not having space for it in the deck. Here Snapback returns in style, pushing incredible turns when combined with Flare, and never a dull draw since you automatically add three damage to your turn. Lesson for 4 into Snapback for 3 is a crisp line. Boom/Spindle and Snapback again adds a consistent sting to the opponent. In the rare instances where Snapback cannot be utilized, it blocks for three.
Overflow the Aetherwell is a cheap card to sling; the surge effect is excellent when threatened; and for its cost, the damage is good. Where Overflow shines is on Chorus turns. You might shoot an Aether Spindle for 6, taking a card, then opt into Overflow, which can threaten surge and two resources. The ideal scenario is to shoot Spindle, opting into Overflow and Blazing Aether. You shoot Overflow, trigger surge, and then use your chest piece to activate Kano and shoot them for a 10+ damage turn. Outside of Chorus and amped up turns, Overflow is as strong of a one-card play we can get: a simple three damage that the opponent rarely blocks, chipping them closer to the death threshold.
Chain Lightning has gone in and out of favor in Kano over the years. It finds a home here as a single copy primarily as a target for Lesson in Lava. As long as you are able to play a wizard non-attack action before it resolves, Chain Lightning reads “go again” - a rare privilege in Kano. As you might guess, that gets turbocharged once Chorus is involved. A favorite line of mine is Lesson in Lava into Chain Lightning/Blazing Aether. If you are able to send a powerful yellow or red card before Chain Lightning, then finish your turn with Blazing Aether, you are once again threatening 10+ during your turn. Even after blocks, dealing 5+ is worth a good deal in Kano.
The Tempo Plan
Now that we’ve seen the moving parts, how do we enact the tempo plan into a game-winning strategy? That starts with our threats - and which is most dangerous on a given turn. Thankfully, they fall into a neat list.
- Aether Flare
- Aether Spindle
- Lesson in Lava
- Sonic Boom
If given the choice, Aether Flare would likely be in every hand I drew along with an amp source and Snapback or a blue to activate Kano. Nothing forces through damage like Flare can. Besides taking a card, it almost universally pushes five damage. Flare turns require a blue to play Flare + our second card and a blue to activate Kano (unless we draw a hand with Snapback). Whenever you draw a hand with Flare, that is the immediate calculation you make. Can you both Flare and play another card that turn, either from a Kano activation or via Snapback? If you are unable to afford a two-card play because you are starved of resources, then Flare will not be the correct choice for that turn.
After you know you can play a second card, check to see if you can also amp it. It is usually the correct play to take an extra three damage if you can discard Twining or Photon and shoot Flare for 5. If you are able to pair Flare with Chorus then it is likely going to be a no block turn to threaten 10+ damage.
To summarize, the cards we are looking for on a Flare turn:
- Aether Flare in hand/arsenal
- Blue to pay for Flare, Crucible, and our second card
- Snapback in hand/arsenal
- Blue to activate Kano to find our second card if we don’t have Snapback
- Chorus/amp source
The first four items are crucial for making the turn valuable; if you are unable to fulfill those criteria then look towards playing a different threat.
Out of all our threats, Aether Spindle is by far the hardest for opponents to gauge. With the loss of Tomes, a lot of Spindle's most dangerous lines are gone, as we can no longer opt into Tome > blue > blue and more threats. Despite this decrease in power, Spindle remains a devastating piece to our puzzle. Like Flare, Spindle is ideal when paired with multiple blues and an amp source; but unlike Flare, simply shooting Spindle for 5 is a major threat in and of itself. If Spindle ever connects fully, we are able to sculpt our next hand AND the top of the deck, meaning we can potentially opt into a perfect combo hand. Because of this, no sane player will ever let Spindle go unblocked - ripping cards from hand while still providing us with crucial information.
This threat grows tenfold when we add amp into the mix. Opting six cards deep is a game-winning proposition. Besides setting up our next hand, there are many key cards Spindle can find for us - which is why, like Flare, we want to have an extra blue to activate Kano. As mentioned previously, cards like Overflow and Blazing potentially add three or more damage depending on Chorus. Beyond those, we also have six potions in the deck, so opting into a potion and playing it is a one-two punch that makes opponents sweat bullets. Again, Spindle is always taking at least one card, so any time we are able to find and deploy a second threat with Spindle is a tempo-destroying turn.
It is perfectly reasonable to keep a hand with Spindle and three blues to abuse Spindle’s opt and whatever we can find off the top of the deck. For example, imagine sending Spindle for 5, dealing 2 and seeing Sonic Boom into Lesson in Lava on top. You can then Kano the Boom and threaten TWO MORE threats. You will either rip away their entire hand or force through massive damage while taking a card.
To summarize:
- Aether Spindle in hand/arsenal
- Blue to pay for Aether Spindle
- Blue to activate Kano
- Amp source
While Spindle does not usually threaten as much damage as Flare, it forces tempo from the opponent more than any other card in the deck. As such, the only time I do not prioritize Spindle is when I’ve drawn a Flare in the same hand.
Lesson in Lava unlocks the toolbox of this deck. It can be an excellent one-card hand with a Tunic counter, or a strong three-card hand tutoring a spell and playing it. Sometimes you search for a combo piece, other times you search for another threat in order to close the gap. 2+ Lesson turns can turn into a double Blazing Aether turn, which translates to nearly 20 damage. Given the number of options, we will go over several based on how many blues you have access to.
If you are working with Lesson as the only relevant spell of your turn, you can go down two routes. Either search for a missing combo piece (usually a second Lesson or Wildfire), or you can dig for another tempo piece. As a rule, if you can connect for 2+ damage, I would grab Wildfire as this not only sets up your combo but also puts the opponent on edge. Knowing you have at least half the combo assembled will generally force the opponent into playing a safer game, which in turn gives you more time to deal damage or find an optimal combo window.
If Lesson is only going to deal one damage, or the opponent is far outside the combo threshold, you can choose to hunt down another tempo play. In general, my preferred card is going to be Aether Flare, as this is going to help push the opponent into that kill threshold if you are behind on damage.
If you anticipate playing Lesson in Lava and a follow-up spell, things start getting more interesting. The most obvious line is Lesson in Lava into Lesson in Lava. If you have one blue to pay for Lesson and Crucible, you only need another blue in order to go to Kano and send the second Lesson. This will take a card from the opponent’s hand and prepare your follow-up turn. The second Lesson is generally used to find a combo piece as before, or another tempo card. If you are early in the game, another powerful line is to search for Gaze the Ages and banish it, digging to find potions
A special mention here is going to be Blazing Aether as your Lesson target. Blazing Aether is our finisher on the combo turn, so we do not want to burn them on a whim. That said, if you are able to deal five damage or so pre-Blazing Aether, then you are pushing 10+ damage when Blazing Aether enters the mix. Say you have Blazing Aether in hand/arsenal and Lesson. You can Lesson for 4 to grab Chain Lightning and use Chain Lightning to deal an extra 3; then play Blazing Aether. As usual, these things will expand greatly whenever Chorus boosts the turn. Another common reason to grab Blazing Aether is whenever you flip Lesson in Lava in conjunction with an Aether Flare. Such turns are easily dealing double digit damage, and are therefore well worth the Blazing Aether.
To summarize:
- Lesson in Lava in hand/arsenal
- 1-3 blues to fuel your turn
- Chorus
Sonic Boom is expensive and deals little damage, but threatens our opponents with the potential of playing a second powerful threat for free. Sometimes Sonic Boom hits a potion and you cry, other times it hits Aether Spindle and the opponent cries. Sonic Boom has an advantage over our other threats when it comes to two-card play. One blue and Sonic Boom are all we need to push on a turn, making it a very useful arsenal target. You can block nine and send Sonic Boom back threatening a potential two-card eight if you hit Spindle.
There are only two other notes on Sonic Boom. When able, do not pay for Crucible of Aetherweave on Sonic Boom, but save it for the second spell. Sometimes you will be burned because Sonic Boom hits a non-playable, but should the opponent choose not to prevent the damage and we hit a card like Lesson or Spindle off the top we would much rather buff those cards than Sonic Boom. If you are playing into AB3 then of course we pay for Crucible in order to deal damage and flip.
The second note is Sonic Boom’s power on combo turns. If we blind flip Sonic Boom, it can bail us out of a bad Ragamuffin’s Hat draw. If we draw a red and are short on resources, we simply put Blazing Aether on top and allow Sonic Boom to pay for it. If we draw well from Ragamuffin’s Hat, Sonic Boom will let us play a four-spell line, almost guaranteeing a kill. The other power case is when combined with Potion of Déjà Vu - you are able to hit that amazing four-spell line AND make sure you draw a blue from Ragamuffin’s Hat.
To summarize:
- Boom in hand/arsenal
- Blue
- Chorus
Using Chorus and Amp
You may have noticed that, in all four threat analyses, amp sources were always at the bottom of our checklists. Though these cards are what supercharge this archetype and make it viable, they only function when we have the spare card in hand. There are cases where amping is not the correct choice, such as when we only have two blues in hand for Flare or Lesson in Lava. The second spells are worth more damage than the one point of amp buff.
When dealing with Twining and Photon, amp decisions are quite straightforward. They are ideal with a front-loaded spell like Spindle or Flare. Aether Spindle opting an extra point has great value, and therefore discarding to amp has value. When amping Aether Flare, you double dip the value because it will boost the next card. Lesson and Boom are less useful to amp by one, since the damage does not scale much unless you are trying to Lesson search a Blazing Aether. You must use your judgment of the situation and ask yourself if the amp is more important (Spindle for 6 because you are digging for combo pieces) or perhaps blocking with the blue and saving health takes precedence.
Chorus takes amp to a new level by buffing the entire turn; therefore, discarding it is almost always going to be an excellent choice so long as you ensure more than one spell is being played. If you are unable to play more than one spell, my recommendation is that you use Chorus as the blue for the turn and pitch it away. If you see the chance to launch at least two spells, keep that sucker in hand and get ready to lay down the law. I’ve had turns pushing 28 damage thanks to Chorus, Flare, and Blazing during my own turn.
I’ve discussed various ways to abuse Chorus all over this article so I will summarize some of them here. (Whenever an unknown spell is used, I assume a bad hit like blue Zap.)
- Chorus > Aether Flare 5 > Snapback 9 = 14
- Chorus > Aether Flare 5 > Zap 6 = 11
- Chorus > Aether Spindle 6 > Overflow 4 > Blazing Aether 11 = 21
- Chorus > Lesson in Lava 5 > Lesson in Lava 4 > Blazing Aether 10 = 19
- Chorus > Sonic Boom 4 > Zap 3 = 7
- Chorus > Lesson in Lava 5 > Chain Lightning 4 > Blazing Aether 10 = 19
- Chorus > Lesson in Lava 5 > Chain Lightning 4 > Overflow the Aetherwell 4 = 13
- Chorus > Snapback 5 > Chain Lightning 4 > Zap 2 = 11
These are a few of the most common use cases for Chorus of the Amphitheater turns. There are far more than I can write about here, but I encourage you to practice random hands with Chorus and see how much damage you can come up with.
Sideboard and Equipment
The main shell of tempo is powerful and flexible, able to take on almost every deck in the format with no changes. However, there are a couple heroes that prove to be a nuisance without some additional help. These are Runbelades and Enigma.
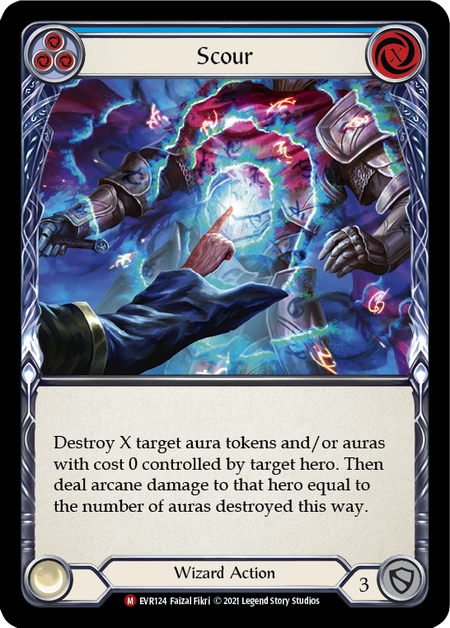
Sideboarding against Runeblade is easy. Florian and Vynnset both generate a good number of runechants or play 0-cost auras. As such, we run 3x Scour in the sideboard to throw a wrench in their works. Simply take out three blues of your choice and do not alter the primary gameplan.
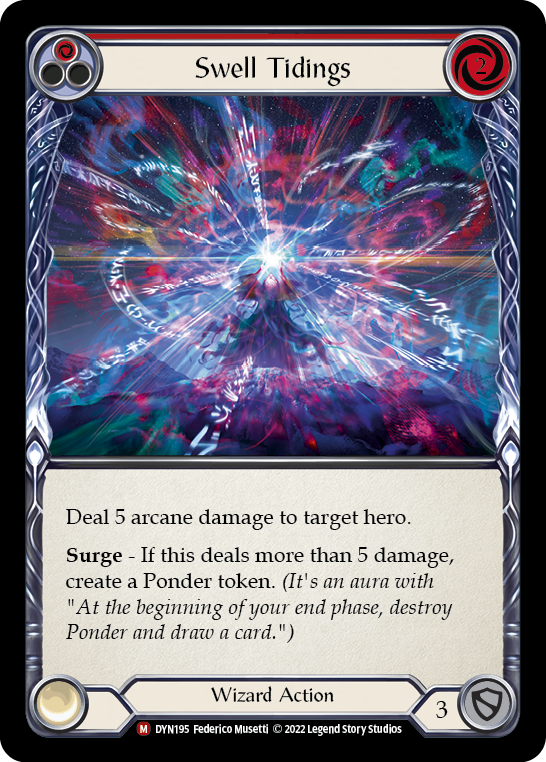
On the other hand, we have Enigma. Enigma’s core gameplan completely ruins our ability to combo; therefore, we pivot the deck from going wide to a few powerful “big reds” that go over her Arcane Barrier and destroy ward. Enigma typically plays AB3 and presents an instant speed ward. If we were to play our normal gameplan, she would easily neutralize our threatening on-hits and continuously play ward, attack, and remain safe behind her high HP and ward wall. To fight this plan, we run Waning Moon, Photon Splicing (red), and Swell Tidings. Both options ensure we push past her AB3 and destroy ward; Photon Splicing in particular pairs nicely with Waning Moon.
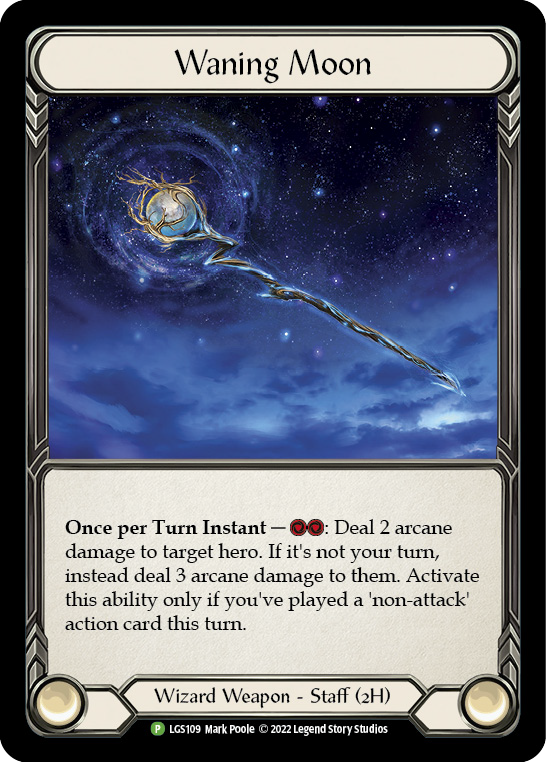
Finally, we have Wounded Bull. Wounded Bull is an attack, which is contrary to everything Kano tries to do. However, it is extremely powerful into Enigma as it threatens eight damage. It does everything we want into Enigma: it pushes a breakpoint, threatens high damage off two cards, and can even break Phantasm to stop a hefty attack from Enigma. If Enigma blocks with three cards, we can easily destroy her board with Kano activations and Waning Moon during her next turn. If she blocks with no cards, we clear the board and deal a decent chunk of damage. If she only blocks a little, she loses cards, a ward permanent, AND life all in one turn.
Sideboarding into Enigma, we take out our least efficient cards such as Sonic Boom and Chain Lightning, along with a few blues. Thanks to how long the game against Enigma tends to go, we are not forced to play the full 33-34 to maximize combo potential.
The last piece of the deck is our equipment suite. Head, Arm, and Leg pieces never change: Ragamuffin’s Hat, Storm Striders, and Metacarpus Node are all required in order to combo. In the Chest slot, however, we have several options.
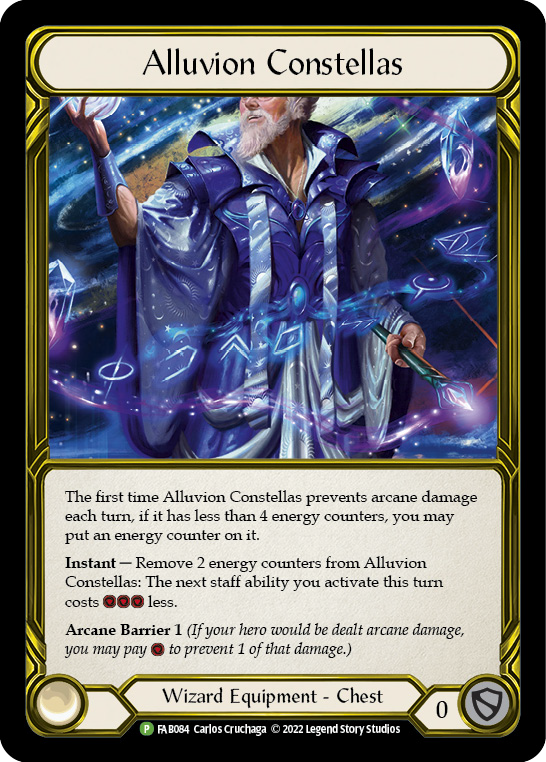
Alluvion Constellas is used exclusively in the Kano mirror - none of the Runeblades are slow enough or present enough arcane damage to make it worth it. Few Verdance builds focus on arcane damage - though that may be changing - and Oscilio is far too fast for us to use Alluvion.
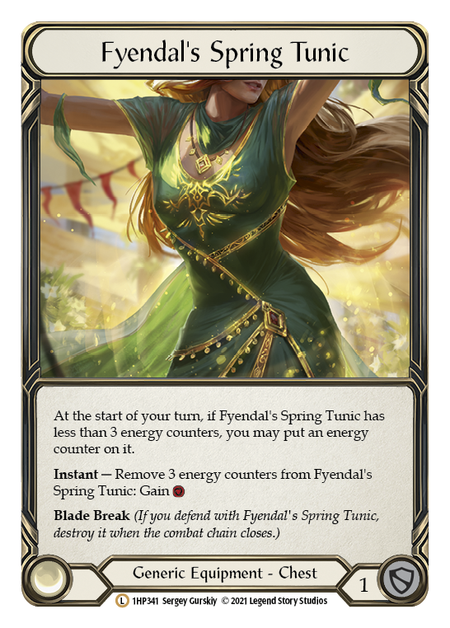
Fyendal’s Spring Tunic is used in any game we anticipate lasting at least three turns. The one block is sneakily relevant, and if any game goes for six or more turns we can generate two resources.

Finally we have Threadbare Tunic. Originally included in a decklist as a joke, it turns out that Threadbare is shockingly good in a tempo-oriented build. Why? It allows us, with proper sequencing, to gain that crucial extra resource during our own turn. The downside of needing to empty your hand is actually quite easy to bypass. After all, in order to activate Ragamuffin’s Hat you must go to one card in hand, and frequently end up empty soon afterwards.
Let’s look at an example hand. Say you have Blazing Aether in arsenal, Lesson in Lava, and three blues. You can Lesson in Lava for 4, grab a second Lesson, then grab Blazing Aether. This line already deals 14 damage - but you can then destroy Threadbare Tunic and Storm Striders to play your second Blazing Aether for 28 total damage! Another possible line is Aether Flare, Chorus, two blues, and Lesson in Lava in arsenal. You Chorus, then send Aether Flare with Crucible for 5; after Flare resolves you can activate Kano, and holding priority break Storm Striders and Lesson for 9 into Blazing Aether for 29 damage.
These are some very specific lines, but since the downside to Threadbare Tunic is so easy to bypass in this deck, we lose almost nothing. Gaining access to many game winning turns only available to us thanks to extra resources during our own turn.
In Conclusion
Tempo Kano returns to its roots focusing on powerful, highly interactive turns instead of trying to exclusively set up a big combo. Taking advantage of the general misunderstanding regarding Kano’s threat density, it is easy to blindside unsuspecting opponents who tunnel vision on stopping Aether Wildfire. Furthermore, Tempo Kano is incredibly fun to play, each turn a new puzzle as you attempt to maximize damage. Mastering Tempo Kano is a mastery of the hero, both with combo sequencing and action-speed play. Though the combo ceiling is much lower, you unlock many double digit damage lines during your own turn, and will absolutely obliterate any deck packing low arcane barrier counts.
Looking to the meta at large, Tempo Kano preys upon decks that forego arcane barrier for Spellvoid. Light and Shadow heroes are especially vulnerable to devastating Flare turns, since they tend to run AB1 and Spellvoid 2-4. If they break Spellvoid to prevent a Chorus turn, they are open to a normal Wildfire combo. If they do not respect Chorus turns, they will quickly find themselves at such low life totals that Spellvoid can no longer save them.
Not all is perfect - though the floor of the deck is significantly higher, the lowered ceiling cannot be understated. Thanks to the speed of many decks in Flesh and Blood, there will be games where you are threatened with lethal and simply do not have a high enough combo in hand to win. On top of that, playing this deck is hard. Unlike the full combo versions of Kano, where you simply wait to play potions and draw the combo, each turn in tempo Kano requires thought and consideration. If you make a mistake in sequencing or play the wrong threat, you can easily spell doom for yourself.
Despite the weaknesses and difficulty, I wholeheartedly recommend trying out Tempo Kano. The deck is rewarding, incredibly strong, and absolutely one of the most fun experiences Flesh and Blood has to offer.
Until next time, may your top decks be red, your Ragamuffin’s be blue, and your Blazings be lethal.


