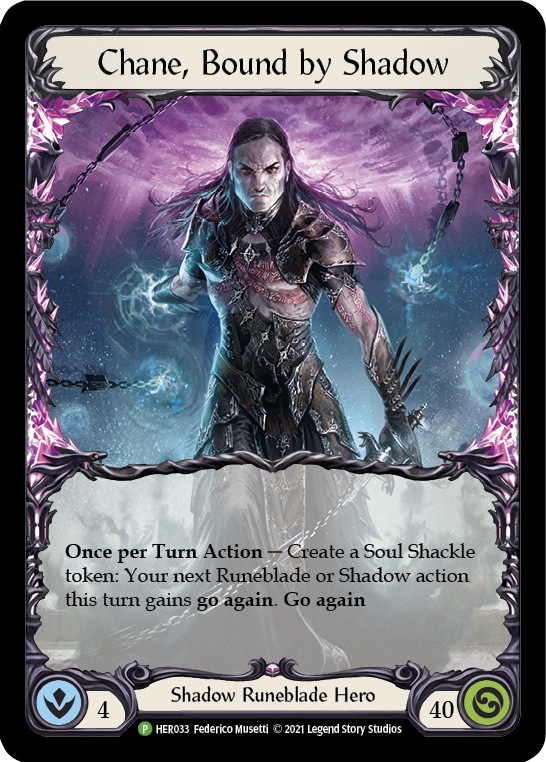
Sean Knowelden makes his Rathe Times debut with this article, but has written previously on the topic of Chane. This article will not be covering the fundamentals of his list; if you would like to gain more of a basic understanding of how to play this list, you can read his prior report on the deck at Teklo Cards.
My goal today is to give you a peek into my preparations for Pro Tour: New Jersey, the deck I took, and some lessons I learned along the way- lessons that can help you not just with the deck at hand, but with deckbuilding in general.
Monday, April 25th

While trying to predict potential bans, me and my testing team (The Southampton crew - Joe, Jack, Bruno & Francesco) tested a lot of decks across the board to in hopes of finding what could be good into a few different possible scenarios. I won't go too deep into that here, but we were preparing for:
- Starvo hit
- Starvo & Viserai hit
- Starvo, Viserai, & Prism hit
When the real bans came into effect, a few realities became obvious. We have full time jobs, and sometimes even pretend to have lives outside of card games, so we didn't have time to 'break' the format with something not currently popular. This is compounded by the brutal pressure that Starvo demands against trying to do anything with setup. We had to work from existing archetypes.
- Oldhim is in the same metagame spot as Starvo, but is mostly a weaker deck, primarily due to how much it accepts a nigh-unwinnable Prism matchup.
- Viserai losing his combo plan to overcome his weak matchups took him out of contention.
- Briar is powerful, but the Starvo matchup is brutal, with their disruption hitting the deck on two axes: Channel Lake Frigid and Frostbites are difficult to play through, and on-hit effects disrupt our ability to hold a full hand.
- Prism is powerful, but struggles vs Briar and Chane, both of which I expected to be popular at the PT now that Viserai was less appealing.
- Chane... was actually not obvious.
Why is Chane not obvious? And how did I end up playing him?
Lesson One: Challenging Assumptions
Be willing to challenge your established picks.
At first glance, Chane seemed like the clear cut choice I should take. I've got experience with the deck, it's good against Prism, and in ProQuest season the matchup was pretty close to 50/50 against Starvo. So surely now, with the bans, it’ll just be Chane favored, right?
Unfortunately, Chane suffers from a problem I want to coin as the "Flip Flop" (I will be taking reader suggestions on a better name).
With most other decks in the field, you can make a good guess at the game plan your opponent will be presenting for the match and prepare accordingly. For example, a Prism player against Starvo is aware they're going to try to control their auras, so they can add additional auras in an effort to overwhelm them. The Chane mirror match is a hotly contested race, so most Chane players will sideboard in cards that try to swing that in your favor- whether with a Sink Below to buy you time or a Razor Reflex to push through the last few points of damage.
However, Chane struggles with guessing at the opponent's tack specifically within this meta, because some of the best decks in the format can take more than one approach in response to him, and guessing wrong can be brutal. We'll focus on Starvo as an example, as I was expecting him to be the most common deck by far.
Starvo Game Plan 1: 'Casino'
- Usually uses Stalagmite, Bastion of Isenloft to help in racing situations
- Deck will be configured with a large number of elements aiming to attack with a dominated attack with a powerful on hit effect
Preferred Chane response
- Race back, leaning on Carrion Husk to maintain tempo
- Disruptive discard effects such as Reek of Corruption to force blocks
- A lean configuration of 60 cards to keep blood debt count consistent
Starvo Game Plan 2: 'Control'
- Usually uses Rampart of the Ram's Head to punish a Chane turn that breaks the chain multiple times
- Reduces element density, plays an increased number of defense reacts
- Will prioritize taking as little damage as possible, aiming to win the game by just outlasting the Chane player's resources
Preferred Chane response
- Squeezing consistent chip damage through their defenses early on
- Build up of powerful turns, looking to finish the game with Eclipse
- A larger configuration of up to 70 cards, to obtain another turn of the game before succumbing to Soul Shackles
This was the first barrier I came up against in testing: the Flip-Flop™ barrier. Not only was this an awkward position to find myself in, but after playing a lot against control Starvo, the matchup felt absolutely awful for Chane. Although the casino variant appeared to be the common response to Chane within Callings, given how overwhelming the advantage felt when Starvo went control against the poor Chane players, I assumed this would be the approach the Pro Tour players would take.
Just when I was close to giving up & playing the villain himself, I hit upon a solution. All I had to do was cut one of the cards that the majority of people all agree is a key enabler for the deck.
Lesson Two: Axing the Sacred Dwarf
Don’t be afraid to challenge established wisdom if you’ve got a good reason for it.
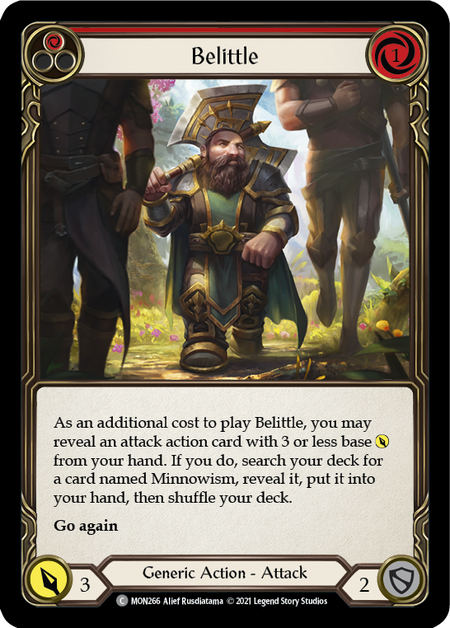
Conventional wisdom has Belittle as a mandatory card in Chane, and certainly for good reason. I played with the little chap & his oversized axe the entirety of the previous Pro Quest season, and am no stranger to how good he is. The combination of helping to ensure you could play a Non-Attack Action (NAA) & Attack Action (AA) on a turn, or provide additional resources while keeping some pressure on, is a powerful enabler for the deck.
However, as I was trying to fix the fatigue matchups for Prism & Starvo, I began to wonder if there was merit to trying a list without Belittle. There were, after all, some downsides of the card that I didn’t think were being examined in detail:
- The package required to support Belittle was not insignificant - typically at least 7 cards (3 red Belittle, 2 red & 2 blue Minnowism) - which made it hard to retain a lean deck size vs decks that I wanted to add high-impact cards against.
- There was a tension created by adding cards such as Runic Reclamation or Command & Conquer vs Briar, as these cards had a negative synergy with Belittle.
- Similarly, the deckbuilding restrictions created by Belittle require you to add cards like blue Shrill Of Skullform to your deck - a perfectly playable but unexciting blue.
- Red Minnowism is fine to draw by itself, but if you ever need to cast blue Minnowism to enable your blood debt cards, it’s a bit embarrassing compared to some of the other blues you can play.
- In some percentage of hands, you’ll draw Belittle and be forced to pitch a red in order to reveal your blue low-power attack from hand, or even just be unable to play the Belittle with the reveal at all.
- A minor point, but against Prism & Starvo fatigue plans you want to ensure that you close the chain as few times as possible to reduce the value from their equipment blocks - a Belittle as the first attack of the turn into a red Minnowism can create an additional close of the chain to increase the value of their equipment.
- Finally, blocking for two isn’t great, and it can increase the tension of your hand on being able to block efficiently if the other cards you’d usually block with are required as your reveal target.
Once I began trying lists with no belittle, a lot of deckbuilding space opened up.
The Decklist
Weapons
- Rosetta Thorn (1)
Equipment
- Carrion Husk (1)
- Arcanite Skullcap (1)
- Grasp of the Arknight (1)
- Spellbound Creepers (1)
- Snapdragon Scalers (1)
- Time Skippers (1)
Loadout
- Art of War (Yellow) (3)
- Bounding Demigon (Red) (3)
- Eclipse (Blue) (1)
- Bounding Demigon (Blue) (2)
- Captain's Call (Blue) (3)
- Captain's Call (Yellow) (1)
- Gorganian Tome (1)
- Enlightened Strike (Red) (3)
- Lead the Charge (Yellow) (3)
- Revel in Runeblood (Red) (2)
- Ghostly Visit (Red) (3)
- Bounding Demigon (Yellow) (3)
- Howl from Beyond (Red) (3)
- Howl from Beyond (Yellow) (1)
- Mutated Mass (Blue) (1)
- Command and Conquer (Red) (2)
- Rift Bind (Red) (3)
- Mauvrion Skies (Yellow) (1)
- Mauvrion Skies (Blue) (3)
- Shadow Puppetry (Red) (3)
- Sink Below (Red) (3)
- Nimblism (Red) (3)
- Shadow of Ursur (Blue) (3)
- Invert Existence (Blue) (2)
- Runic Reclamation (Red) (3)
- Seeping Shadows (Yellow) (1)
- Sting of Sorcery (Blue) (2)
- Sigil of Suffering (Red) (1)
- Last Ditch Effort (Blue) (3)
- Soul Reaping (Red) (1)
- Unhallowed Rites (Red) (3)
- Vexing Malice (Blue) (3)
Fixing The Flip Flop™ Issue
In the interest of not being classified as a short novel, I’m just going to bullet point a few of the non-standard cards and explain their purpose. The key point to note in the deckbuilding here is that the majority of cards are there to both be good against fatigue & standard builds- pulling us back from the dangerous dichotomy of choosing wrong.
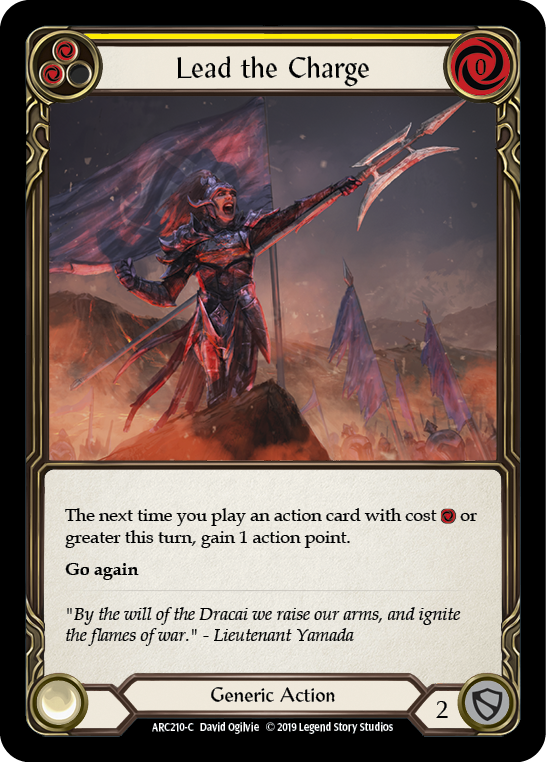
Lead the Charge is in the deck to usually function as a slightly worse yellow Captain's Call, but with the high upside against Prism when considering Arc Light Sentinel. It's also good against Blizzard, and reduces the amount you need to break the chain against fatigue Starvo.

A secret all star in the deck, Enlightened Strike helps improve damage output on the traditionally weak early turns, presenting damage even when under a Spinal Crush effect. It combos with almost all of your go again effects to be a true powerhouse in the draw a card mode.
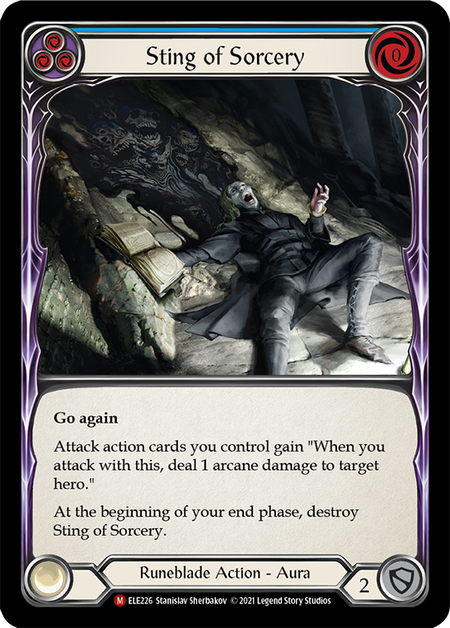
Sting of Sorcery can present almost unblockable damage against Briar & Chane in the late game, while being a 0-cost NAA enabler where required and blue pitch to help support the high cost reds you bring in for these matchups. Additional blues are also a valuable part of the plan against Prism & Starvo.
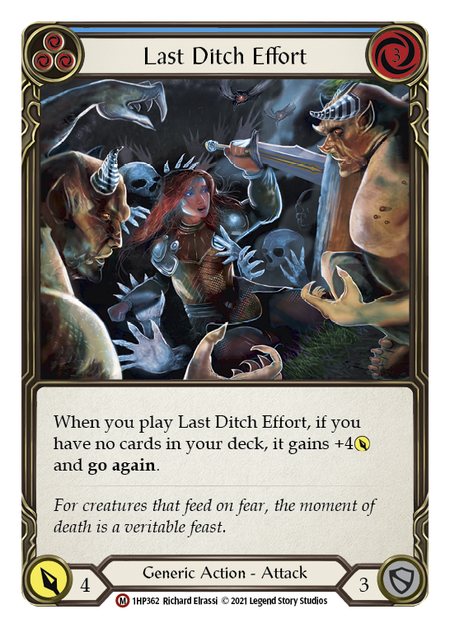
Last Ditch Effort was one of the most valuable additions that was gained from removing Belittle. This functions as a reasonable blue 3 block where required, much as Shrill does, but has the very real upside when a game goes long of presenting an additional 8 alongside an Ursur to push through the last points.
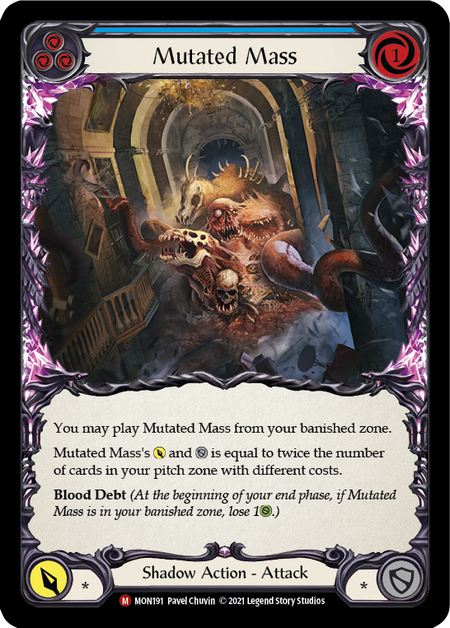
Against any matchup with the potential to fatigue, Mutated Mass offers what is frequently a 4th Ghostly Visit, with the upside of helping to keep the blue count high. Just 1 copy is included, due to the not-insignificant downside of 0 block, but it's a valuable role player.
Lesson Three: Low Floor, High Ceiling
If you can add cards with a low floor against everyone and a high ceiling in specific matchups, you can gain a valuable edge.
This could almost be a separate article in itself, but if there's anything I can advise for you to take away from this piece, it's this: don't think of your decks as a main deck of 60 cards and a 20-card sideboard. Your deck should be looked at as a core configuration that never changes, and then a lot of flexible slots that can move based on a given matchup. Thinking about your deck like this will not only help with deckbuilding, but will help ensure that you still sideboard correctly when playing against something you may not have explicitly prepared for.
This thought process also influenced my deck construction, and is why I value flexibility so highly in my deck. At something like the Pro Tour, I want to make sure that I can give myself a shot at beating anything, regardless of how they sideboard.
With that in mind, I present the core 48 cards.
- 14 Red Blood Debt cards: Keeps consistency of powerful Shackle reveals high.
- 3 Enlightened Strike & 1 Soul Reaping: Powerful cards to be able to pressure on low Shackles.
- 2 Nimbleism: Helps enable high damage turns & cast blood debt cards with the NAA requirement.
- 12 Go Again NAA cards: Enables powerful mid & late game turns.
- 3 Art of War: Best card in the deck.
- 8 Non-Red Blood Debt cards: Reduces variance with turns that miss on the most powerful hits.
- 5 Blue 3-Blocks with Upsides: Blue cards are how you have your most powerful turns, so a critical mass is required.
Sideboard Guide
Note: This is formatted assuming you're including the listed base deck above, and then adding the noted cards from your sideboard.
You might be curious as to why I present 64 cards against Prism and Starvo - but assuming that you’re trying to keep your deck size as small as possible to ensure consistent blood debt hits while ensuring you get the best chance of drawing Art of War, 64 actually sees more Art of Wars than 60 cards (assuming a Shackle every turn). There’s a lot of complex math behind this that goes a bit over my head, but essentially with 64 there’s another 4 cards from the original configuration of cards that don’t get banished and are drawn instead.
This is a theory and deckcrafting article, so I don’t want to talk too much about the Pro Tour event itself. Unfortunately, my record ended up as a disappointing 3-4. The conclusions we drew from testing that Starvo would aim to fatigue Chane ended up not being the consensus, and I fell to some brutally aggressive Starvo gameplans.
That being said, if you looked at the top tables, a lot of the Prism builds were finding success with the fatigue strategy. My friend & testing partner Francesco Giorgio also had a positive record against Chane across the tournament employing a fatigue Starvo strategy, so I think our logic was sound, but we just underestimated how much other people would want to employ the fatigue strategy.
There’s just one last lesson, and then I’ll let you have fun trying to play with the Eclipse puzzles, which are like Kano puzzles but they don’t require an advanced doctorate.
Lesson Four: Keep Your Focus
Every card you present in your deck should be in service of your game plan.
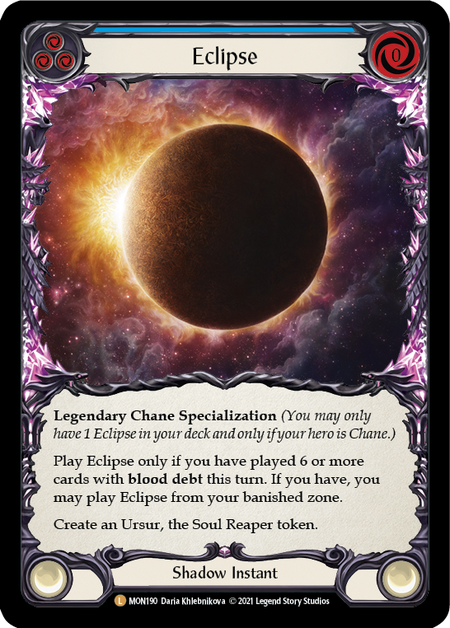
If you want to play Chane, one of the most important parts of playing a fatigue matchup is being able to do your Eclipse turns in a reasonable timeframe, while still playing around key cards. We’ll use Starvo as the opponent as it’s the most complex to plan the turn against, because you need to consider Blizzard and if you can afford to play around it - while making sure to break the chain as little as possible to prevent a shield getting extra value.
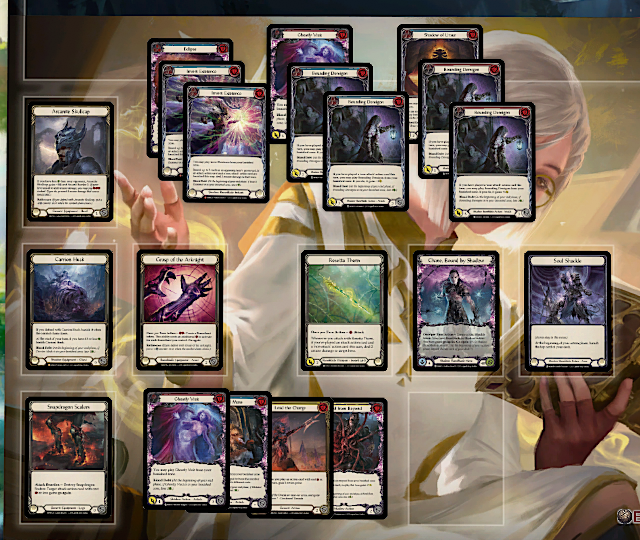
For each of these puzzles (constructed from real game states that were stumbled into during testing), the challenge is to do as much damage as possible, while playing around Blizzard and minimizing the amount of times you break the chain! For each of these, assume that you have Snapdragon Scalers in play with no deck remaining - and if you want the bonus challenge (and how I ended up on my boots choice), try to see what difference a Spellbound Creepers makes as the footwear. As a hint, I’d recommend counting total resources available, and then counting how much resource potential lines will cost as a total.
Puzzle #1
Hand: Ghostly Visit (R), Mutated Mass, Lead The Charge (Y) , Howl From Beyond (Y)
Banished Zone: Shadow of Ursur, Bounding Demigon (R) x 2, Bounding Demigon (B) x 2, Ghostly Visit (R), Invert Existence x 2, Eclipse
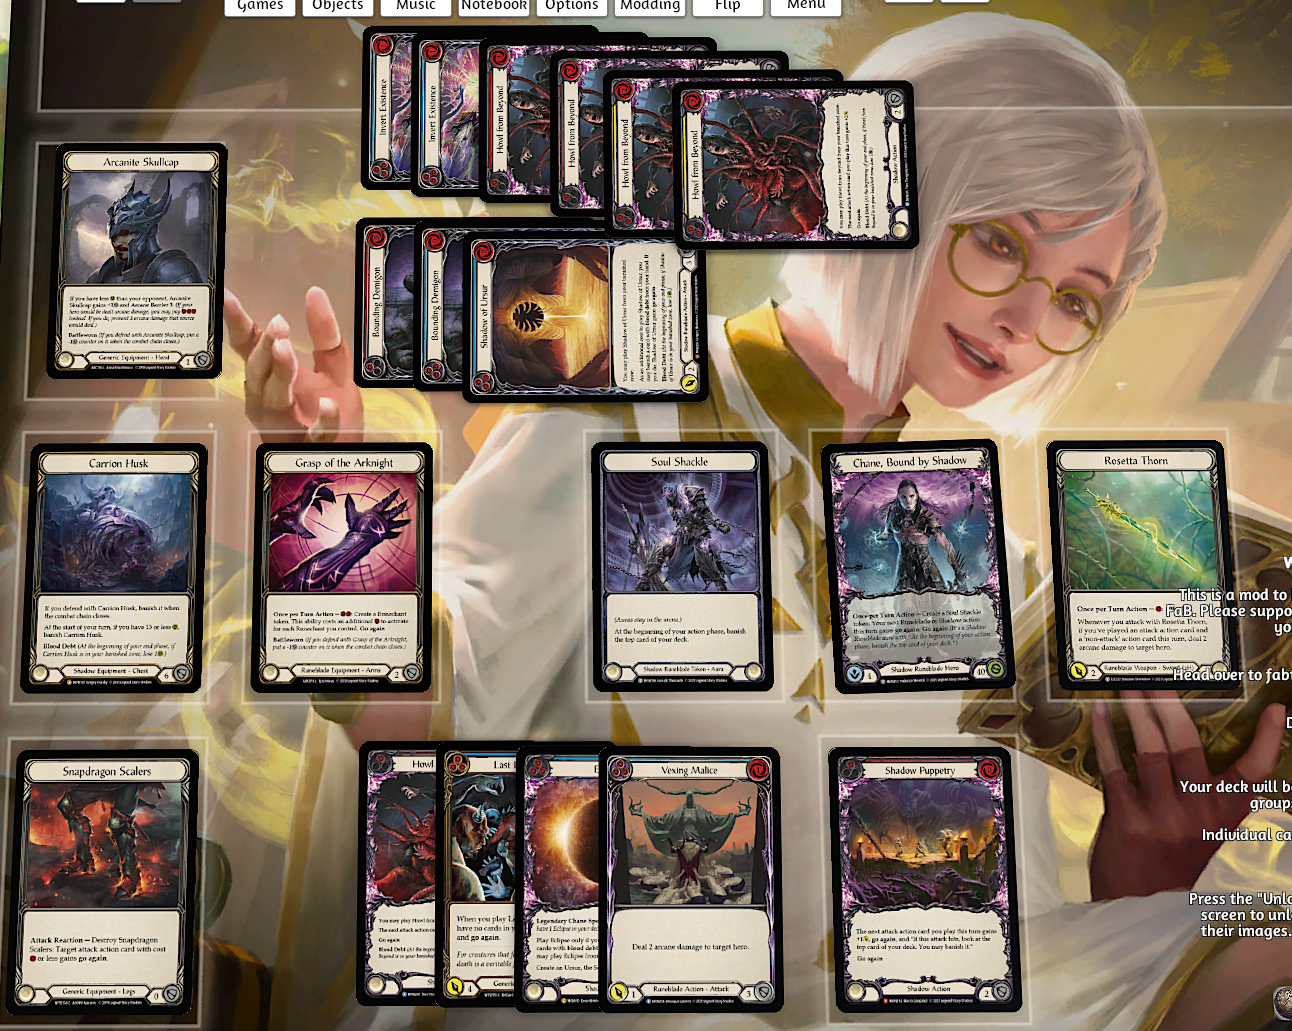
Puzzle #2
Hand: Howl From Beyond (R) , Last Ditch Effort, Eclipse, Vexing Malice
Arsenal: Shadow Puppetry
Banish Zone: Howl From Beyond (R) x 2, Howl From Beyond (Y) x 2, Bounding Demigon (R) , Bounding Demigon (B), Shadow of Ursur, Invert Existence x 2
Thanks to you for following along, and thanks again to my great testing team, Ben J for helping me with the math, everyone from the UK group & the Rathe Times for helping me to go very in depth on some thoughts I had on how to build everyone’s favorite Runeblade.
ANSWERS:
Puzzle #1:
Soul Shackle -> Lead The Charge -> Ghostly Visit (Banished) [Pitch Mutated Mass for 3 Resources] 2AP -> Bounding Demigon 1AP -> Bounding Demigon -> Snapdragon Scalers 1AP -> Shadow of Ursur (Banish Ghostly Visit for Go Again) 1AP -> Invert Existence x 2 -> Eclipse -> Attack with Ursur. Six Blood Debt cards played, 18 damage, with 2 excess resources from the Howl From Beyond in hand remaining to pay for Blizzard.
Puzzle #2:
Howl From Beyond (R) (From Banish) -> Pitch Last Ditch Effort (1 Resource Floating) ->Shadow Puppetry -> Bounding Demigon (B) -> Shadow of Ursur (Banish Howl From Beyond for Go Again) -> Bounding Demigon (R) -> Snapdragon Scalers -> Invert Existence x 2 -> pitch Vexing Malice (2 Resource Floating) -> Eclipse -> Soul Shackle -> Attack with Ursur with Go Again, then weapon with floating if no Blizzard. 26 damage, assuming targets for Invert & Rosetta attack (-4 if no targets, - 4 if opponent has Blizzard)
Still Awake; Afternoon Nap; Midnight Stroll; Morning Routine by Ghostrifter Official | Music promoted by Chosic | Creative Commons CC BY-SA 3.0

