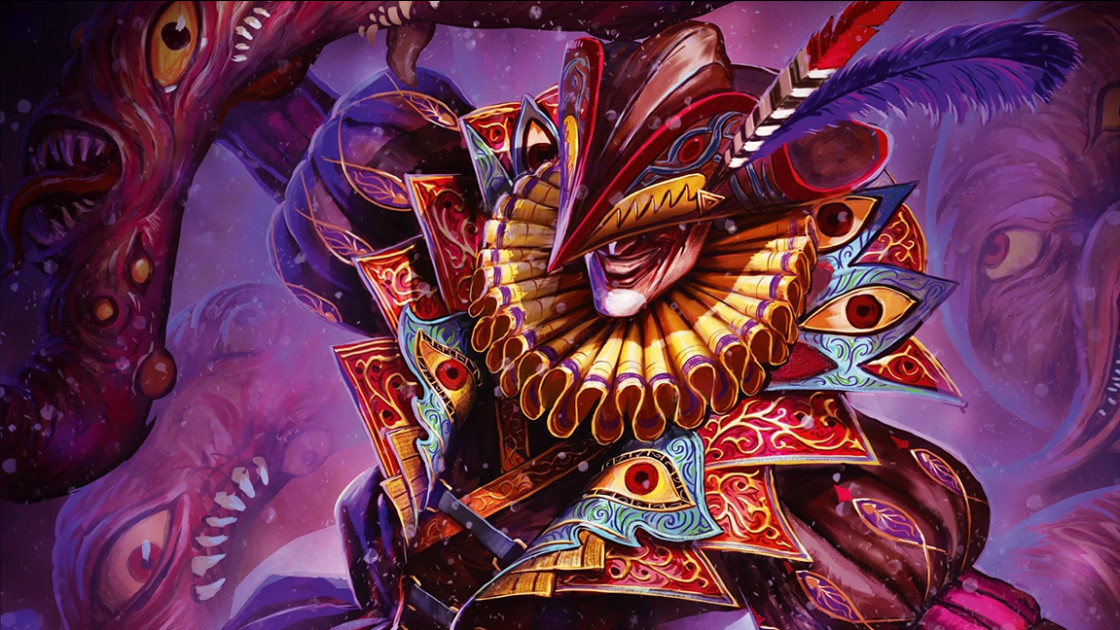
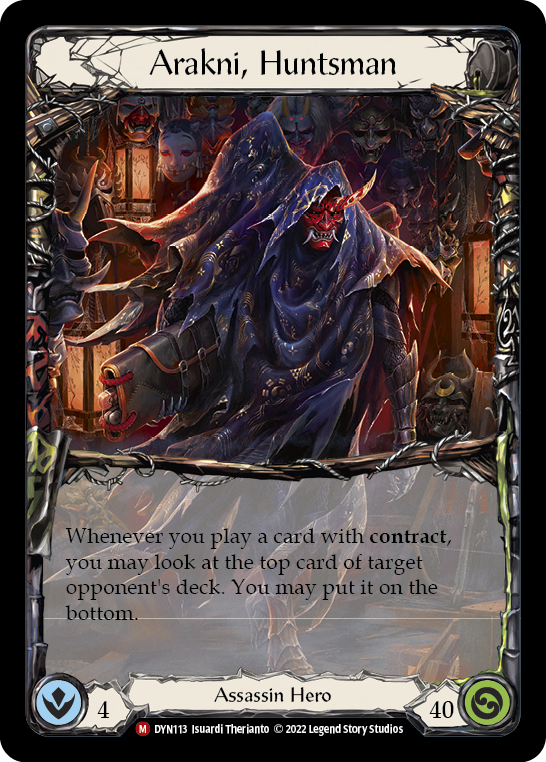
Arakni introduces us to a new class - something we haven’t truly seen since Monarch - and with a new class comes new ways to think about the game. An Assassin is someone who thinks and plans for their target’s demise, and Arakni requires a lot of both.
Playing all the fun new cards is one thing; but playing for the kill can get a lot more complicated. With only one (class) weapon to equip, a middling card pool, and subtle mechanical challenges built into the design, a certain kind of creativity is required to play the Assassin well.
When pulled off correctly, Arakni can disrupt the opponent’s plans and punish their attempts to match value, all while bleeding valuable cards from their deck until they have none left to fight with. It's a slow and insidious death, often unexpected and, after a certain point, inescapable.
First, a Foundation
Editor's Note: Watch for our FAB101 for Arakni later this month!
Arakni’s non-majestic card pool is fairly straightforward, and is composed of two things:
- Attack actions with the contract keyword that trigger the hero ability and banish the top of the opponent's deck, and
- Powerful attack reactions - with varying conditions.
The contract attack actions are the bulk of Arakni’s card pool, making up a whopping three-fourths of their cards (excluding weapons and equipment). The text box on a contract card might look a little intimidating at first, but most of them share an extremely similar effect.
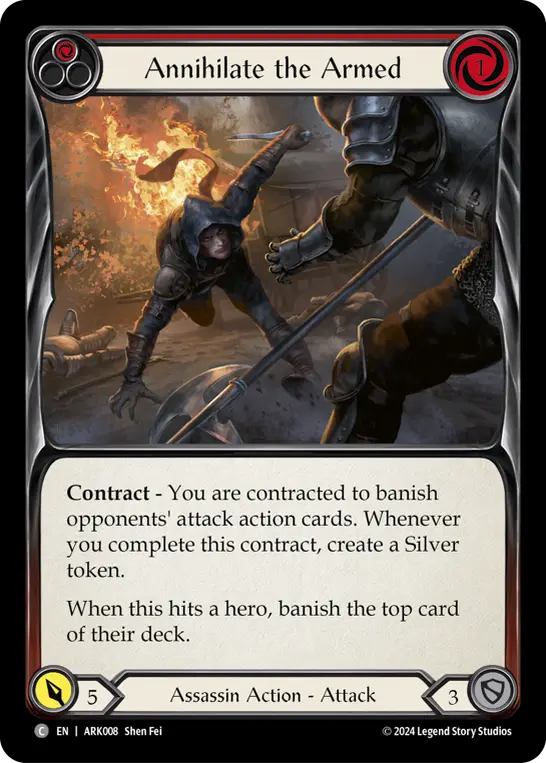
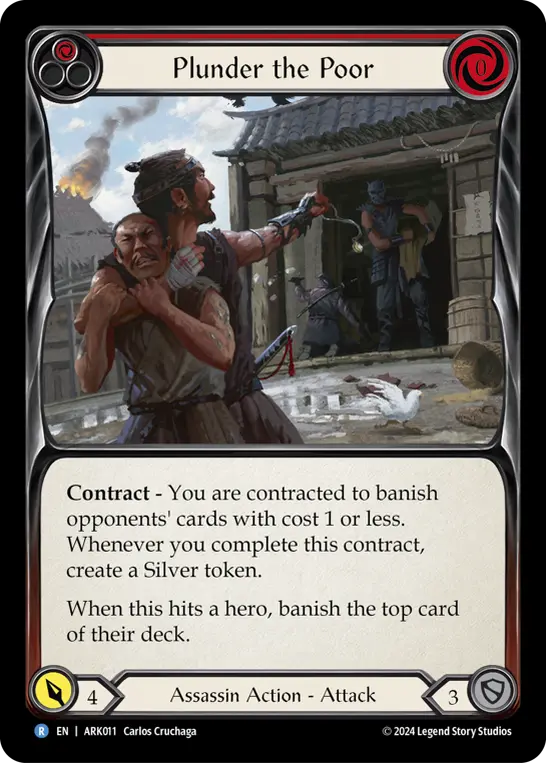
All have a banish on-hit, and the potential to generate a silver from it. Over time these banishes can add up, and will typically cost the opponent between 5 and 13 cards by themselves. Opponents will be tempted to block these due to the mere psychological effect of having an on-hit coming at you; but they may also just let it hit. Adjust your expectations to the matchup you’re dealing with. There are matches where you won’t be banishing much at all.
It would be good to note here that the ‘contract’ portion of these cards is active until the chain closes. So subsequent contracts and banishes in the same chain will continue to trigger old contracts.
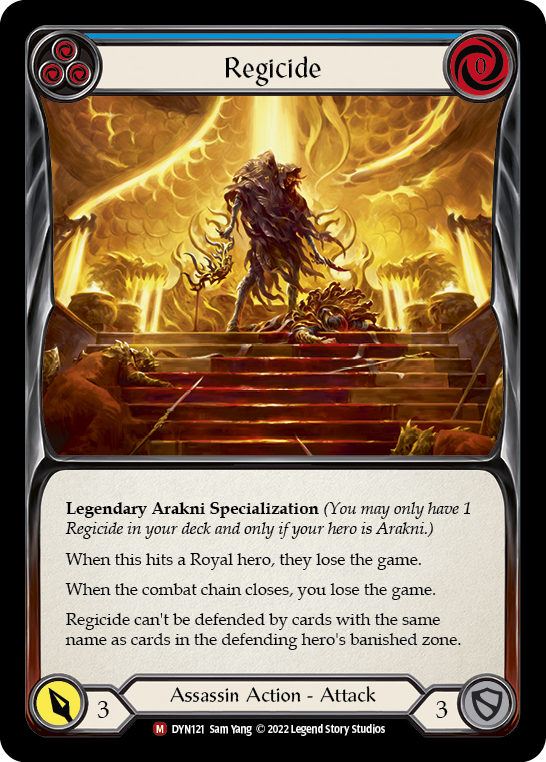
The majestic Assassin attacks have incredible value (with the exception of the controvertial Regicide). When lined up with reactions, these can have devastating effects. Surgical Extraction will banish a card from the hand in addition to the top of the deck. Leave no Witnesses will banish their arsenal, and at a 0 cost makes for some great 1-2 card turns. And Eradicate allows you to banish a theoretically limitless number of cards.
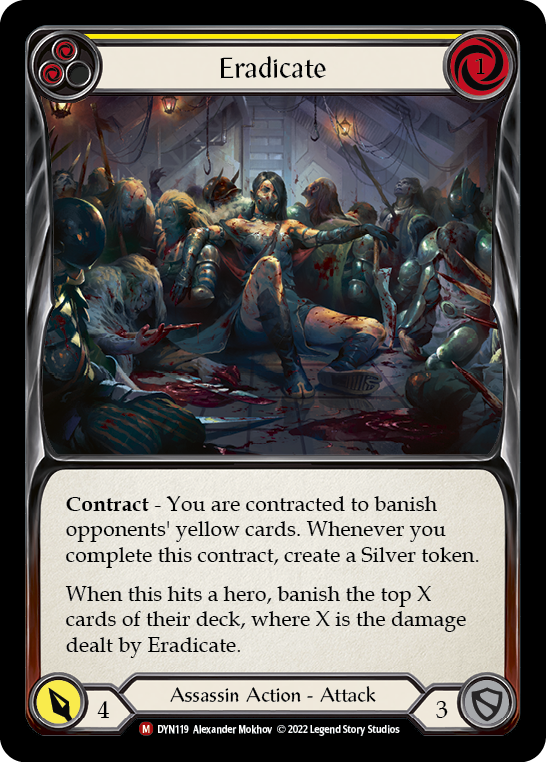
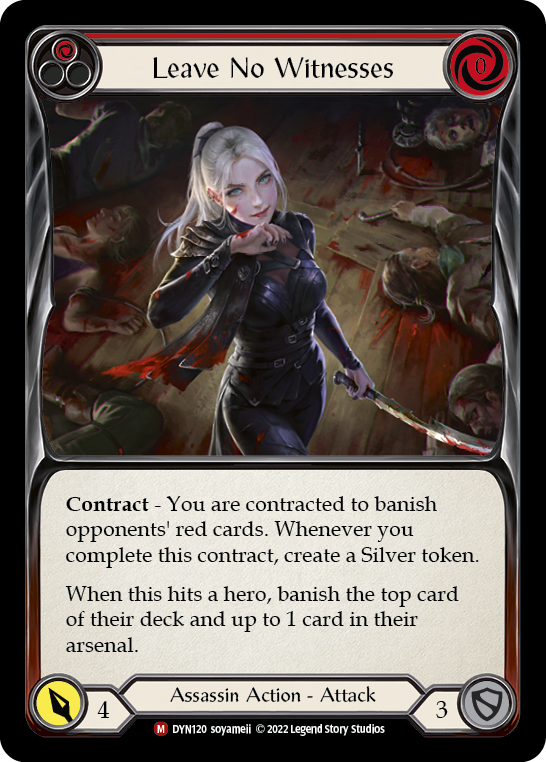

These 3 cards are your main threats - and their shared breakpoint of 4 can be quite annoying for decks without much equipment to spare or defense reactions on hand. Oftentimes these three will even force an overblock; and even with defense reactions, it can often be more prudent to block normally, and save those for the eventuality that there might be an attack reaction lying in wait.

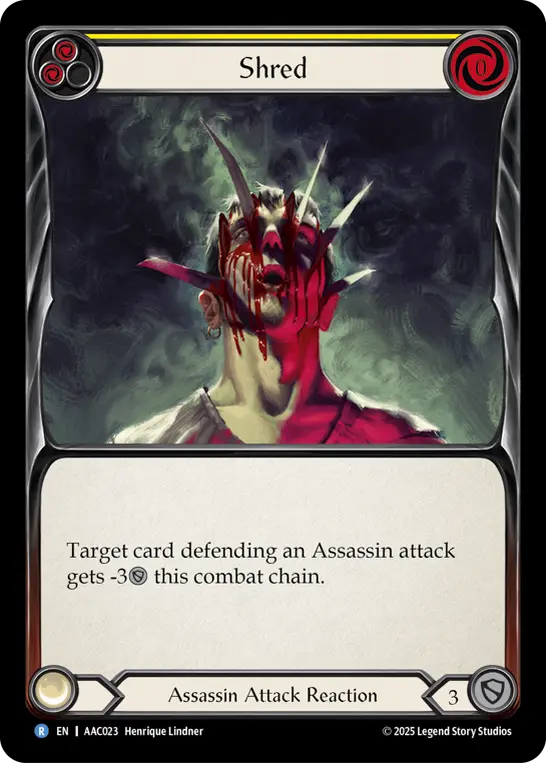
There are two class reactions: Shred and Cut to the Chase (‘Chase’ for short). Both block 3, cost 0, and have minimal requirements.
One key detail that becomes very relevant as we develop our strategy is that all Assassin cards, without exception, block for 3. The Assassin can block like their life depends on it - which it often does.
Generally Shred yellow/blue and Chase red are staples, with the other colors of both being optional includes or sideboard options. Red Shred is definitely more of a sideboard card, but has its place in certain matchups; and the mere existence of red Shred can influence opponents' decisions.
Arakni also has reactions on equipment, and they can be quite strong. Their battleworn block value returns whenever you bring them back from the grave, at a cost of a measly - though sometimes hard to attain - 2 silver. They are somewhat reminiscent of Kassai’s Valiant Dynamos, though you won’t be recurring them nearly as much.
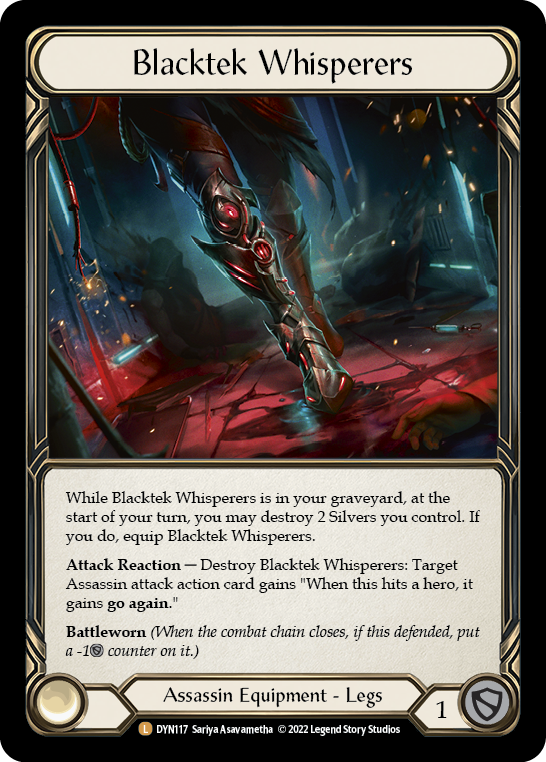

With a complete lack of natural go again, Blacktek Whisperers can help make otherwise impossible plays. And the Mask of Perdition can cause more key banishes, robbing the opponent of more cards from their deck and potentially paying for itself to some degree. Both can, however, only be used on Assassin attack actions.
In matchups where you need Arcane Barrier 3, you'll probably want to keep Mask around rather than the Whisperers.
The daggers aren’t particularly good, but they can force blocks if you manage to use them twice, especially in slower matchups. Sending in the second Spider's Bite after the first hits is a harsh telegraphing of what may come. At that point, it hardly matters if you actually have anything scary or not, they will likely still fall for it. And if they don’t - and you do end up having something - they’re going to have to pray they have enough non-attacks in hand to block it out.
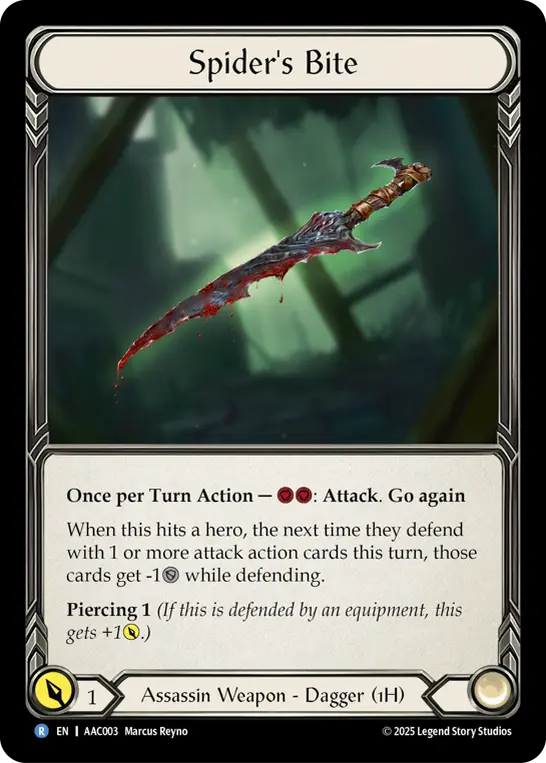
While they can make blocking harder, the impact they have on decks is entirely dependent on their own strategies. A deck with many non-attack actions, such as Wizard or Warrior, won't care if you reduce the block value on attack actions; and if you have an opponent with 3-block attack actions - likely a midrange deck such as Brute or Guardian - they can just drop 2 or more cards and accept that the first one was only worth 1 point of blocking. The moments where your Bites meaningfully reduce your opponent's defenses will be few and far between.
Chasing that First Kill
With the basics out of the way, it’s time to address how Arakni uses the tools at their disposal. Assassin decks can have quite the steep learning curve, and it takes practice to master them - lots of it. You are making a lot of decisions every turn. There are a few barriers you'll definitely run into along the way, so let me walk you through them.
1. Trust in Time - It Always Runs Out
Your nerves will betray you faster than your deck will. When you look at your opponent’s deck and think to yourself, “That doesn’t look very small” - when your health is already dwindling - don’t despair. At that point, there’s a decent chance - through your contracts and your hero ability - diluted the threats in their deck. Their attacks will become weaker and weaker. And they will eventually run out.
Arakni doesn’t really excel in any specific area outside of block value, so leaning into that is recommended. Remember: everything Assassin blocks for 3! You are here to survive what your opponent throws at you while removing their future options. Defense reactions are key to this. They are your friend. But use them cleverly, especially in the mirror match or against Dorinthea. It may just be better to block normally and with a piece of equipment, saving that defense reaction for a response to theirs.
You also need endurance. Your deck doesn’t matter as much as your life- and there are many survival cards that keep your actual goal in mind. This Round’s On Me is a perfect example of this. Giving your opponent a card might sound scary - and in some scenarios it is - but you are forcing them to use more cards for less value. Given that you’re looking to burn through their deck, this is wonderful for you on more levels than just damage reduction.
Sigil of Solace is a card that can work in any hand and works wonderfully going first, though its lack of block can sometimes be annoying. But its ability to circumvent split damage and dominate can be a life saver in some of the more difficult matchups.


But to close the deal, you have to occasionally present something as well. The 0-cost contracts are good candidates for this, being able to be played by themselves as a 1-card hand. That said, some contract conditions simply aren’t very likely to trigger. Nix the Nimble and Fleece the Frail are particularly egregious examples of this, with neither having a particularly high likelihood of hitting anything in a competitive environment.
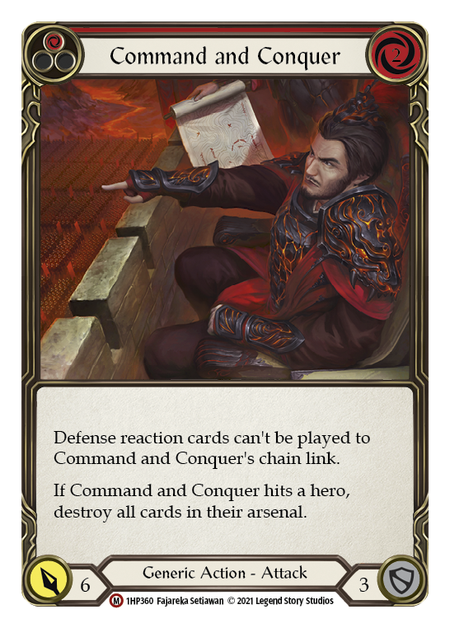
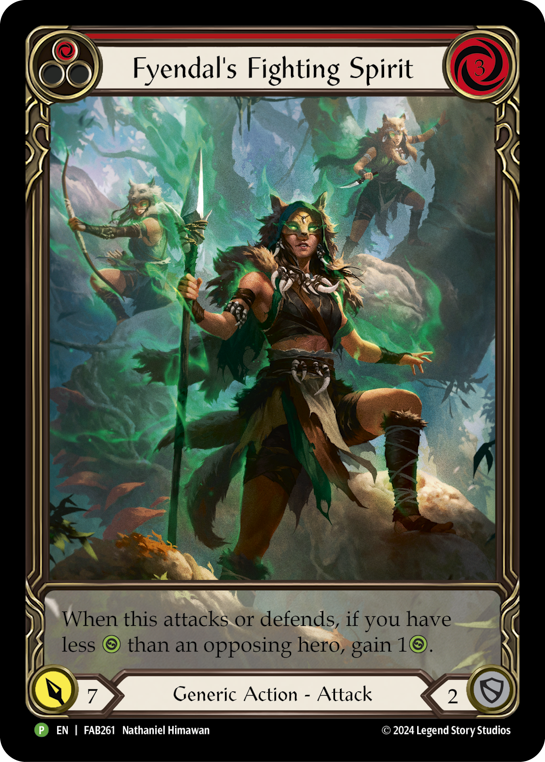
While contract cards are vital to Arakni's playstyle, the number of them that are in actual use has continuously dwindled over time. In their place, strong generics have once again made an impact. Command and Conquer is an evergreen card, and presents another form of disruption, which your deck sorely lacks. Fyendal’s Fighting Spirit makes a wonderful popper in the Dromai matchup, but sees play in a lot of others as well. And Enlightened Strike is the hero of decks with wonky hands - decks where hand size doesn’t always equal ‘better’.

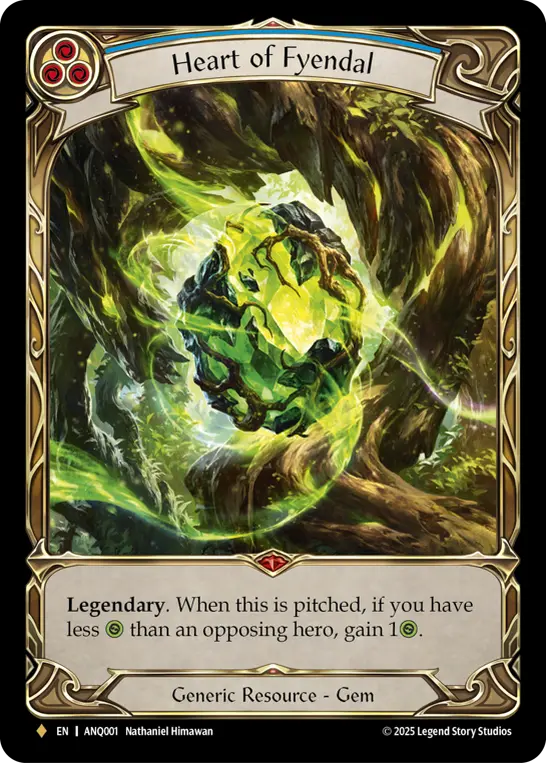
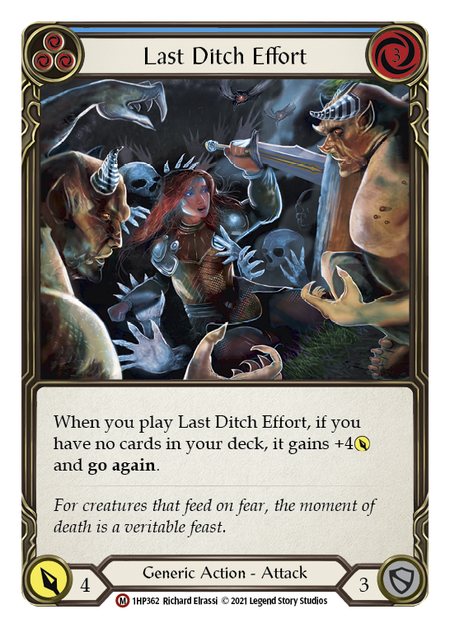
Finally, since we're playing to fatigue, you need something for the worst case scenario. Heart of Fyendal is a godsend here, albeit an expensive one. If you’re behind, it turns your 2 weapon damage per turn into a total value of 3 per turn. It cannot be understated how big of a deal that is. Two copies of Last Ditch Effort will save you in matchups like Bravo where mutual fatigue is a genuine threat.
2. The Dromai Wall
In the long term, Bravo and Fai will become your bitter rivals for opposite reasons. But for beginner Araknis, Dromai can be an insurmountable wall. It certainly was for me during early testing, when no one knew anything yet and we all had to make it up ourselves. It took a lot of hours, but eventually I cracked the code. And after relaying it to others, they could start beating Dromai as well.
Here’s how you do it.
Only two things matter: your health and their deck. Nothing else. Do not hit their health, it is pointless; your aim is to kill them after hard fatigue sets in, since they don’t have a weapon.
Contract cards are exempt from this rule, since their on-hits mean that regardless of whether they ignore it or not, they will lose a card (though they may just have reactions to block it).
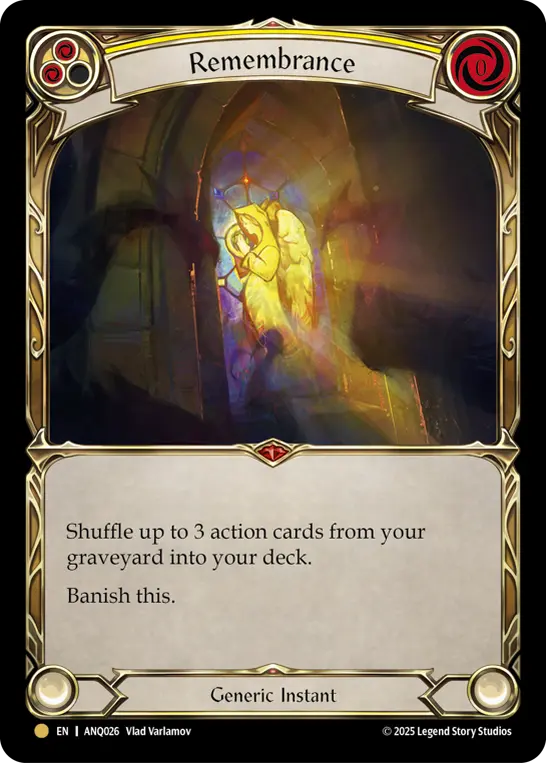
You will need a few things in your sideboard for the matchup. Fyendal’s Fighting Spirit and Command and Conquer are your poppers, but you’ll need them more than once. Bring a Remembrance to get them back; maybe even two if you want to be really safe.
Be generous with your number of blues. Pitching for daggers will become a lifestyle for you.
Packing Arcane Barrier is essential, otherwise Azvolai and Burn Them All will kill you. But do not take Arcane Lantern; in this matchup, double daggers are essential.
If they have any idea what they’re doing, they will try and pitch stack. Stop them. Use your hero ability and disrupt their stacking by sinking their cards every opportunity you get. They cannot be allowed to spam dragons.
Enlightened Strike is key to getting rid of multiple dragons in one turn, but it's not the only method. Double daggers are surprisingly effective at not only getting rid of Ashwings, but dragons too. There are a lot of Dragons with 2 health.
Another thing to keep an eye on is Nekria. They may run low on ashes at various stages at the game, especially if they play out Ouvia. So not hitting them too much can seem like a good idea. I personally just like to think about how I can optimize killing her, using the -1 health counters to my advantage. At full health, a dagger and a 4-strength contract is enough to kill her. If you let her hit you the turn before, simply throwing a 5-strength contract at her will be enough.
Depending on how their hand looks, resist the urge to pop. If they come with a 2-health dragon, it may just be better to not bother and double dagger them next turn instead. There is also the opportunity for them to simply hold back the potential second dragon, so you can’t kill the other on your turn. You will have to call these bluffs against competent Dromai players and sometimes bait out the second dragon to then pop that one.
Keep an Enlightened Strike or a 0-cost contract ready in arsenal. If Dominia comes at you and banishes your popper, we wouldn’t want to be caught with our pants down. Of course, it can also be used to get rid of other dragons.
Blocking the arcane damage from Azvolai may seem wasteful, but every point matters. And with many clunky hands caused by poppers creating turns skips, Sigil of Solace will be one of your best friends in this matchup.
Play correctly, and Dromai becomes a very winnable matchup. But it is undeniably a challenge; the first win here will let you know you've really got a mastery of Arakni's range.
3. Foresight of the Spider
Arakni's hero ability can be a great source of mindgames for you and your opponent. You have to make decisions, and tough ones. Do you leave their key card at the top ready to be banished, or do you think they’ll block and protect it from the contract? Can you ensure your contract hits with attack reactions? Can you bait them into blocking for a useless card? At what point does the overall strategy win out over the needs of your contract’s conditions?
There are a multitude of factors that go into these decisions. Sometimes you will have to adjust mid-game depending on your opponent's behavior: if they block less, you might want to leave power cards on top, but if they block often you may just want to put them at the bottom of their deck. Any card you send to the bottom will come back later. Do you leave reds in hopes they can't pay for their next turn? Do you sink blues to potentially redden their hands? Will that backfire?
It's hard to give advice on how to use a hero ability that depends on not just the hero, not just the deck variant of the hero, but also the player playing said deck. But if there’s something you really don’t like seeing, or if the card in question relies on other strong cards to work, maybe putting it at the bottom is the safer option.
4. Threat Cycling
This one is a little more complicated and a little more cynical.
It’s not unusual for you to run more than 60 cards. It’s also not unusual for your opponents to do that. The problem comes in when you take a look at your threat density. What can you force blocks with? The answer is, unfortunately, not much.
Your main threats are your majestic contracts. The rest of your contracts are great from a macro sense, propelling your strategy forward; but on their own, they provide no immediate value. So we really are focused on just a small assortment of key attacks to apply pressure: those 9 majestic contracts, and 3 copies of Command and Conquer.
The answer to this, then, is to cycle your deck as fast as you can. Draw, Opt, cycle, whatever it takes to find your key cards.
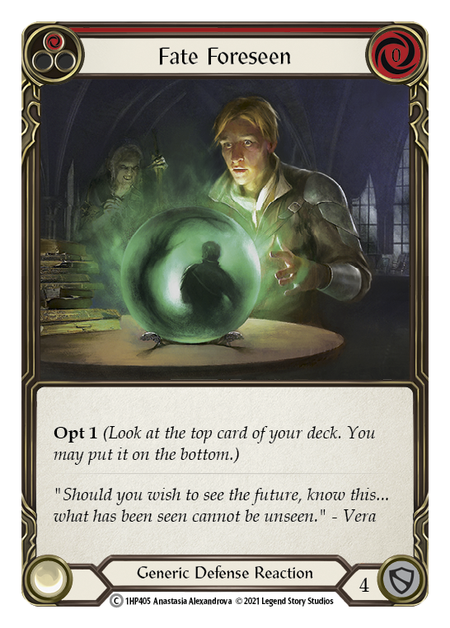
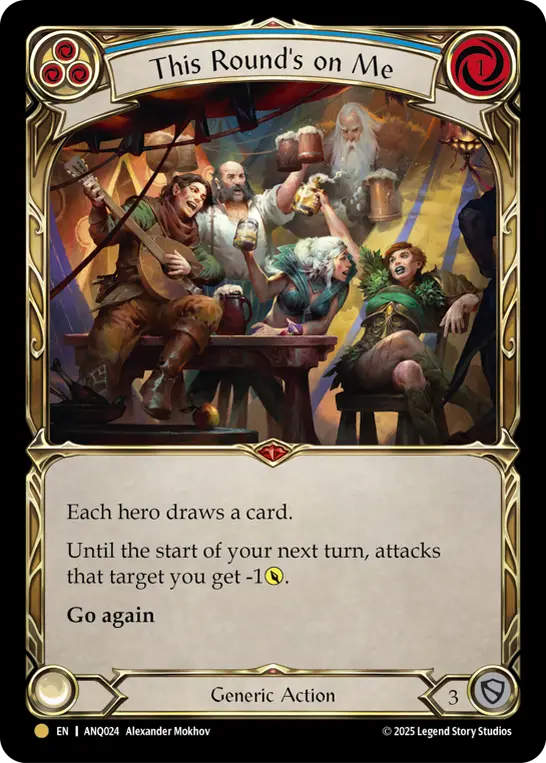
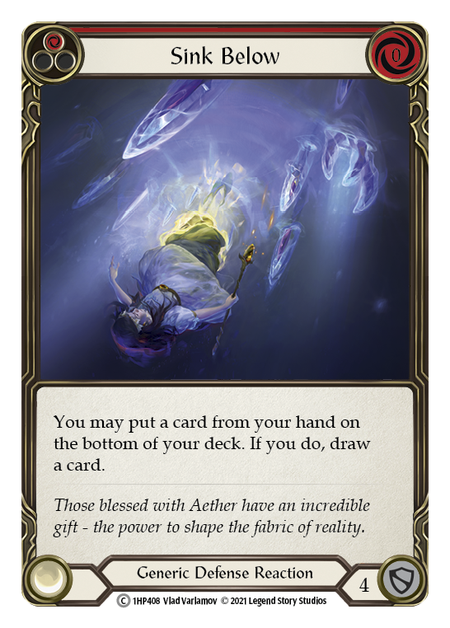
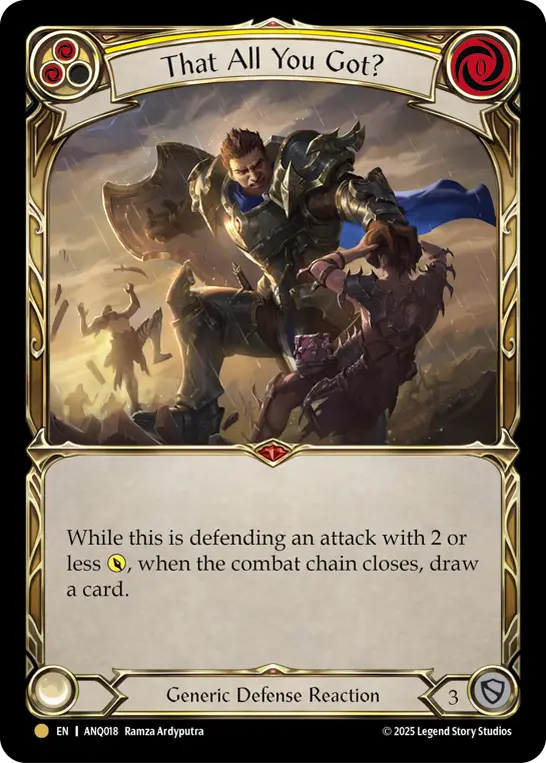
Your typical Arakni list has multiple ways of getting this done: Sink Below, Fate Foreseen, Enlightened Strike, This Round’s on Me, and That All You Got?, depending on the matchup. Is this ideal? No - but neither is getting caught with no form of disruption.
5. Cutting the Chaff
Before we wrap up, we need to talk about two cards that may catch your eye as you learn Arakni - and I'll save you the trouble of learning that mistake the hard way.
Regicide has a strange cult following. Its ability to evade blocks has tempted many a player to include it as a potential finisher, in addition to the fact that it is a blue 3-block. Given that all Assassin cards block for 3, that is not really a reason to play it. There is a very simple reason for why you shouldn’t play Regicide: you die instantly if it doesn’t kill the opponent. And 3 damage attacks aren’t particularly scary in that regard.
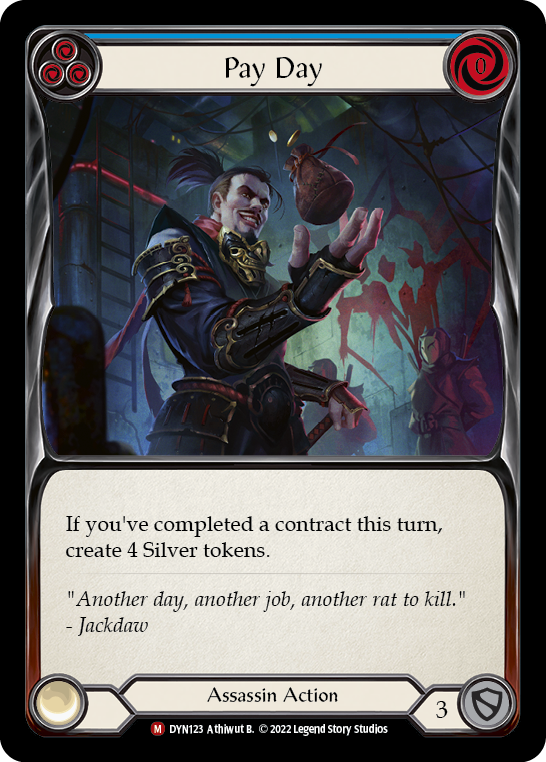
Pay Day suffers from a similar problem. We've noted the significance of silver for retrieving your equipment, and while having 4 silver from a Non-Attack Action is pretty decent on paper, unfortunately the Assassin suffers from a dire lack of go again. Its restriction can also make it brick in some matchups, specifically ones where contracts are harder to land, such as defensive decks or decks whose card composition simply differs too much from the average contract card in your deck.
Field Work
Below is a list that incorporates many recent innovations, while leaving you to toy around with some controversial picks like Razor Reflex. Feel free to adjust as you get used to the champion or to counter your expected meta.
For a new hero with an unusual strategy, Arakni does surprisingly well. In its current state, the deck is about middle of the pack - good enough to win and find success with, but not good enough that they’ll be overrunning Pro Quest seasons...I think.
Truth is, we don’t really know how Arakni will look like in a few months before the next set release. Assassin decks have already changed quite a bit since they were first revealed. And by the looks of it, when it does come around, Outsiders is only going to shake things up further.